Hey Everyone!
Well I’m going to tackle something scary today… DIY Home renovations!
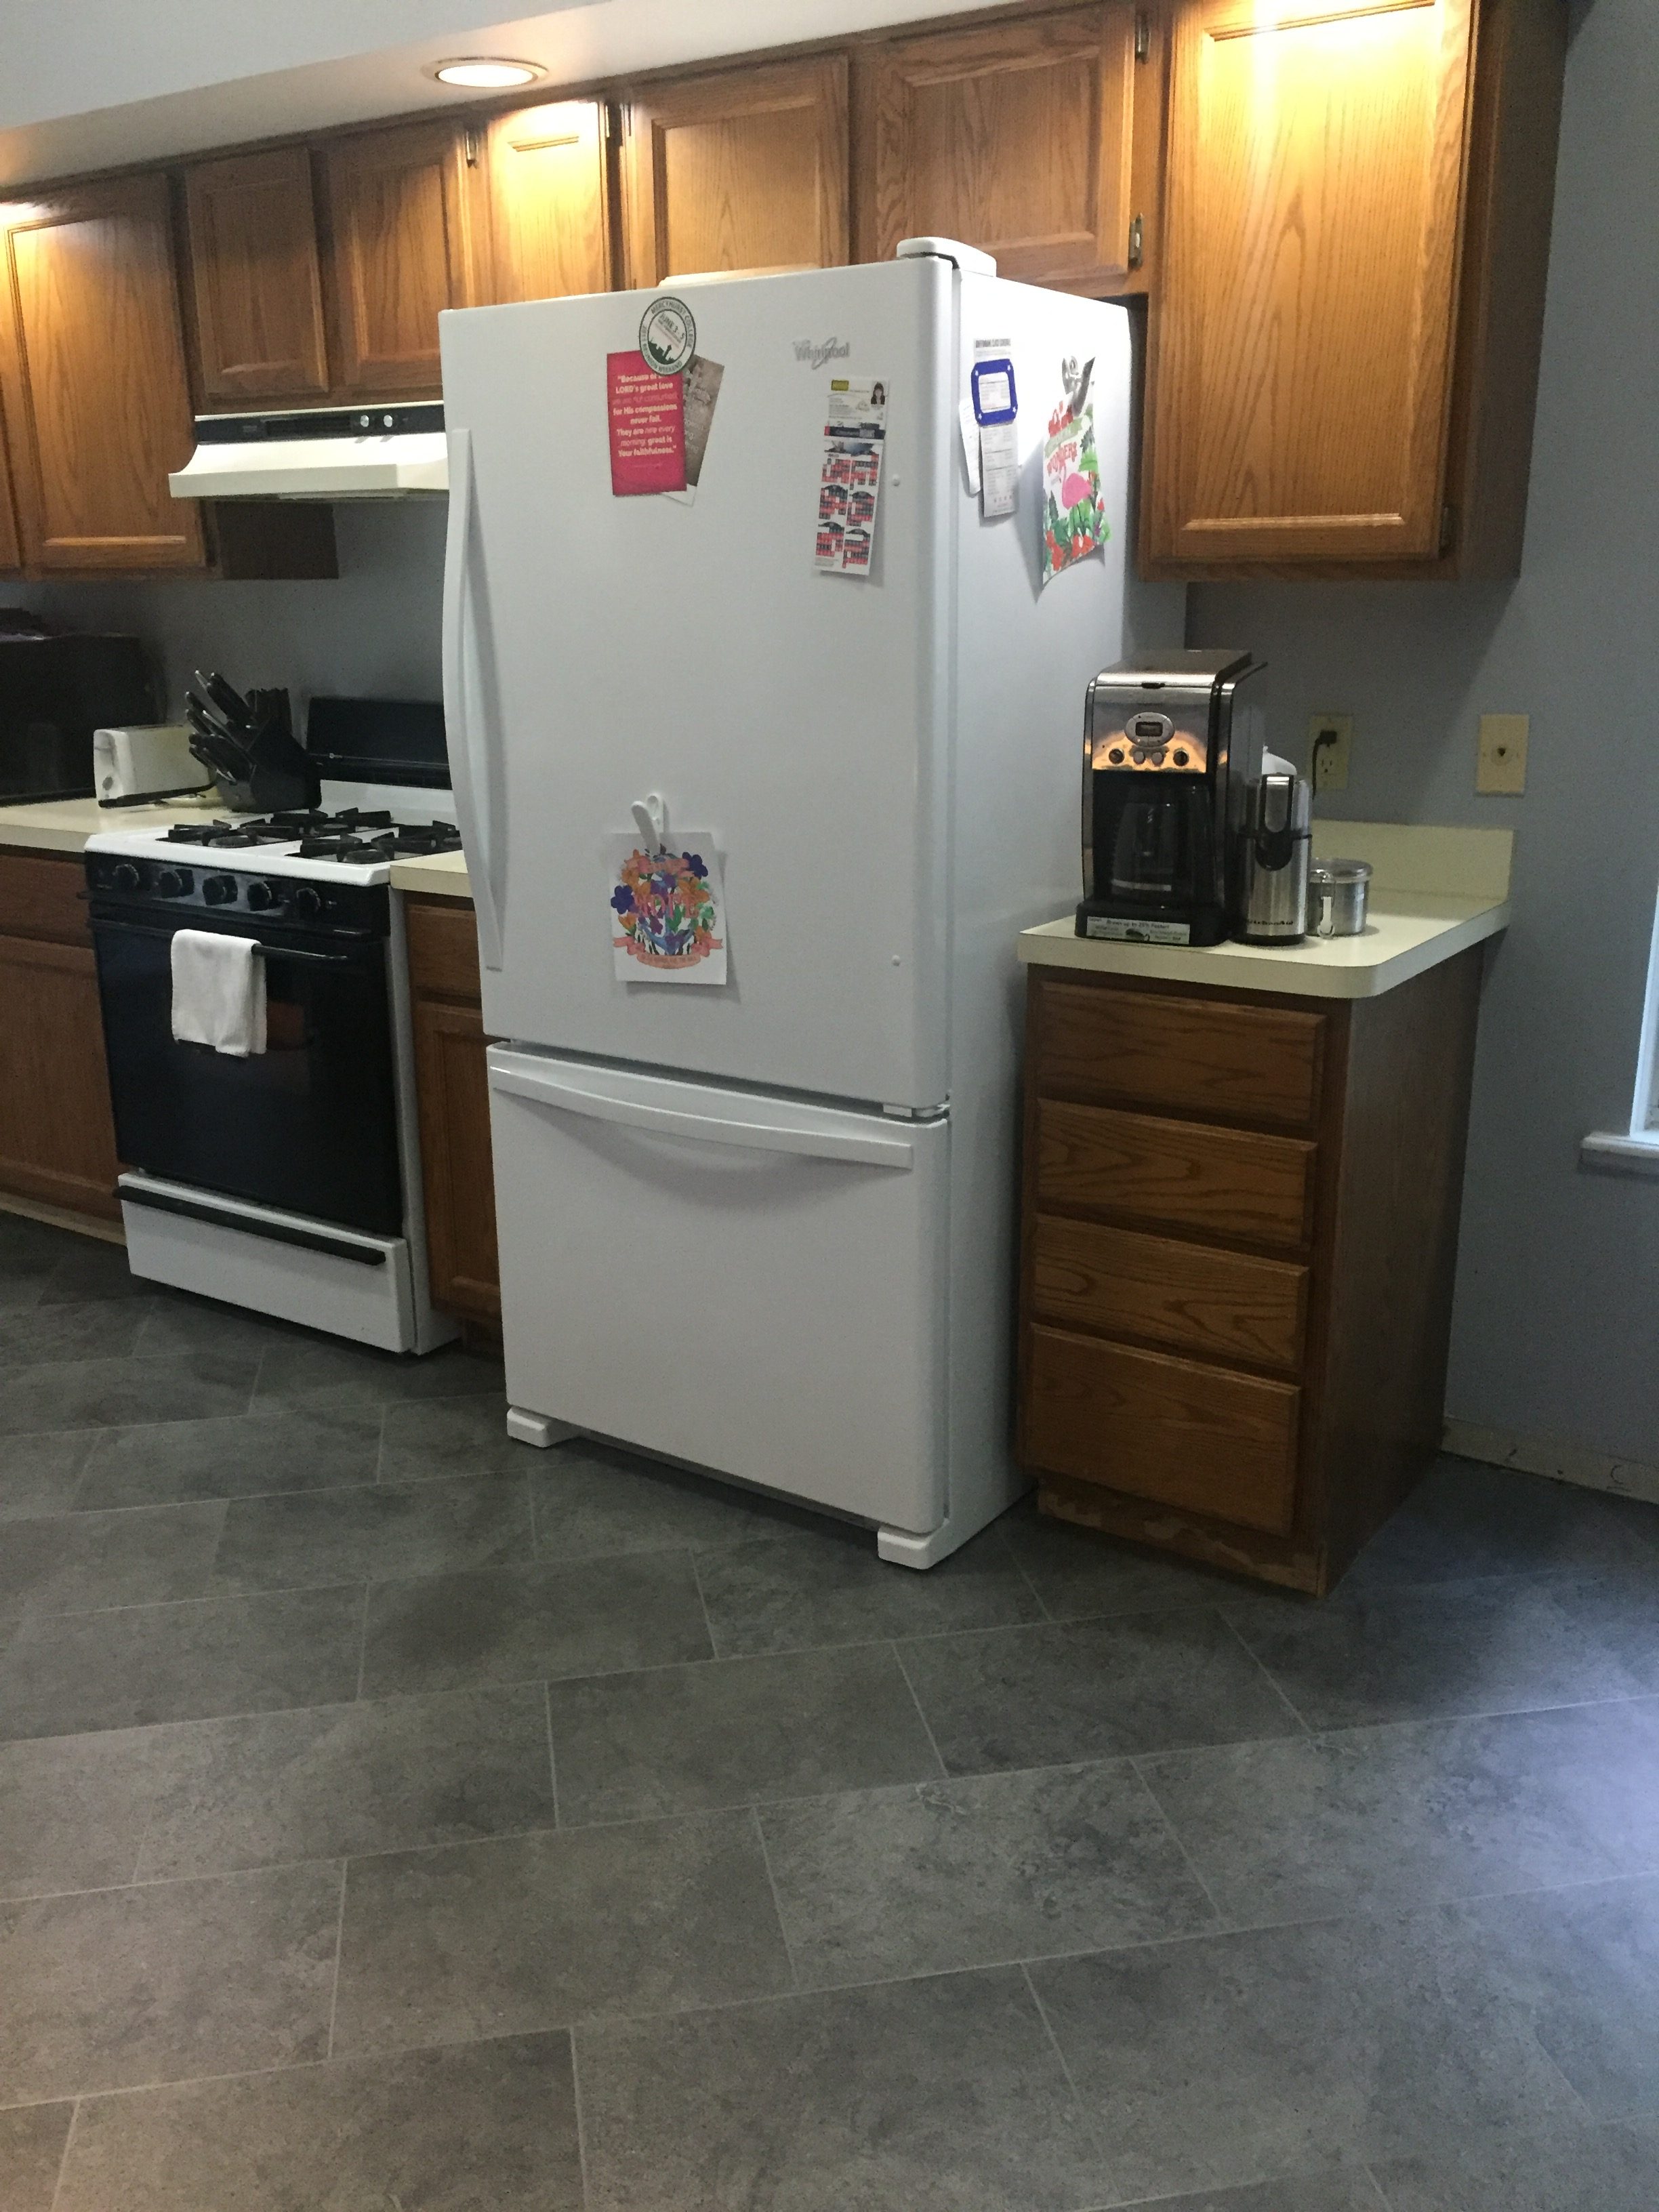
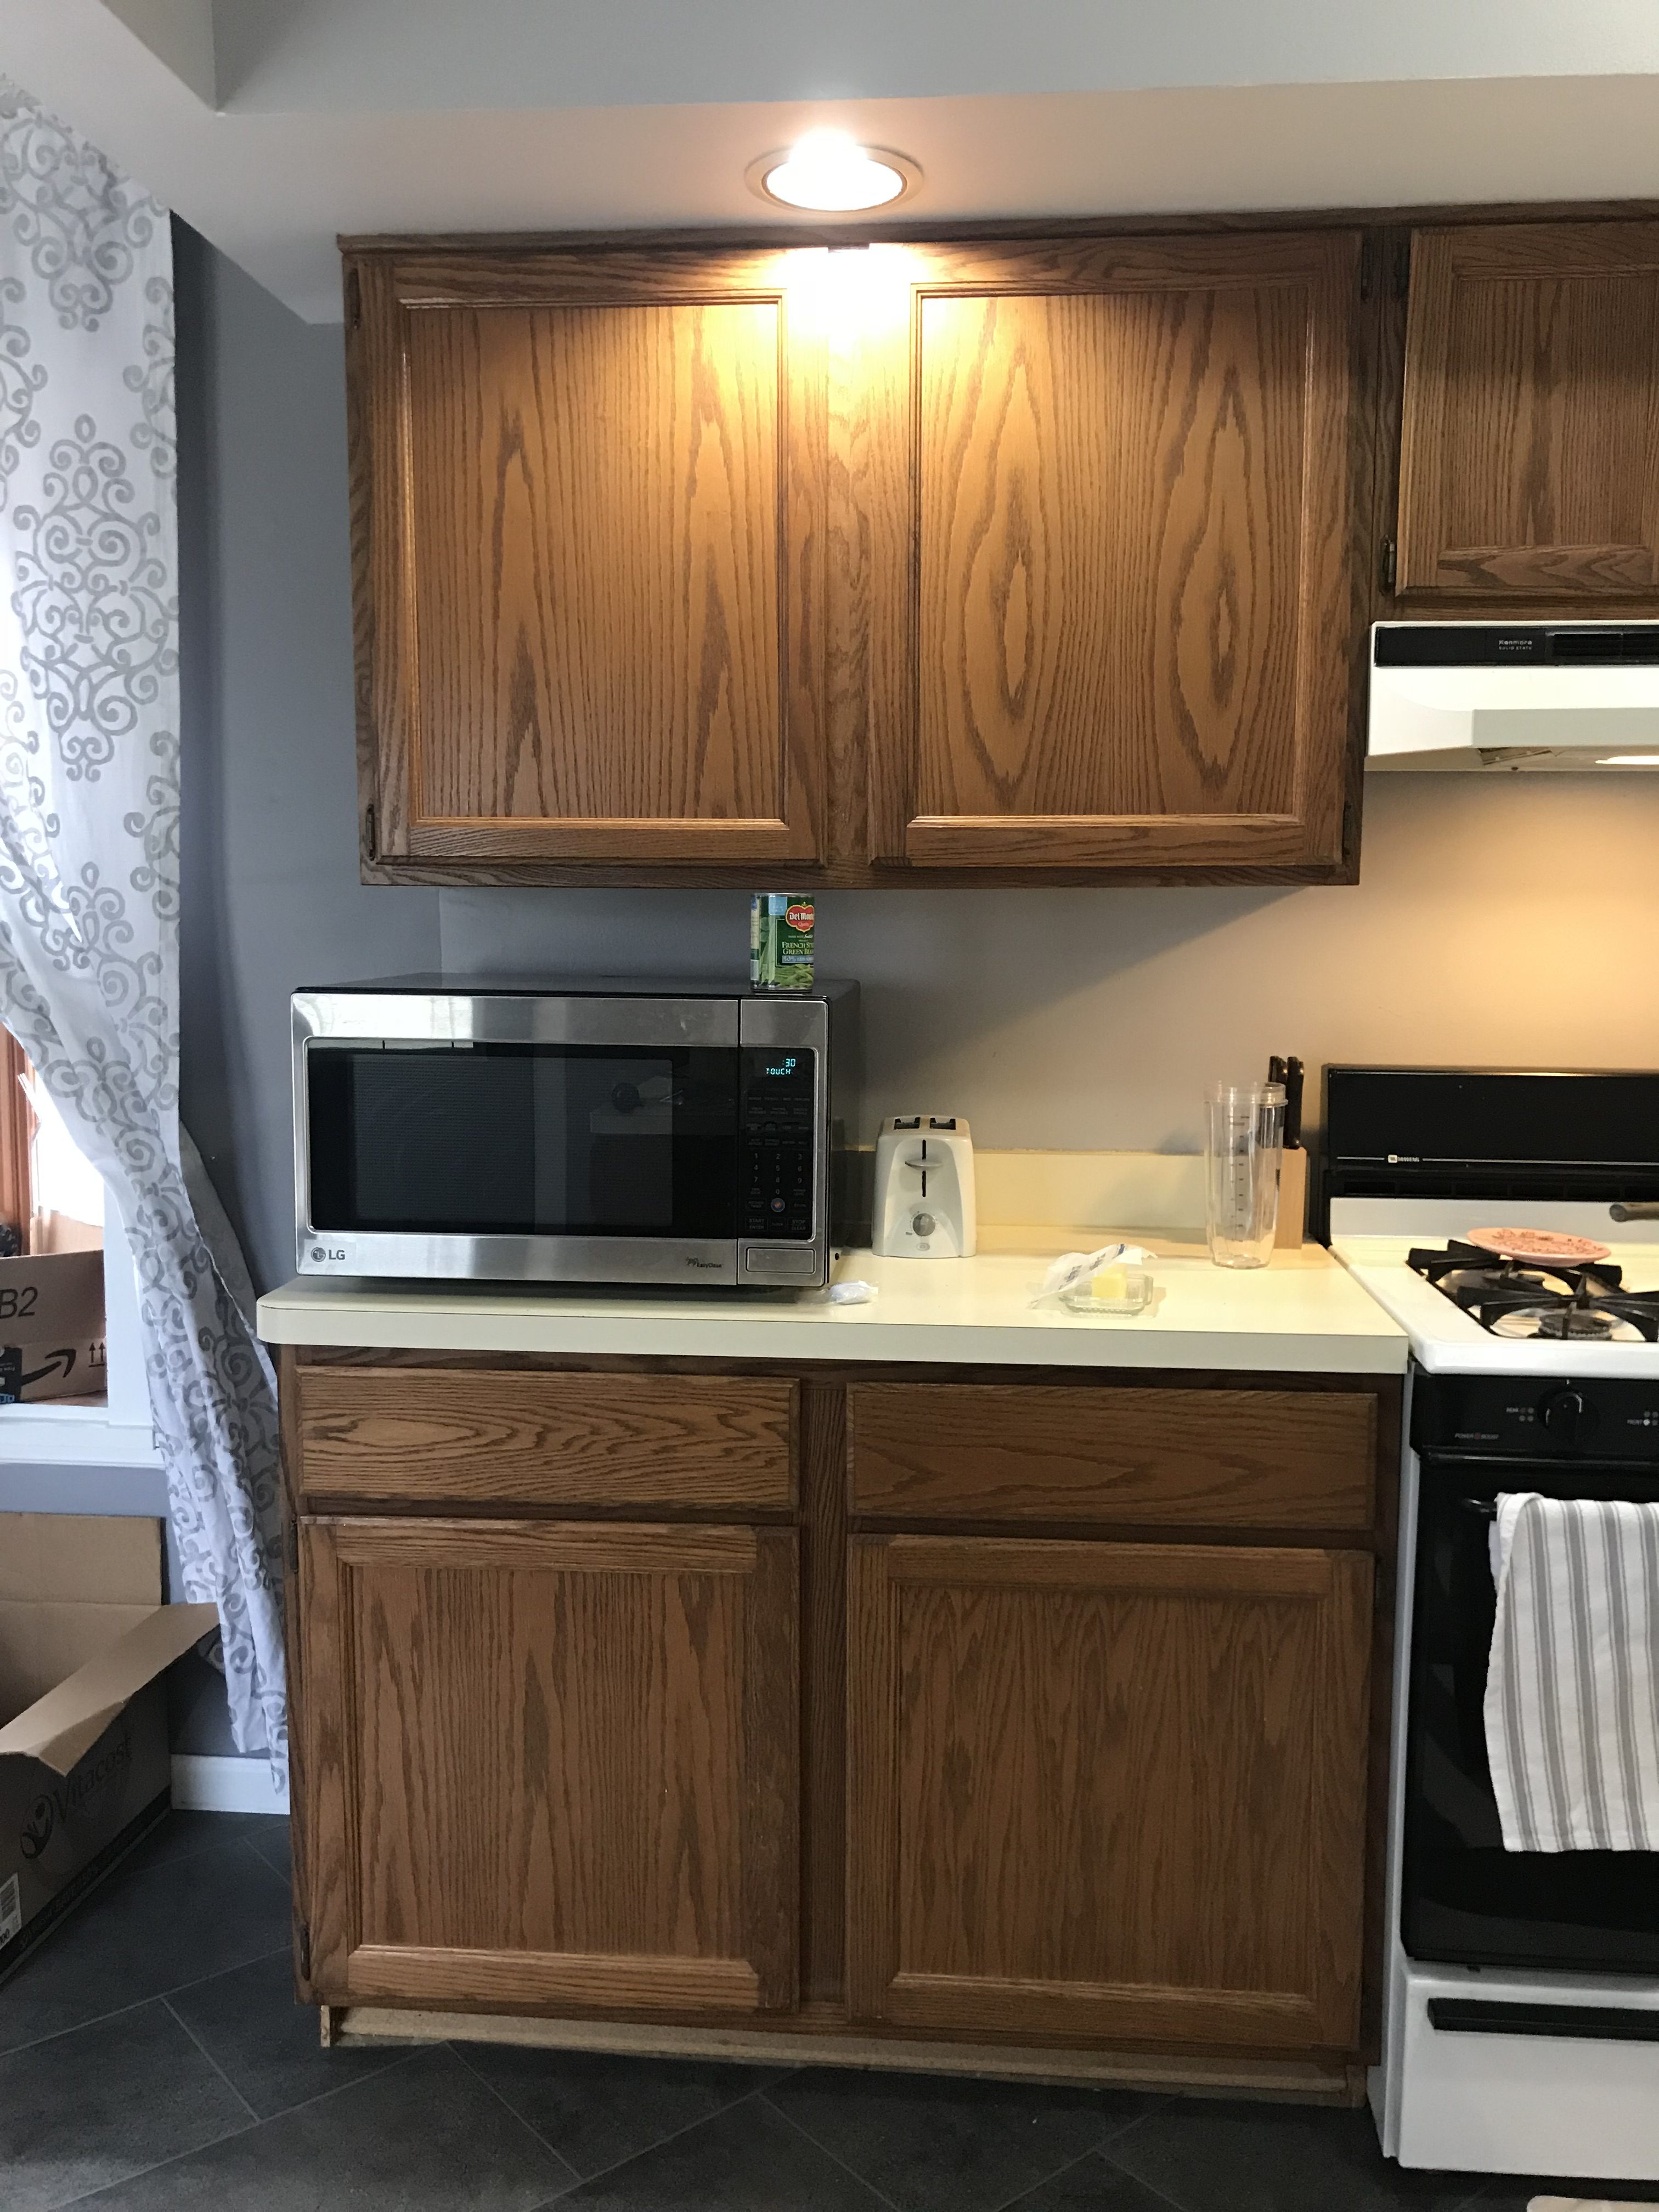
In March of 2018 I decided to take on the huge task of updating my kitchen. When I moved, in 2015, the only thing that I bought new was a refrigerator and a microwave. I was gifted a used stove and it works fine, so I wasn’t going to spend money on a new one & the dishwasher still worked fine. (even though now, in 2019, I needed to buy a new one.
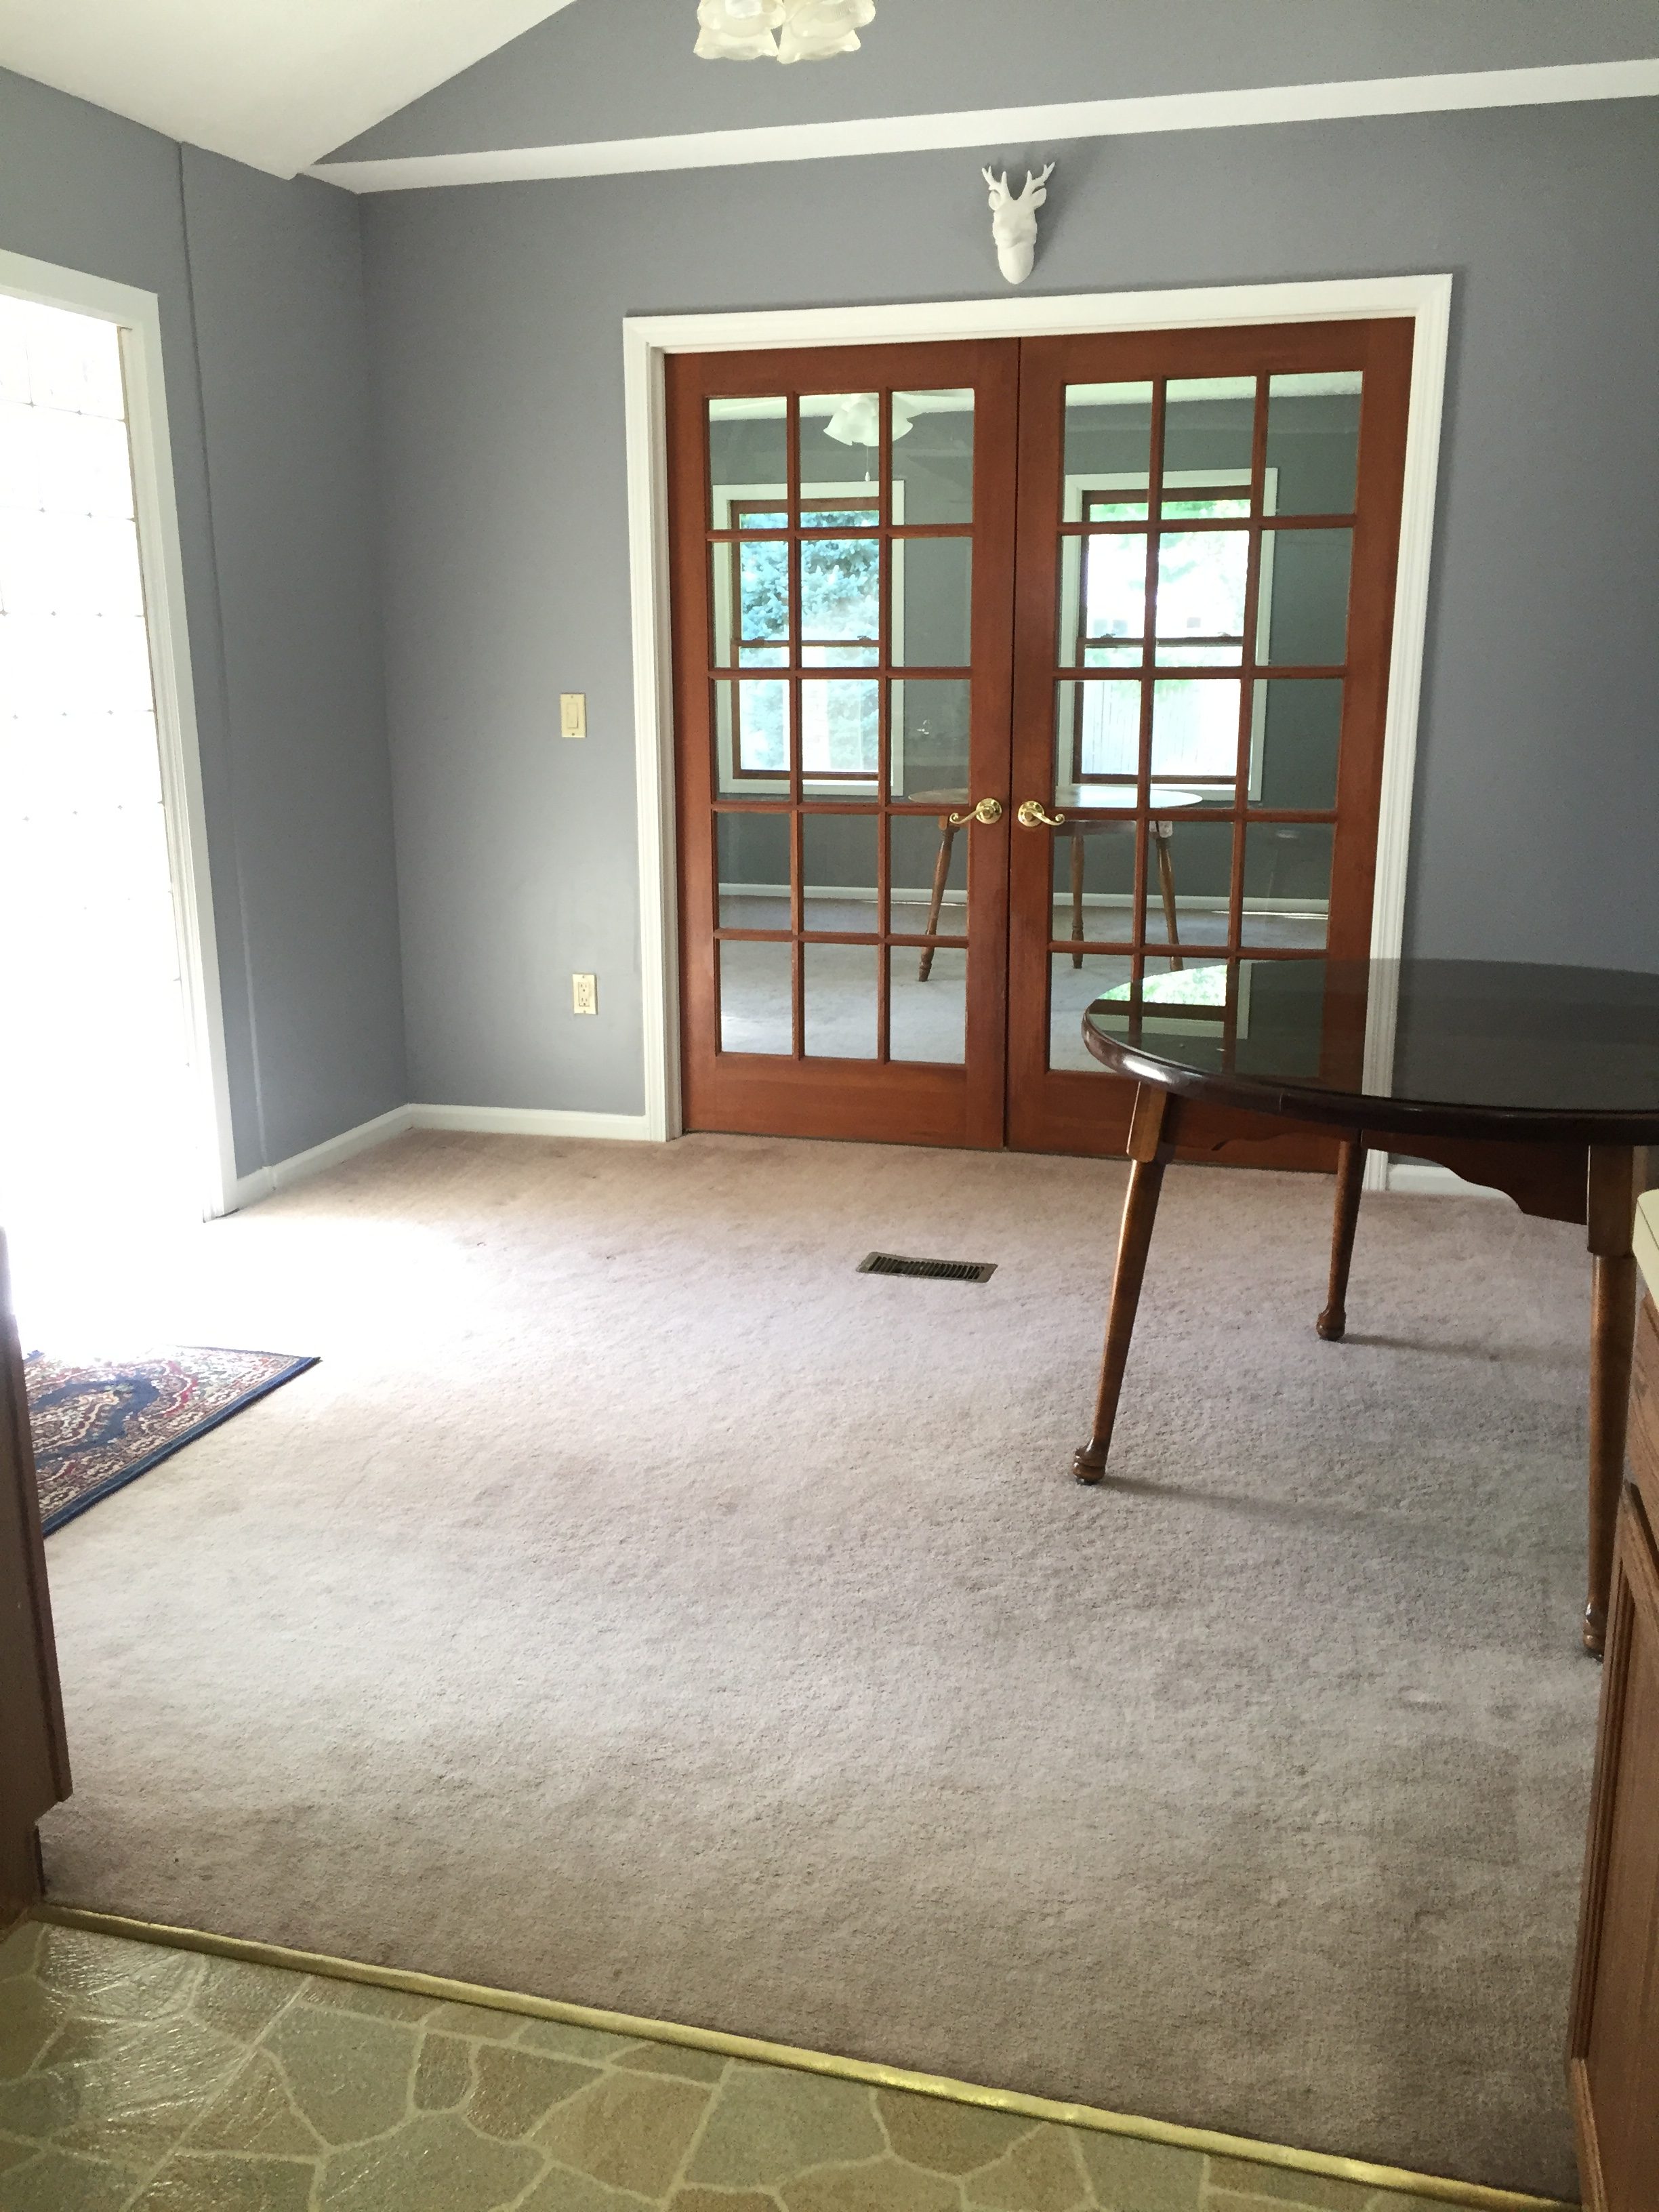
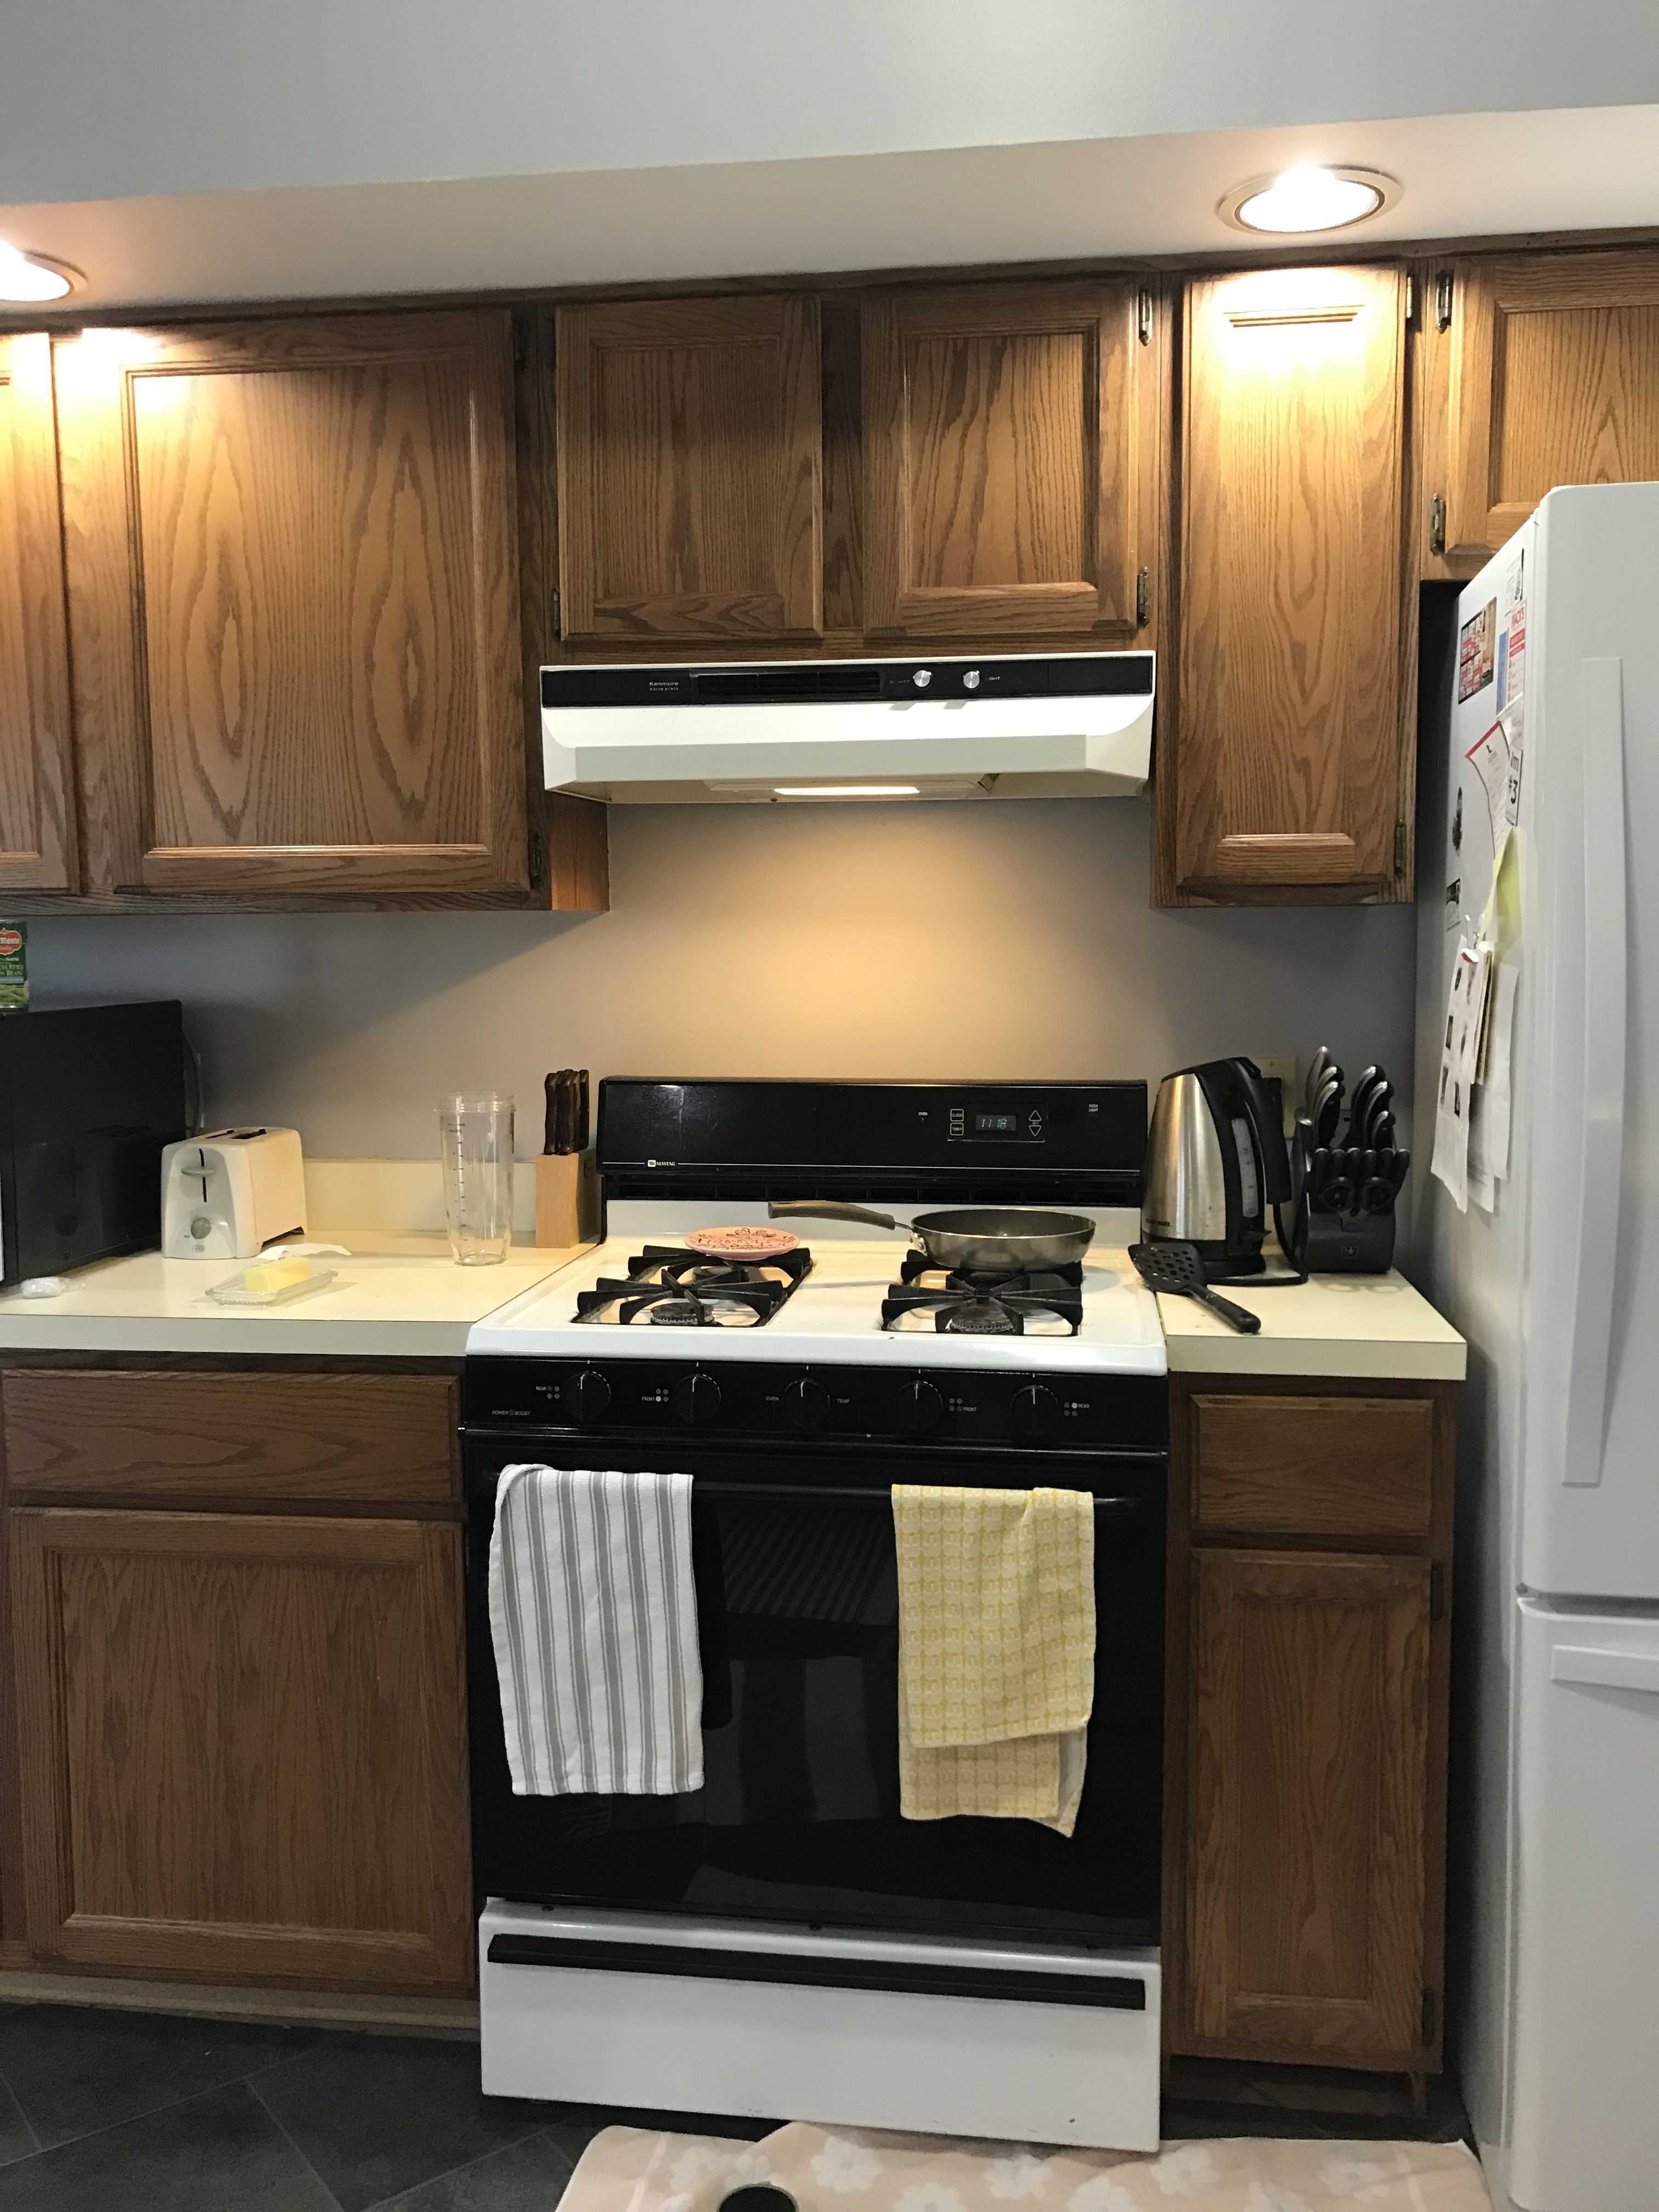
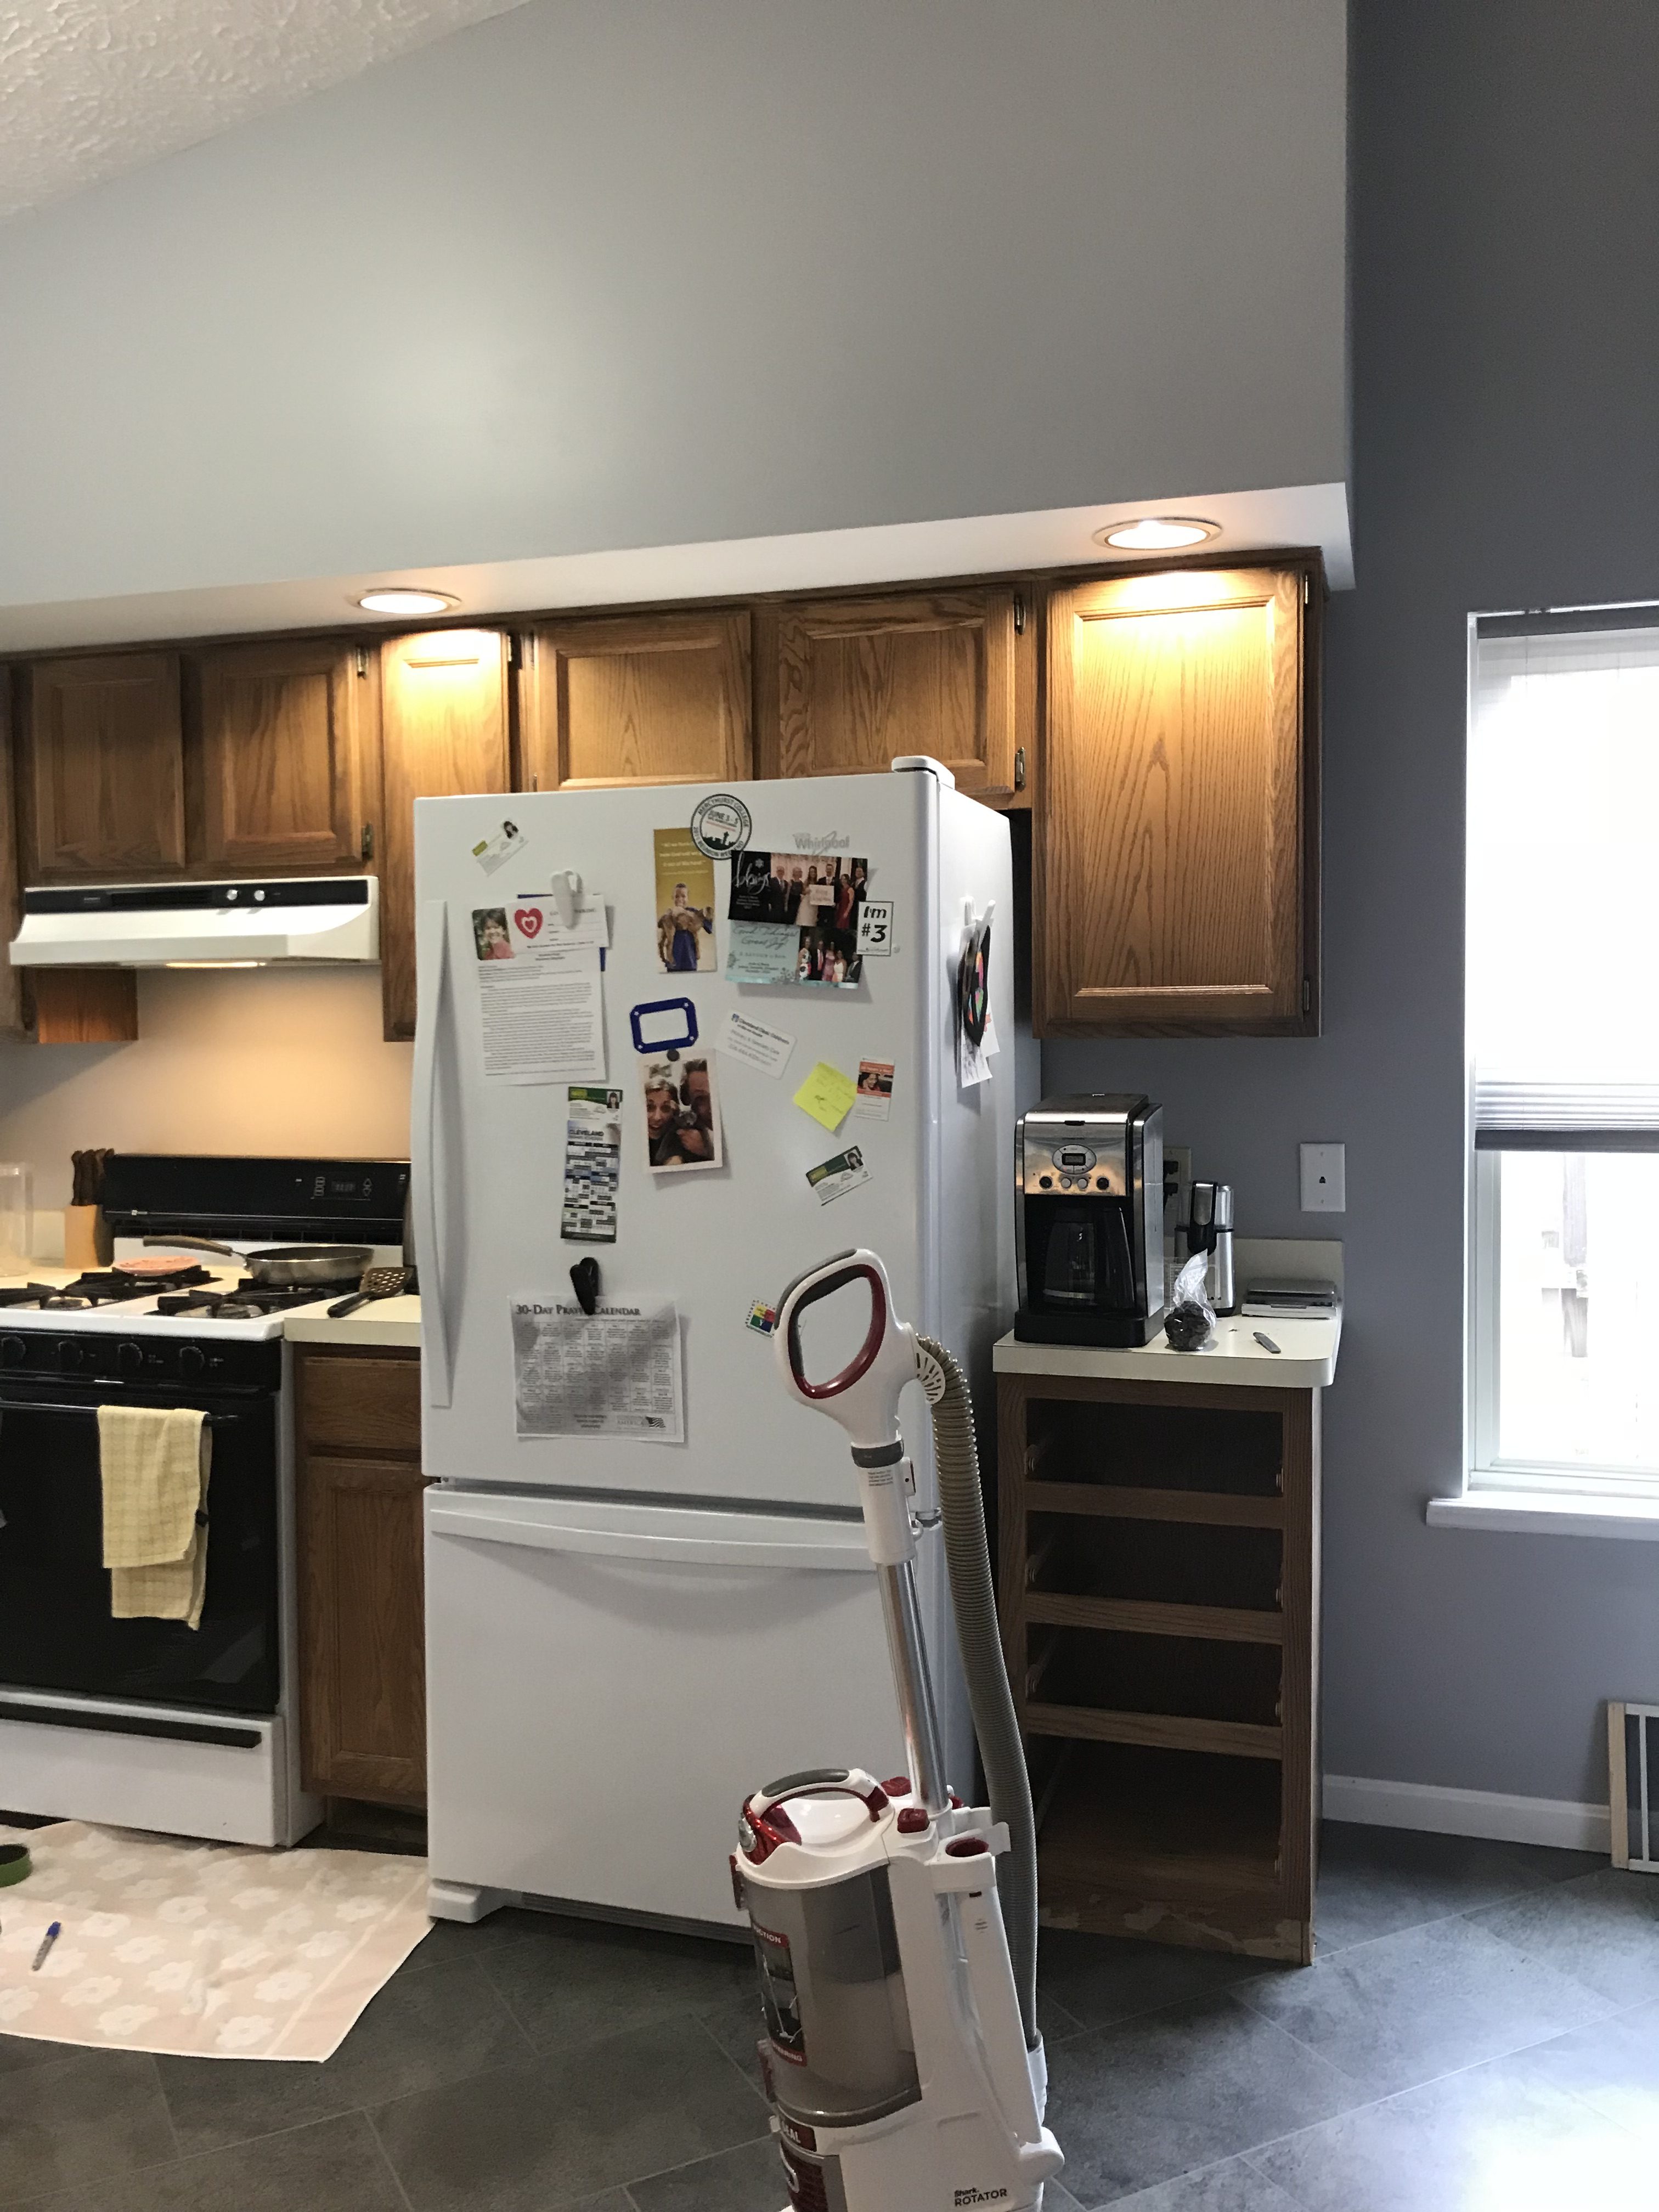
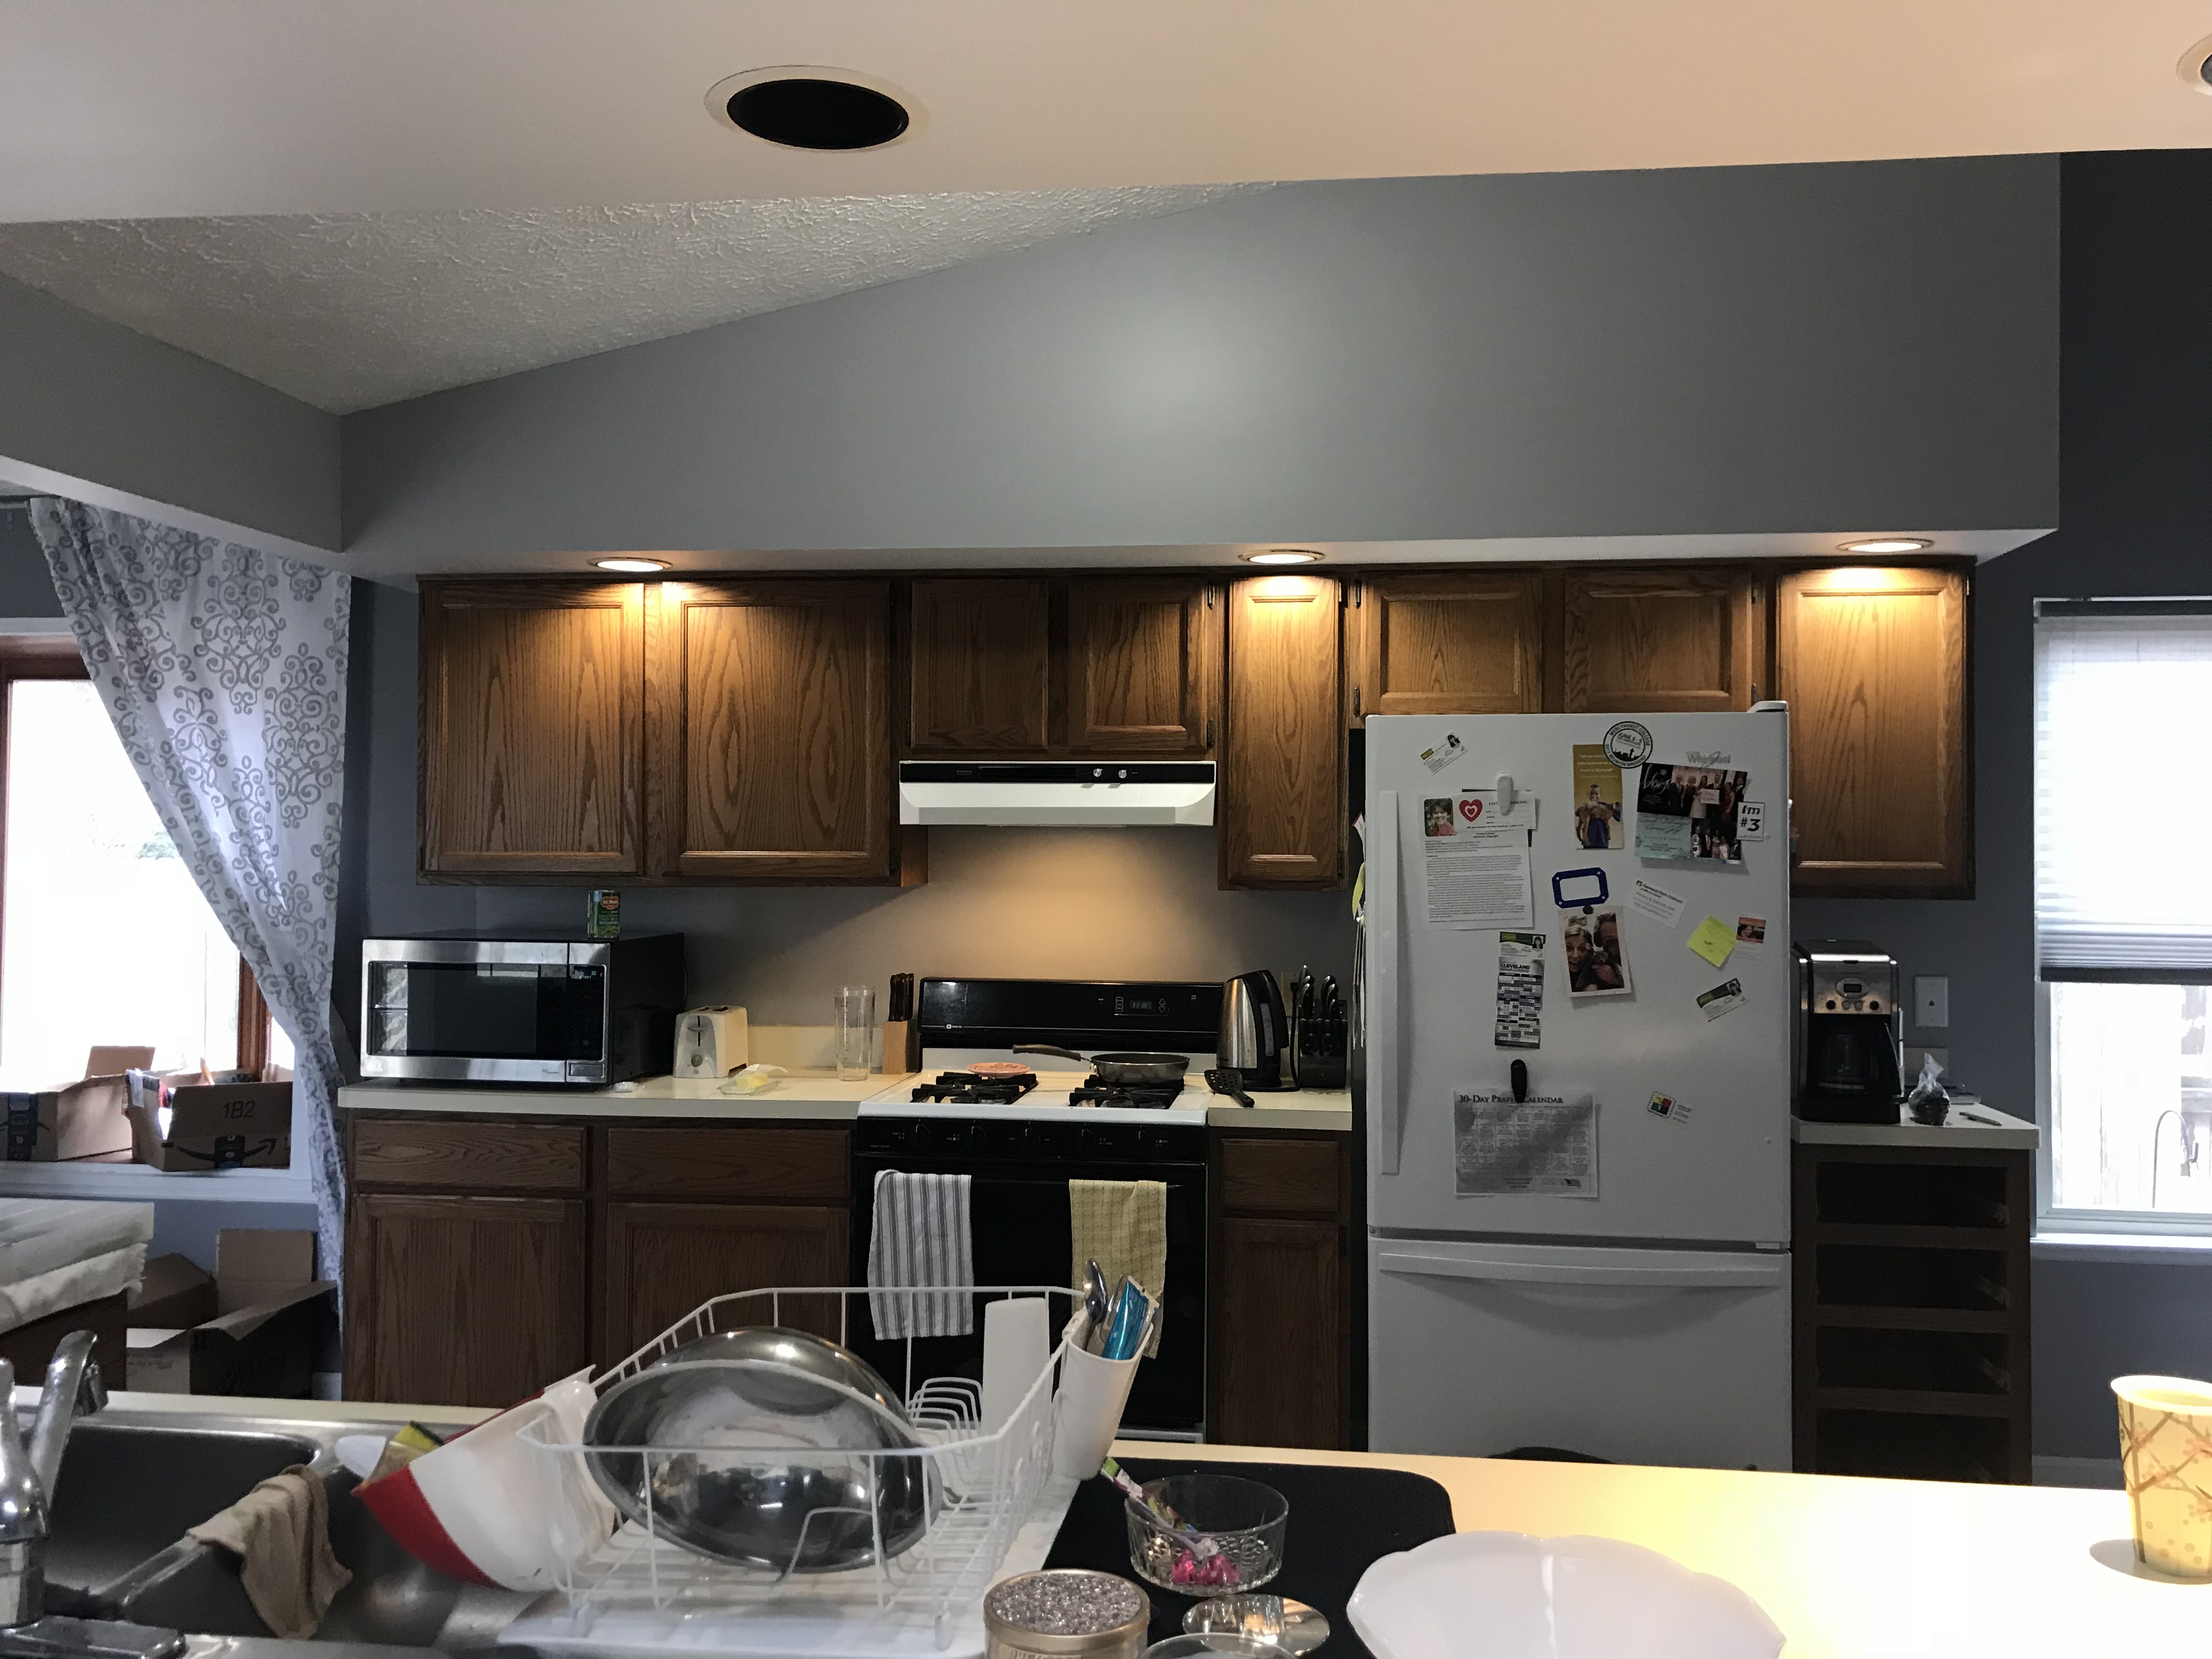
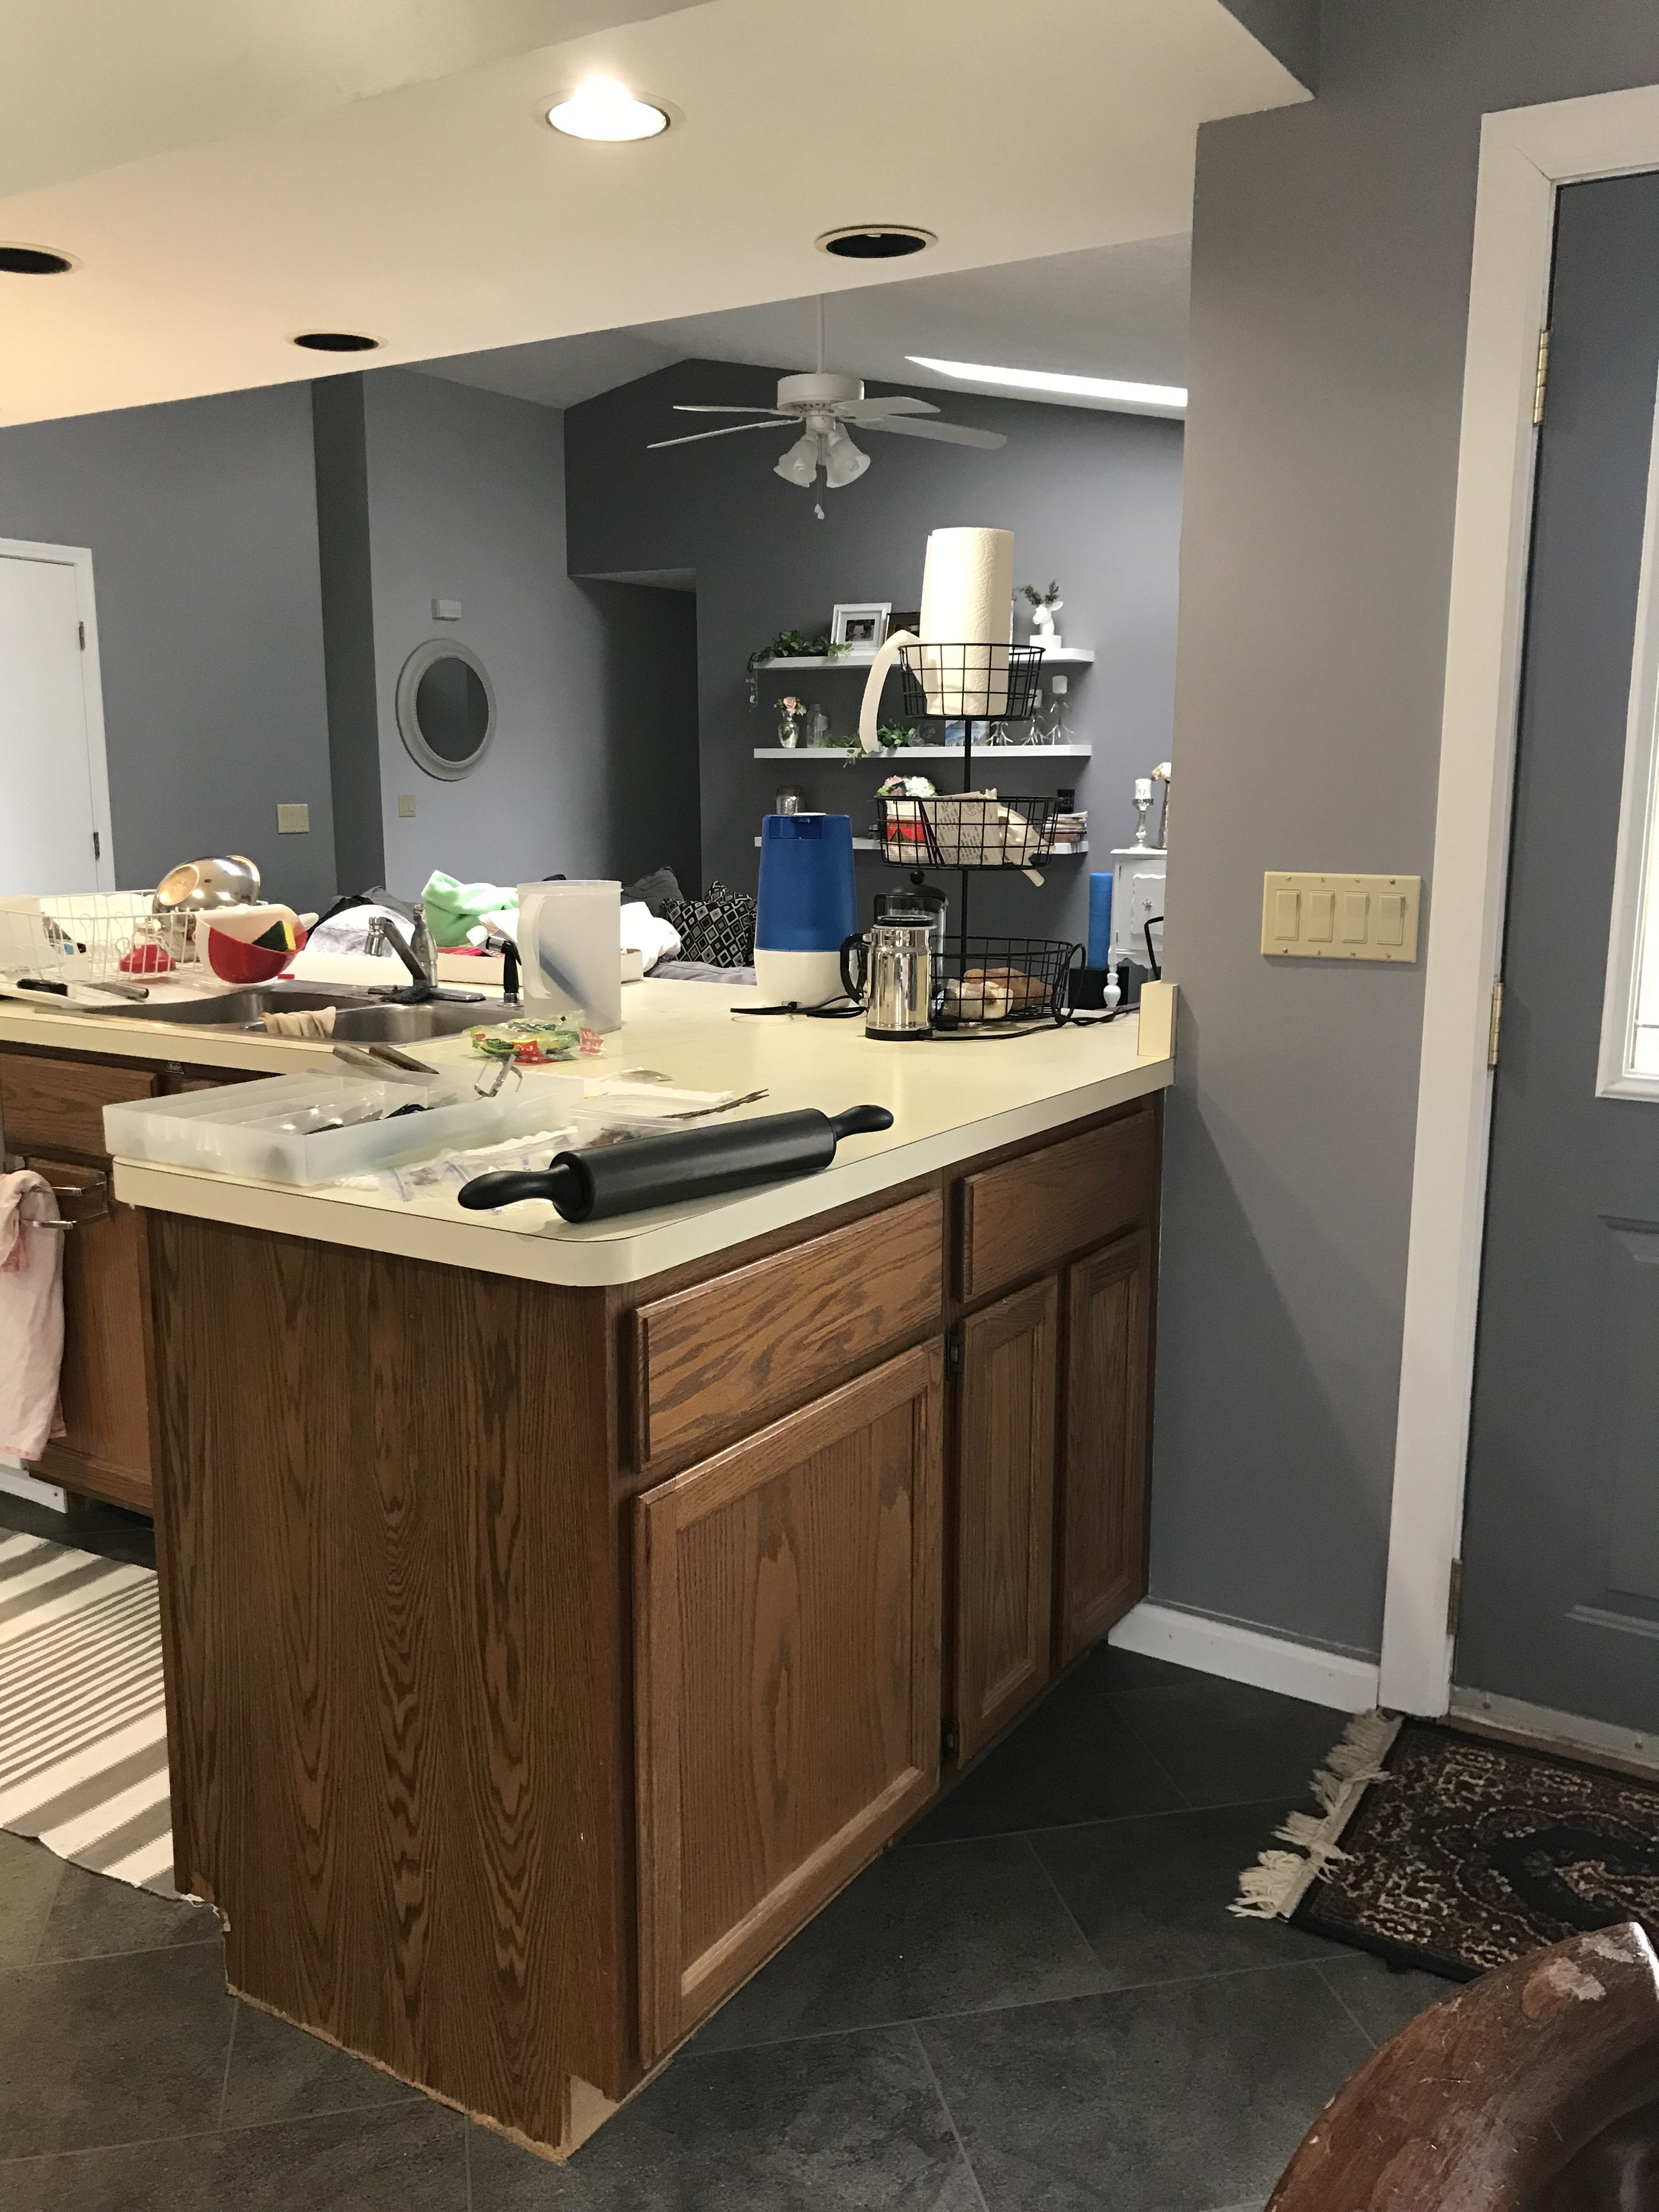
Photos of how I purchased my home...(kitchen)
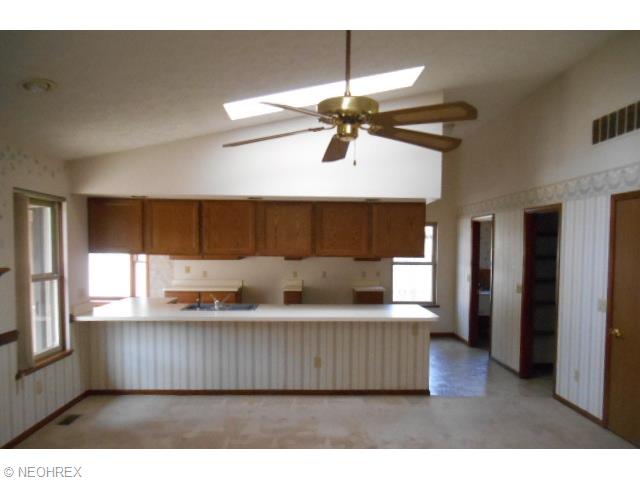
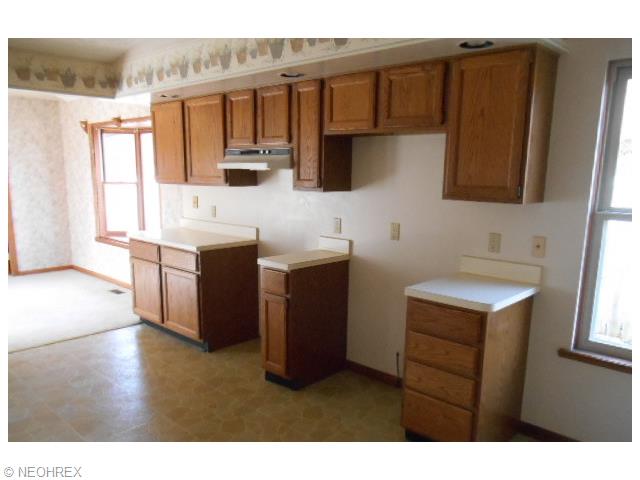

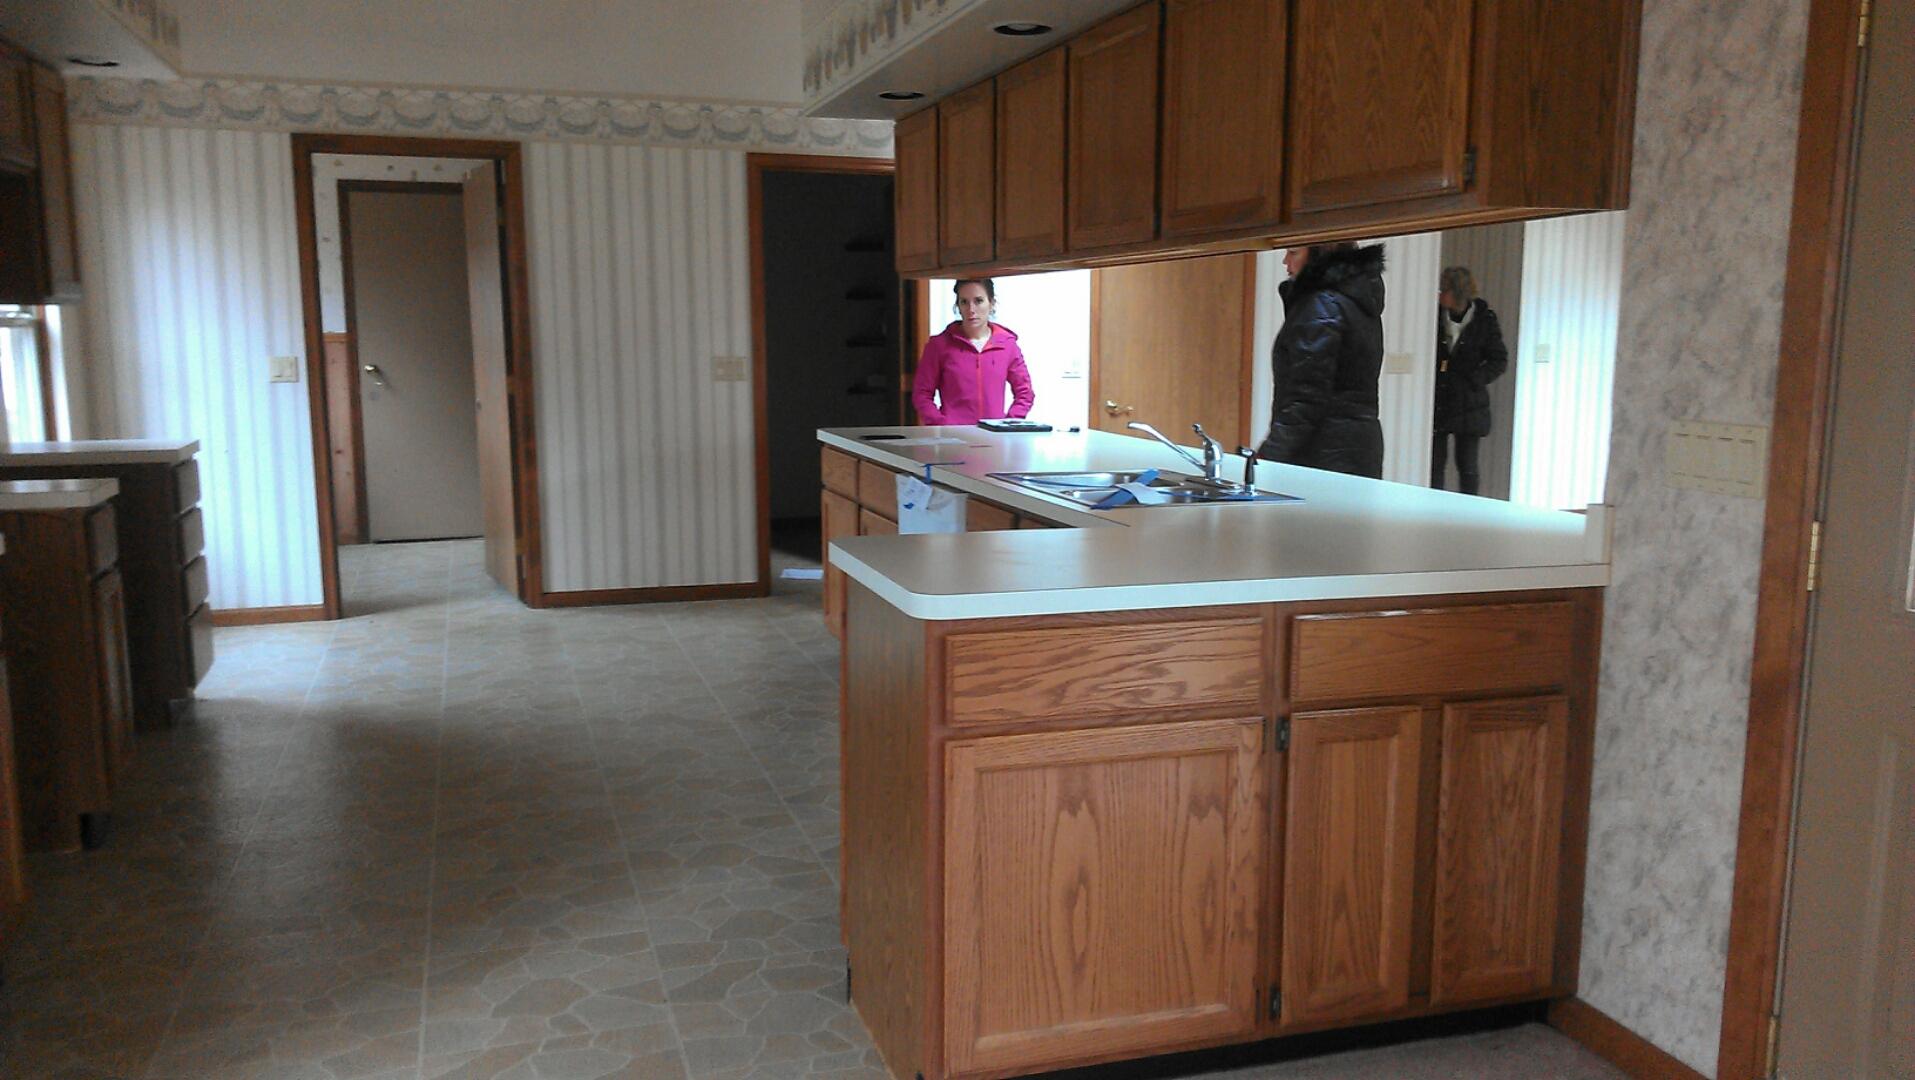
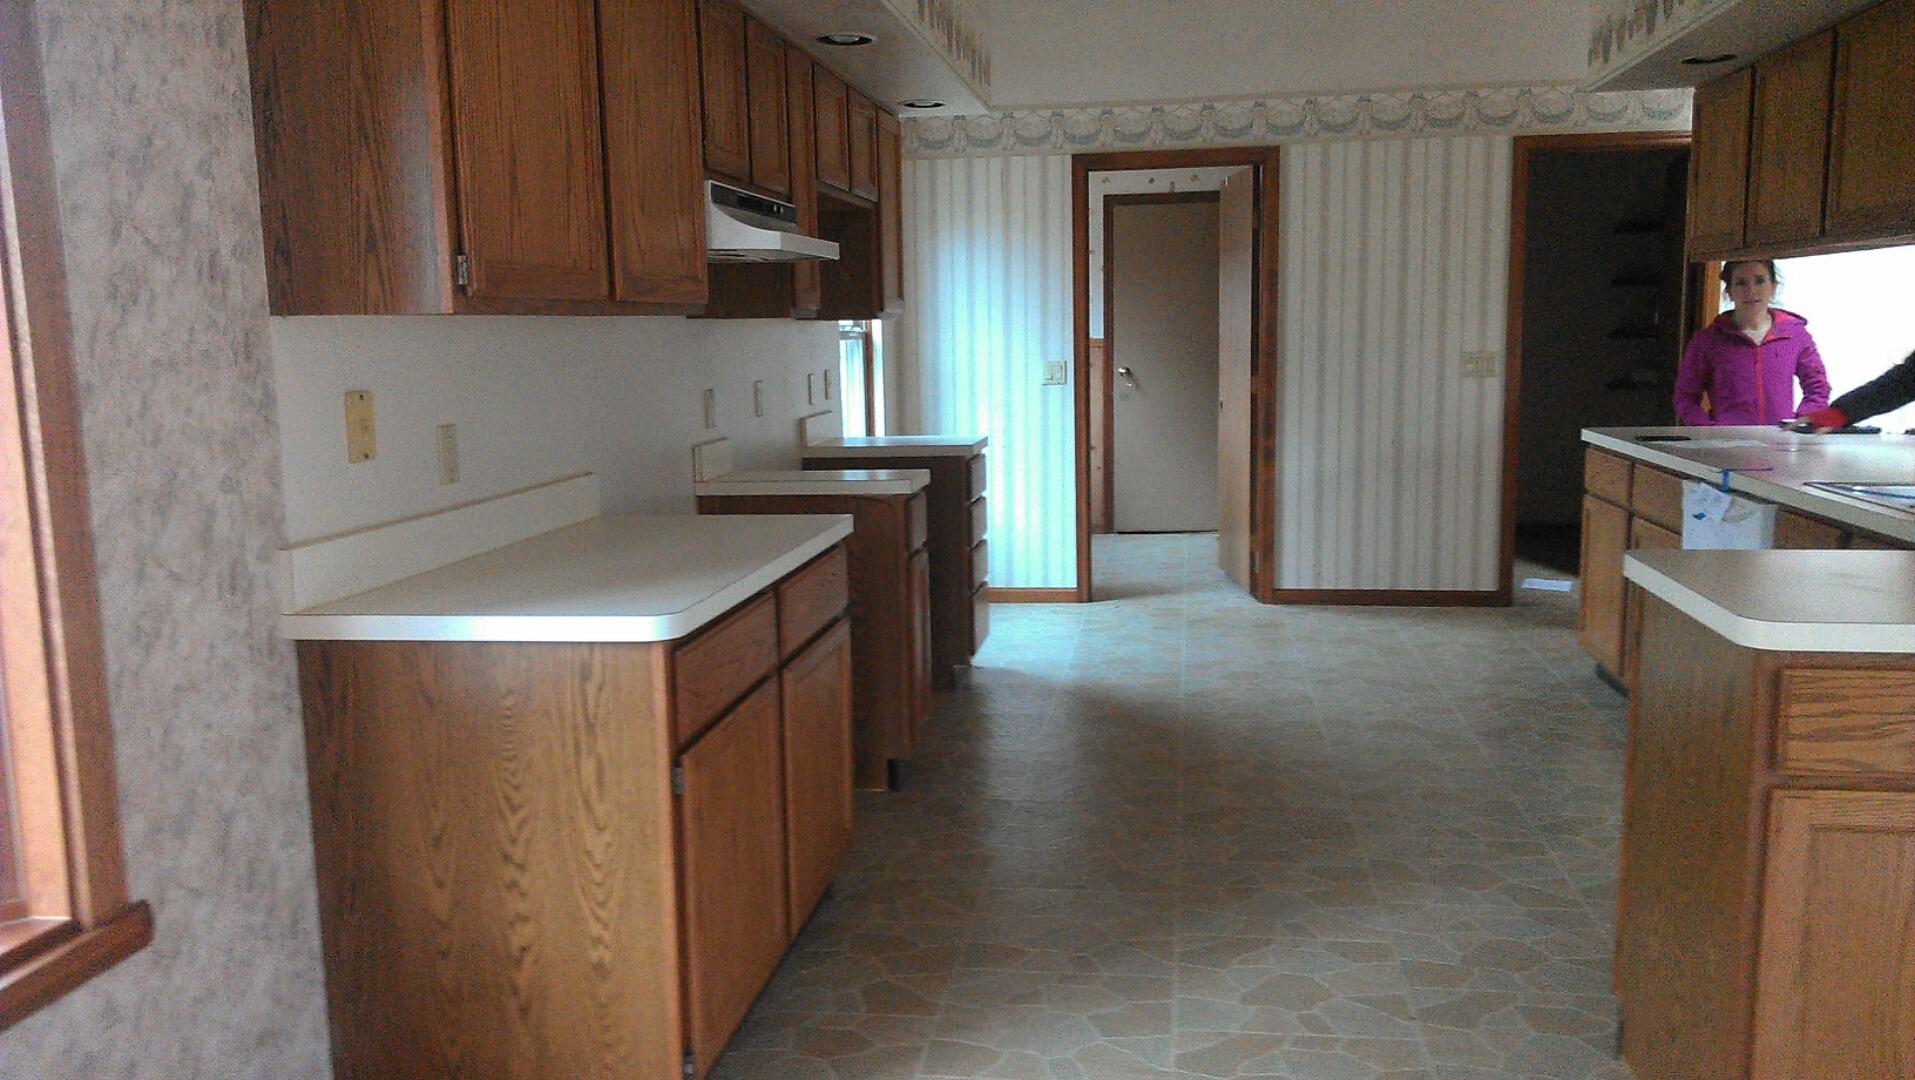
Notice allllll of the wallpaper (crying)
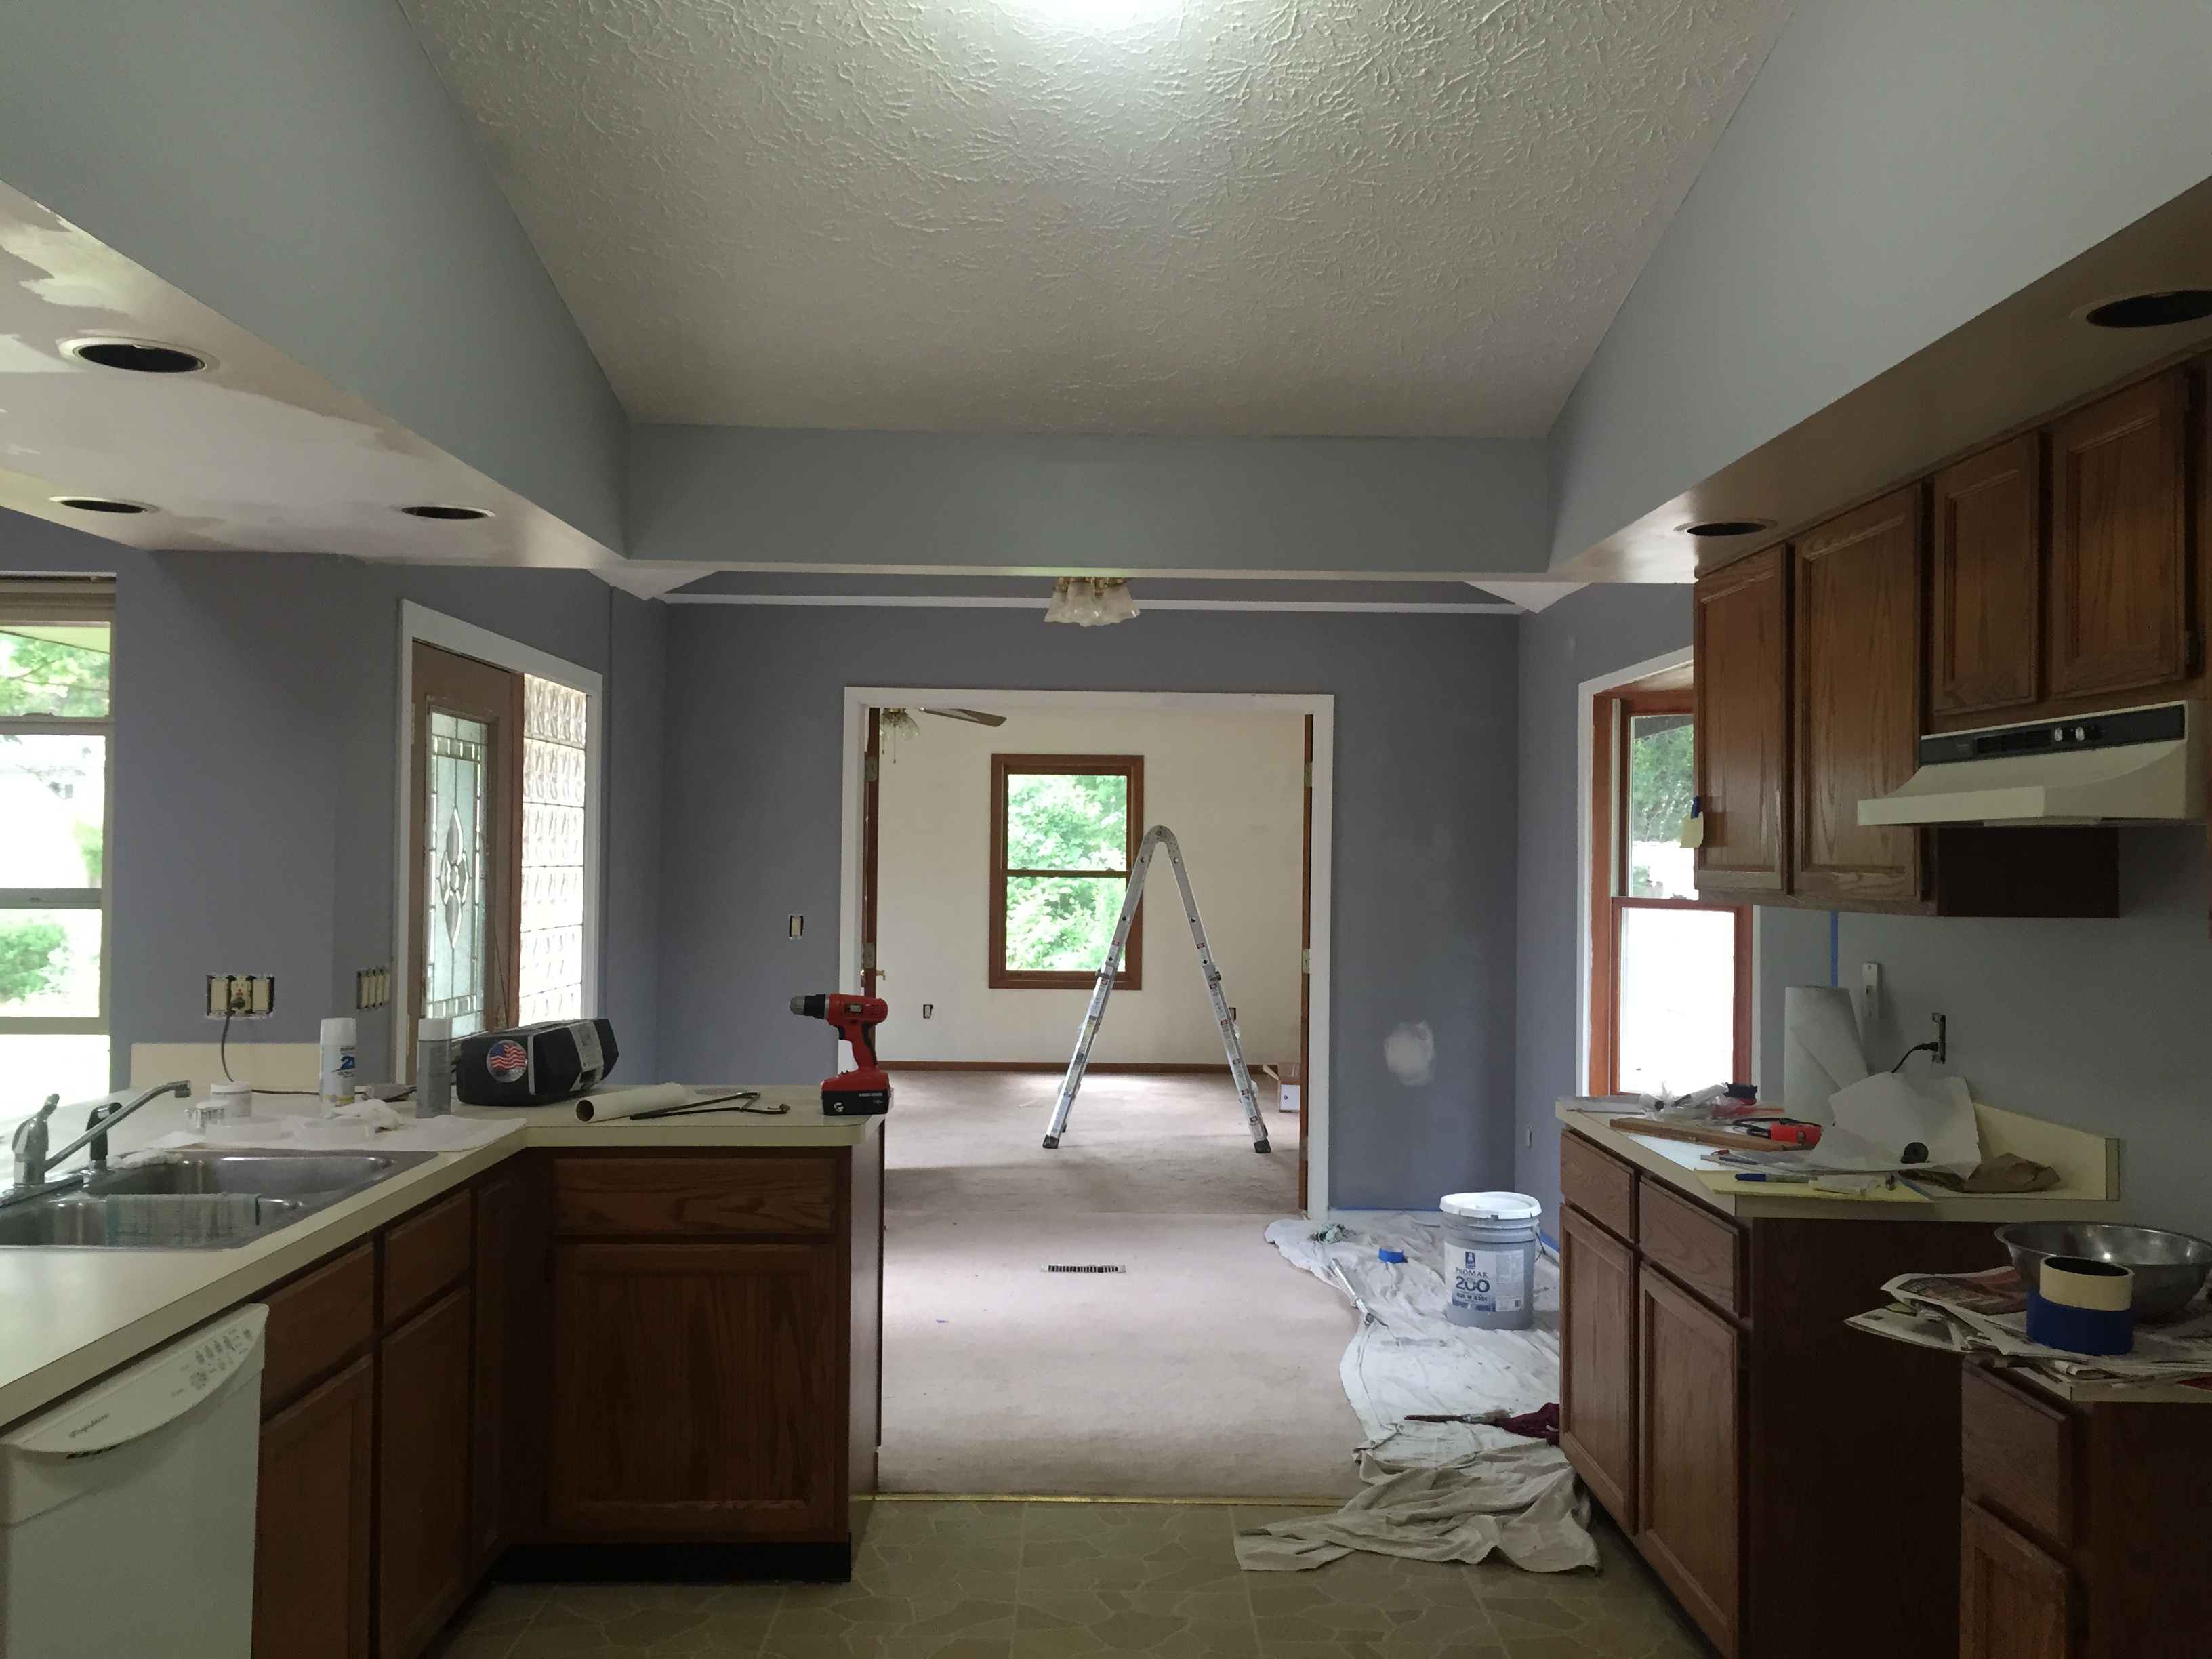
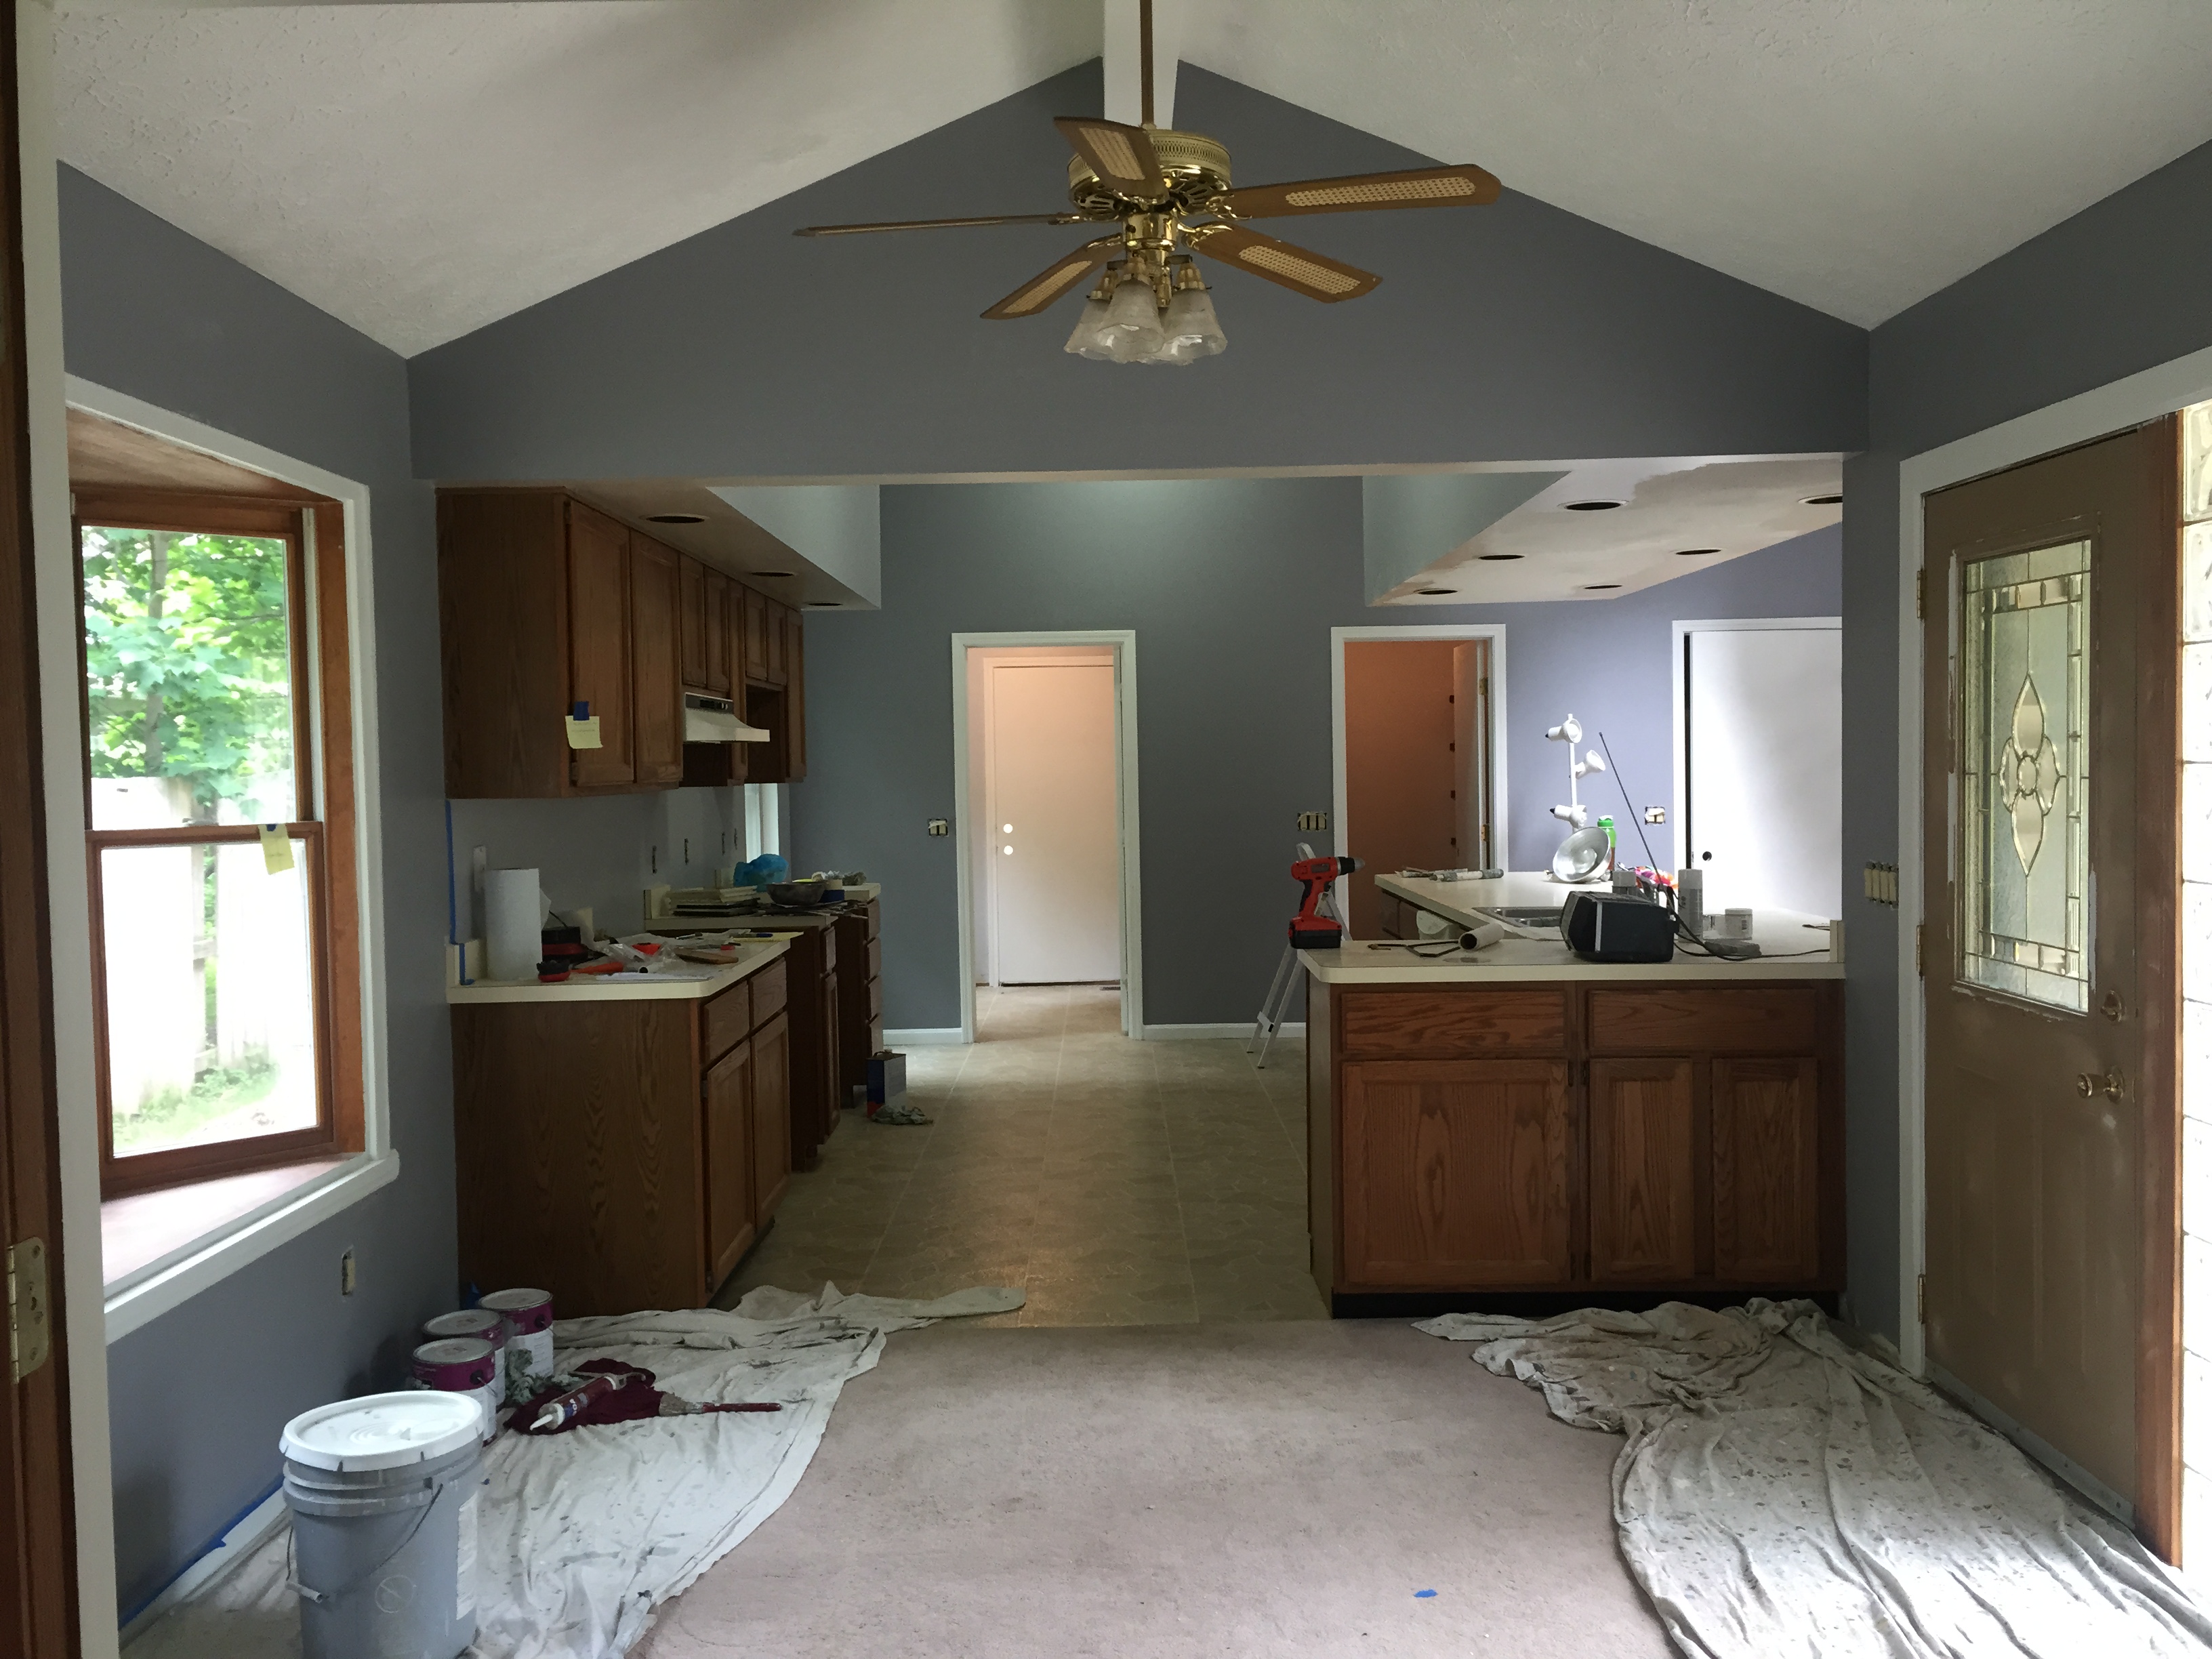
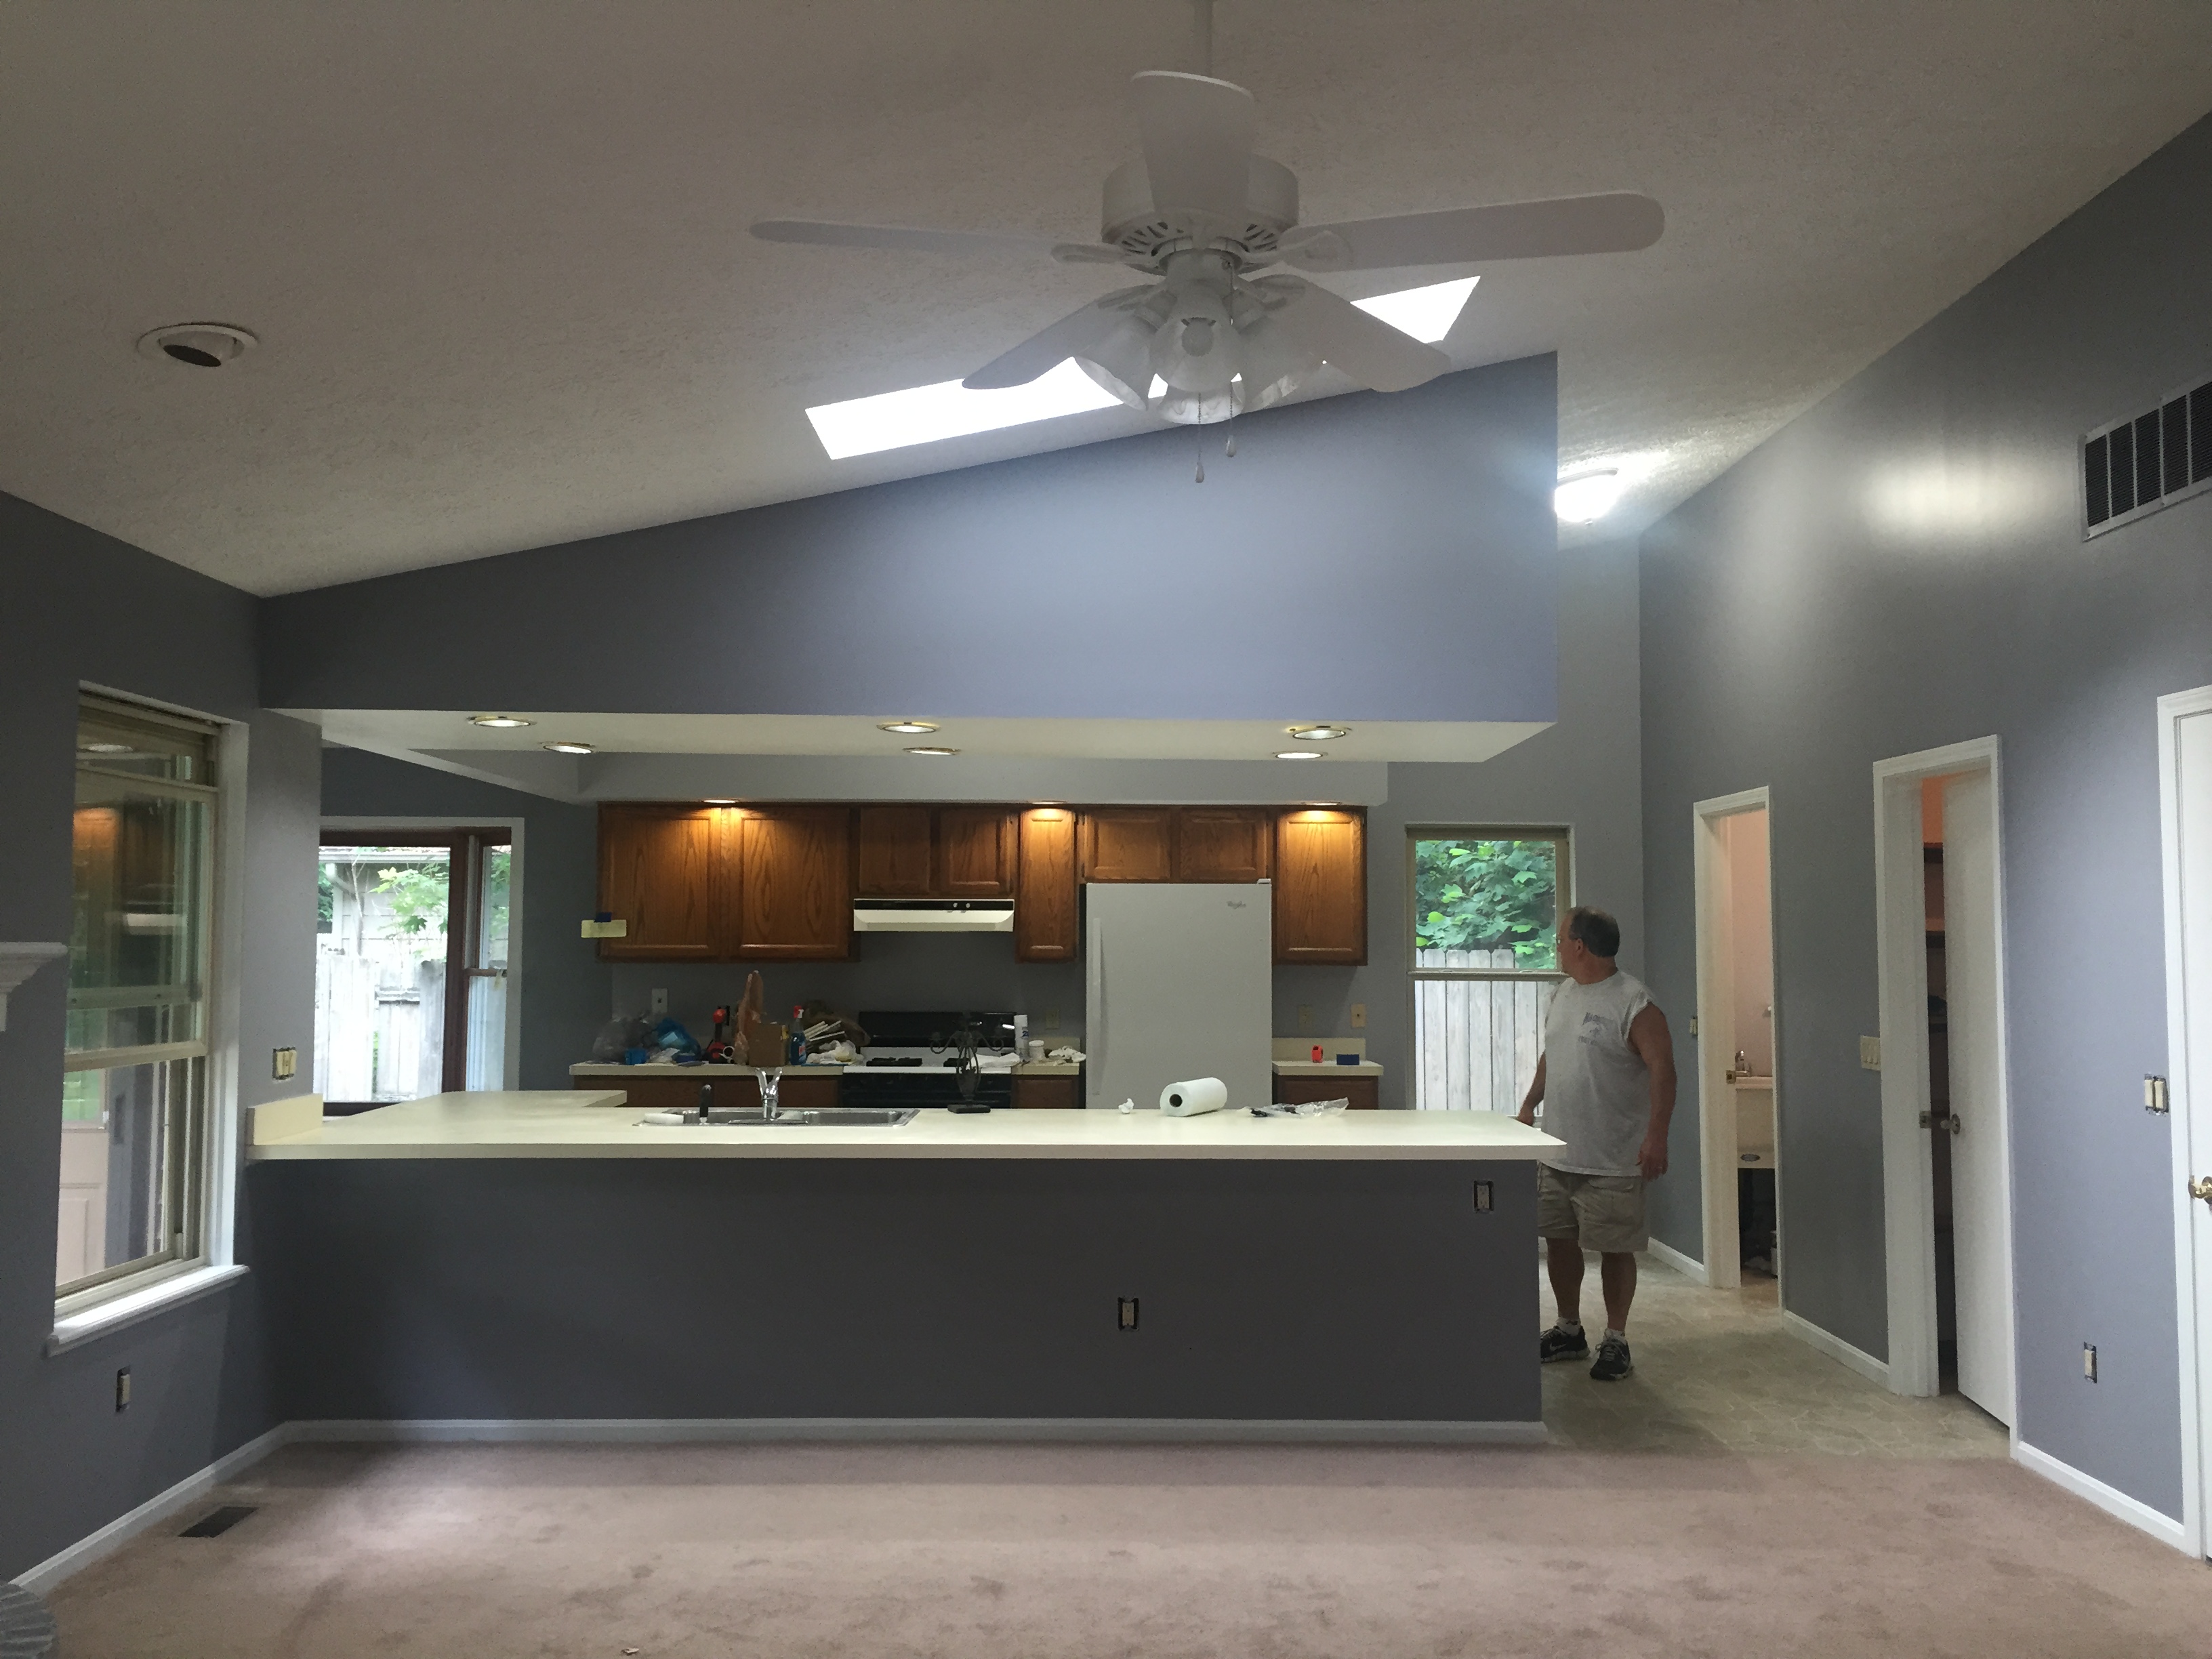
Below were the first updates I did with the money I had. I will say this: If you do not have the money outright, wait and plan. Sure you want something done right away but it’s always better to plan and do it right. Paint is one of those things that can go very far & change the whole aesthetic of a room.
-Take down cabinets over island
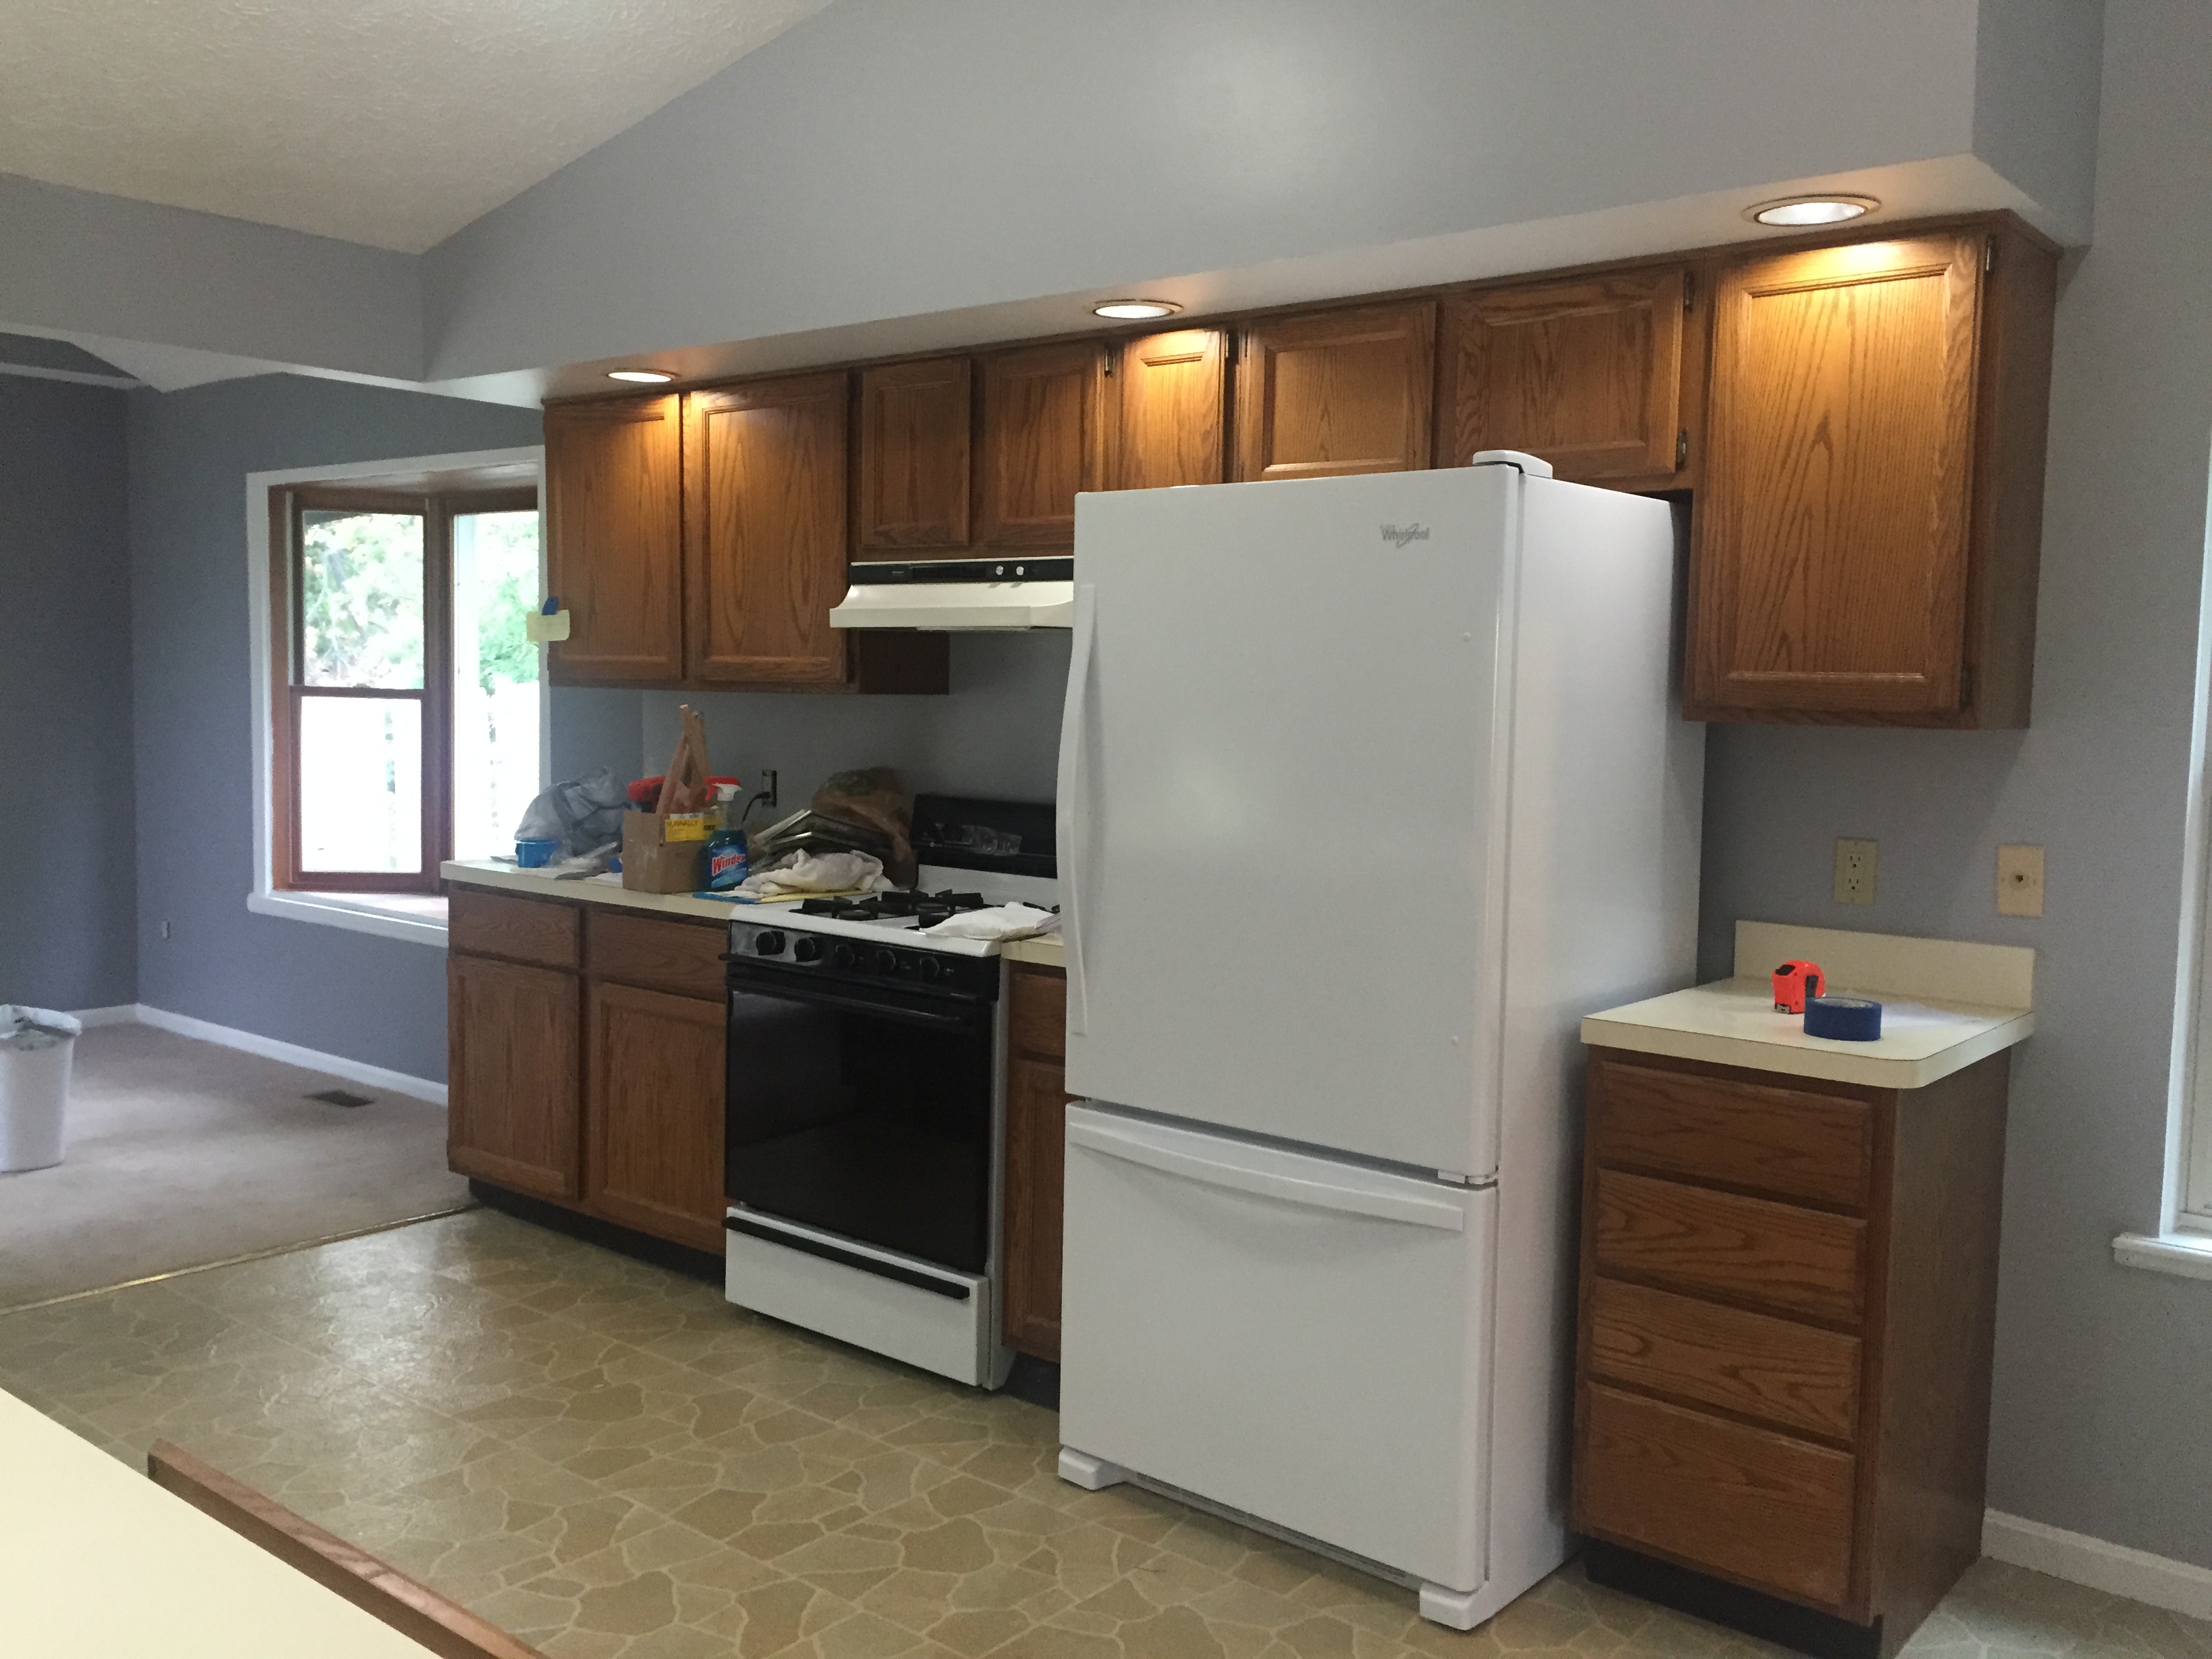
-Add Fridge & Stove
-Paint trim white & walls with my gray pallet
-Carpet in the dining area (gag)
First Updates - 2015
My first step in any process is research, research, research — I tend to get a project in my mind and want to start immediately but the more you talk to people and get their opinion, & talk to home renovation stores, the more you learn.
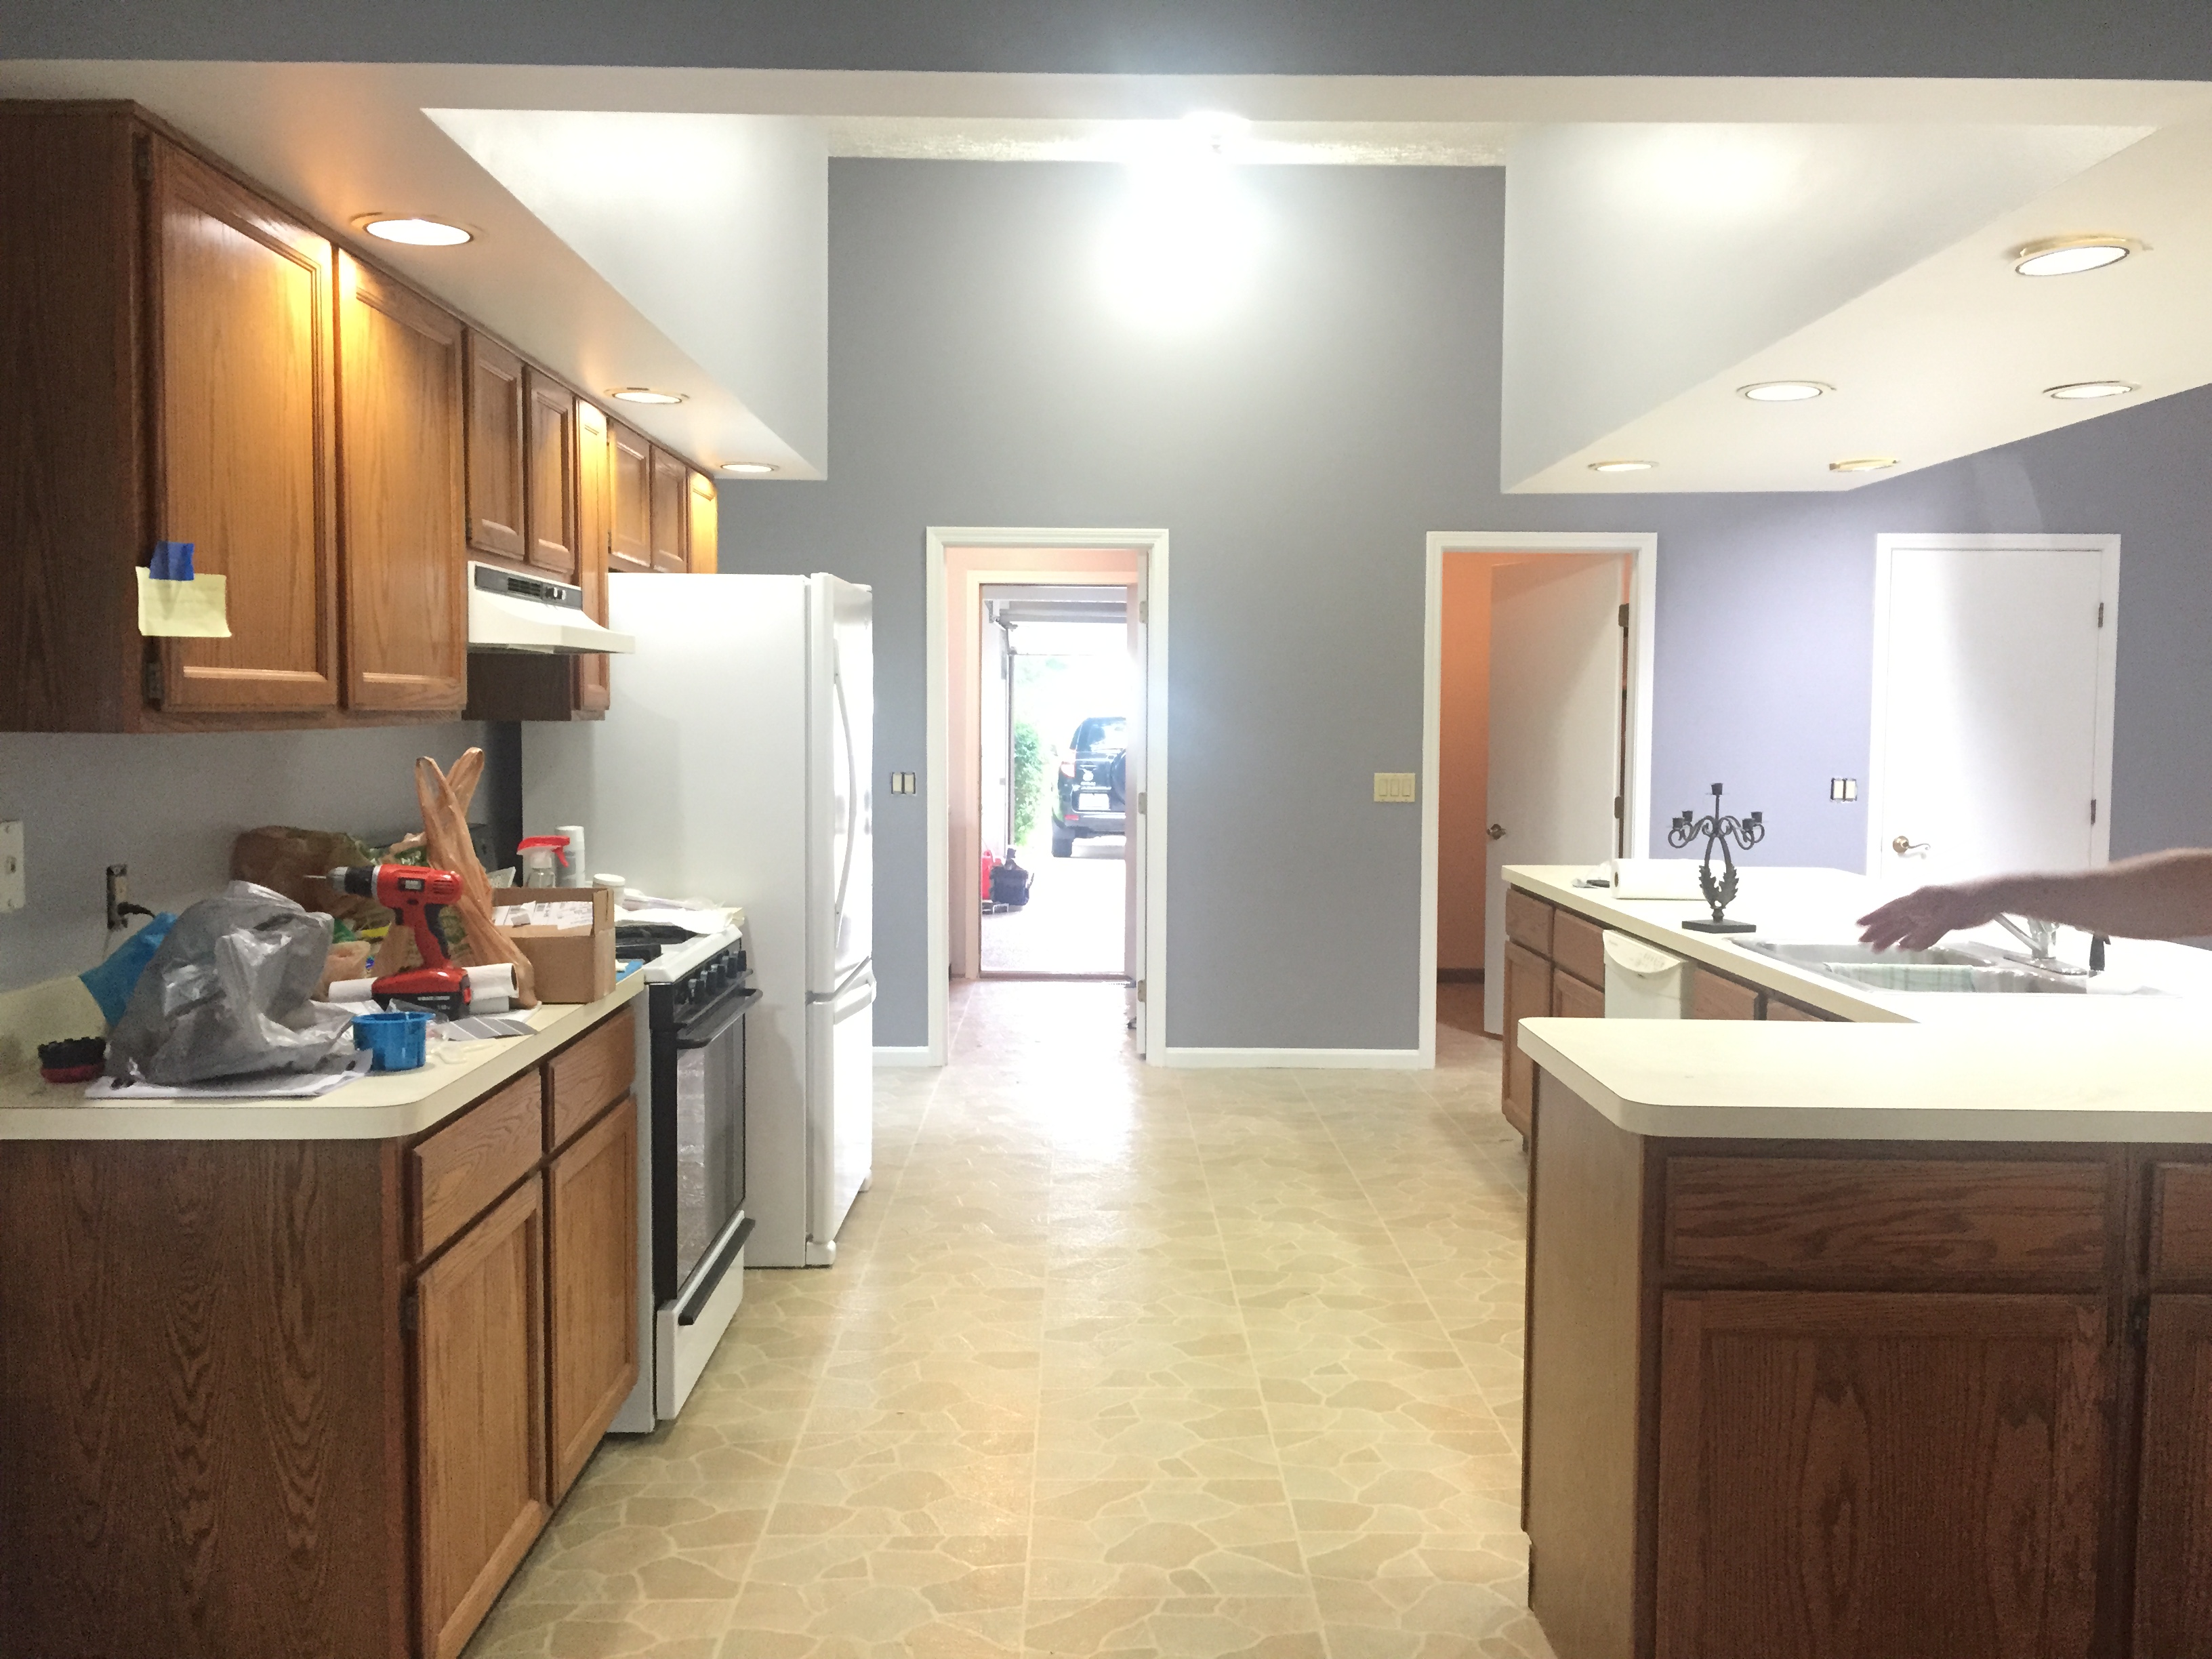
My biggest home renovation tip is this: Choose a pallet of colors that run throughout your home.
Many times, I see people choose a different color scheme for each room and in MY opinion, the house ends up looking cluttered and noisy.
If you want a Spanish themed kitchen, don’t do a beach themed restroom. My home has 1 color pallet that I’ve used for everything and I keep the details/accents white and silver. I do not mix in oil rubbed bronze finishes or random red coloring for a wall elsewhere.
I then take this pallet with me everywhere I go – Home Depot, Lowes, Menards, etc… to match.
My Current Home grouping is this:
PAINT SWATCH GROUP: Behr Mission Control, Power Gray, High Speed Access
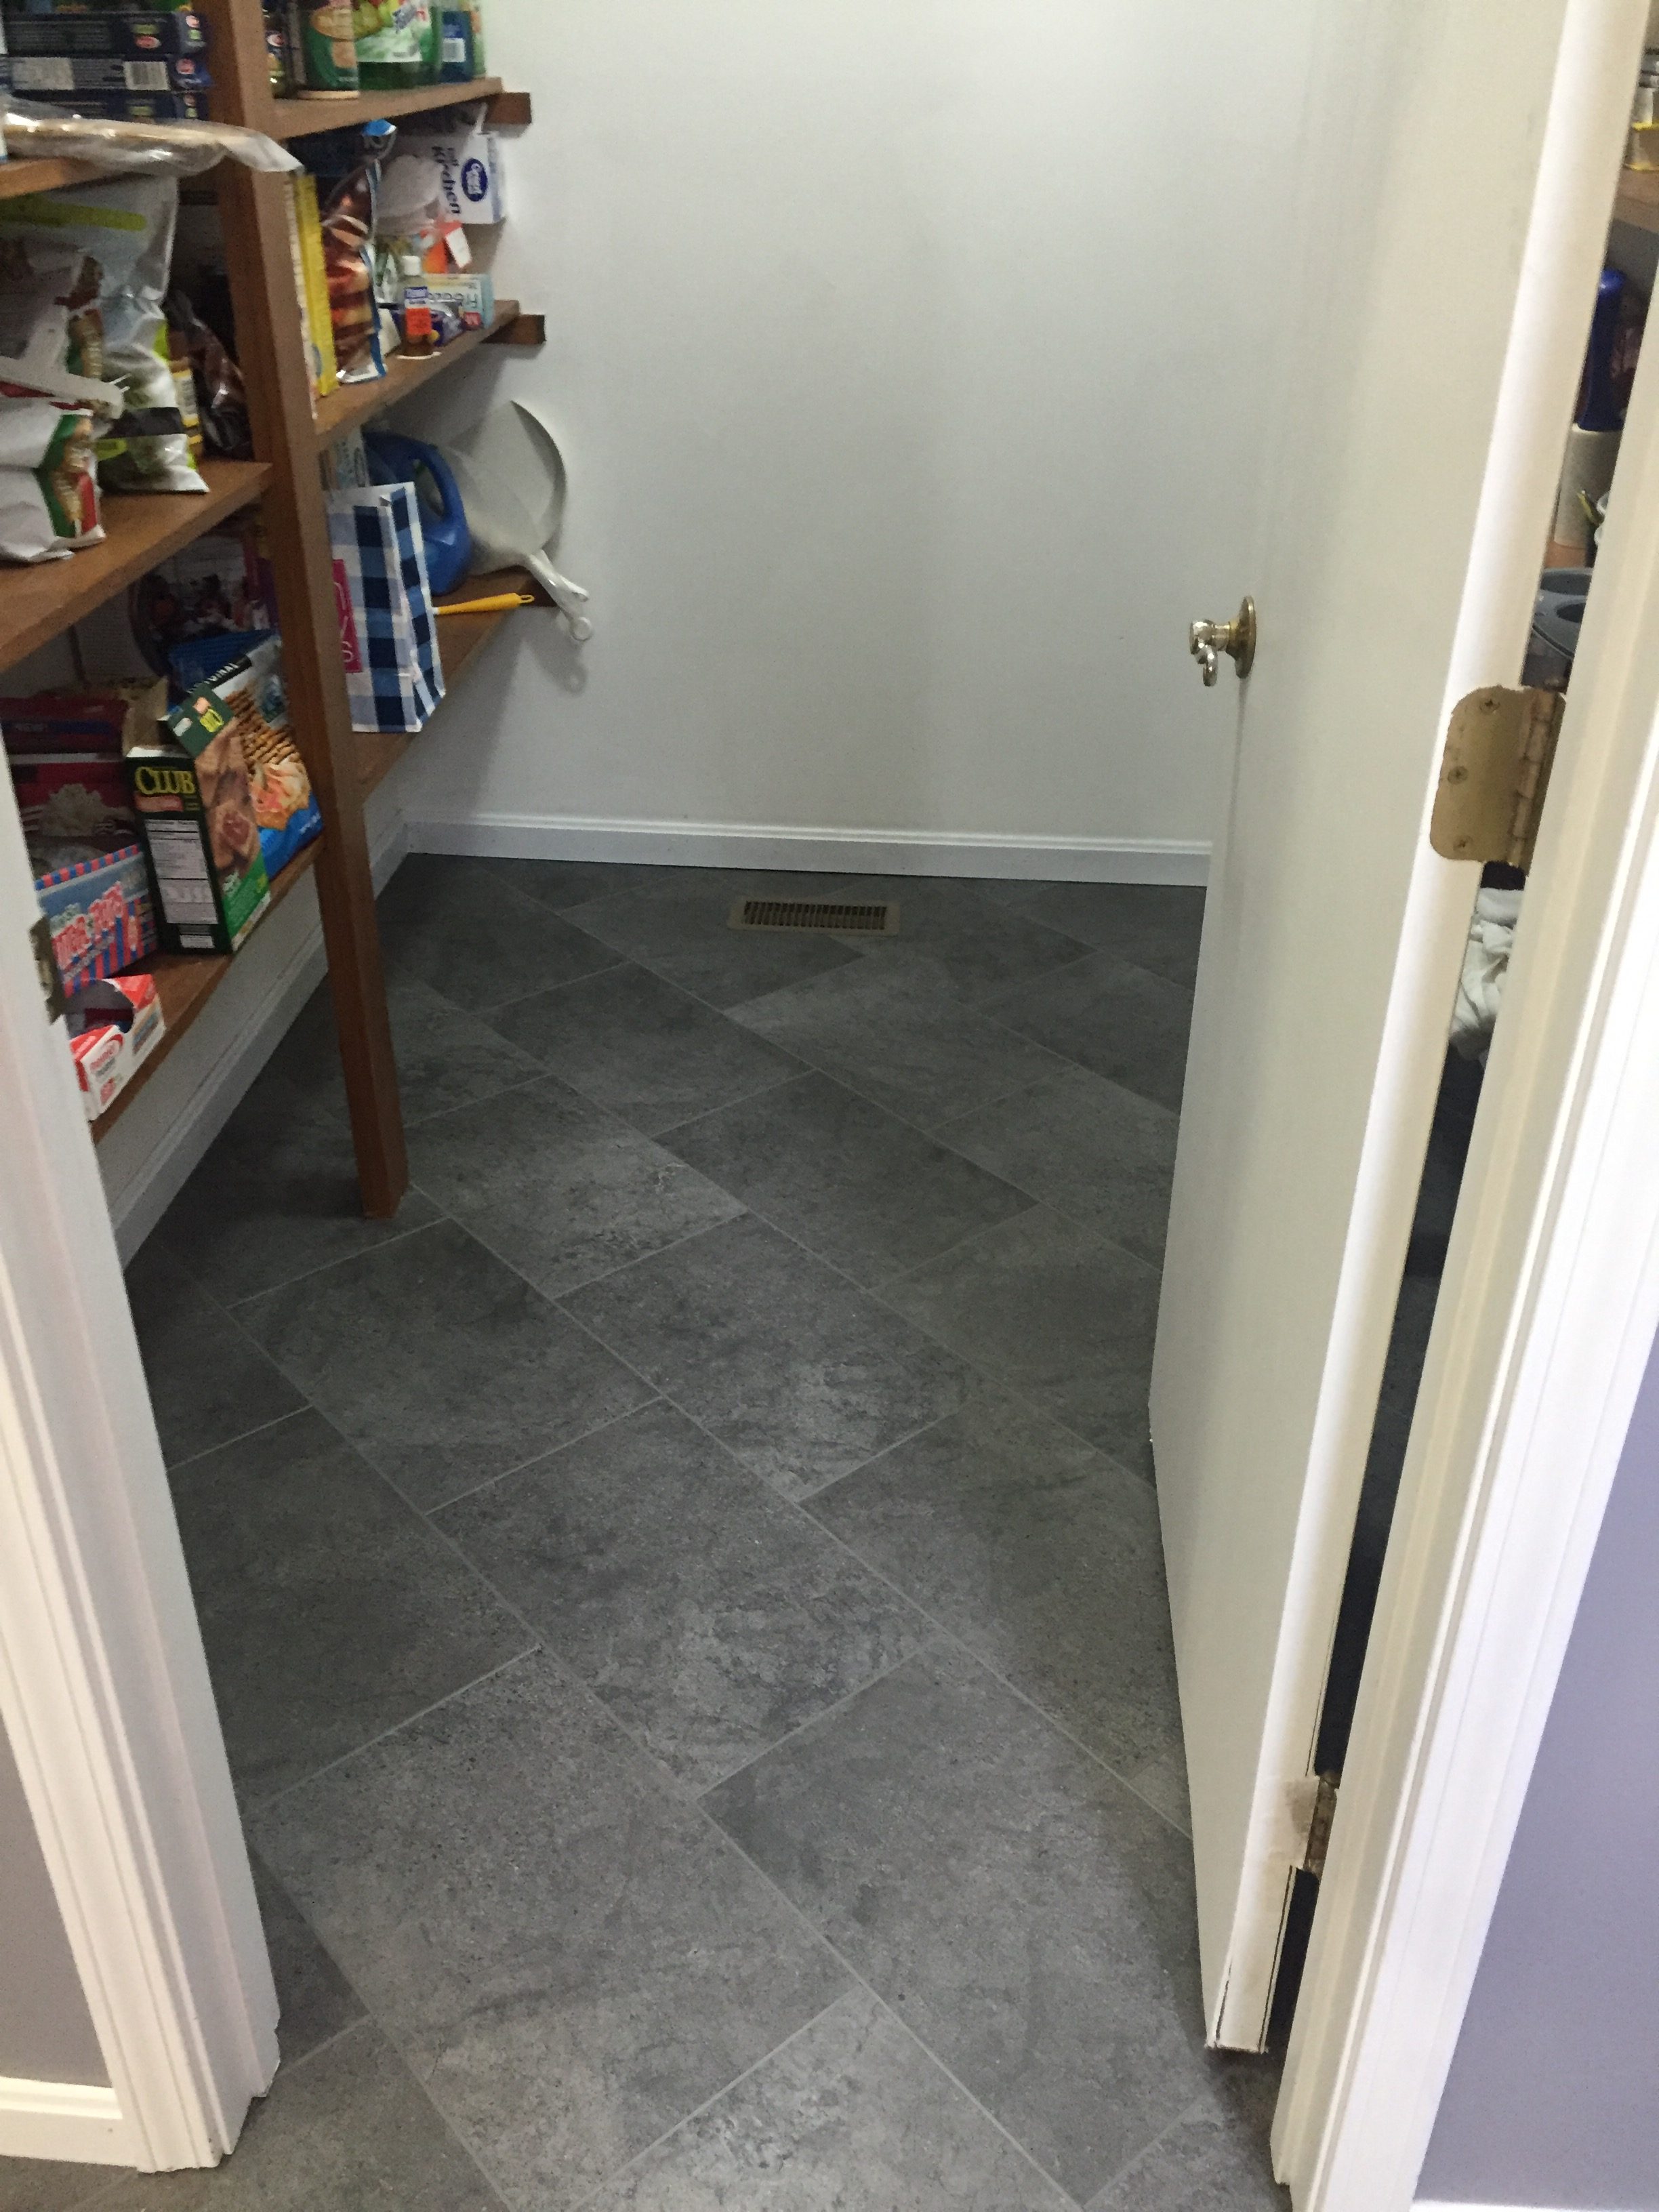
FLOORING: Karndean Cumbrian Stone ST14
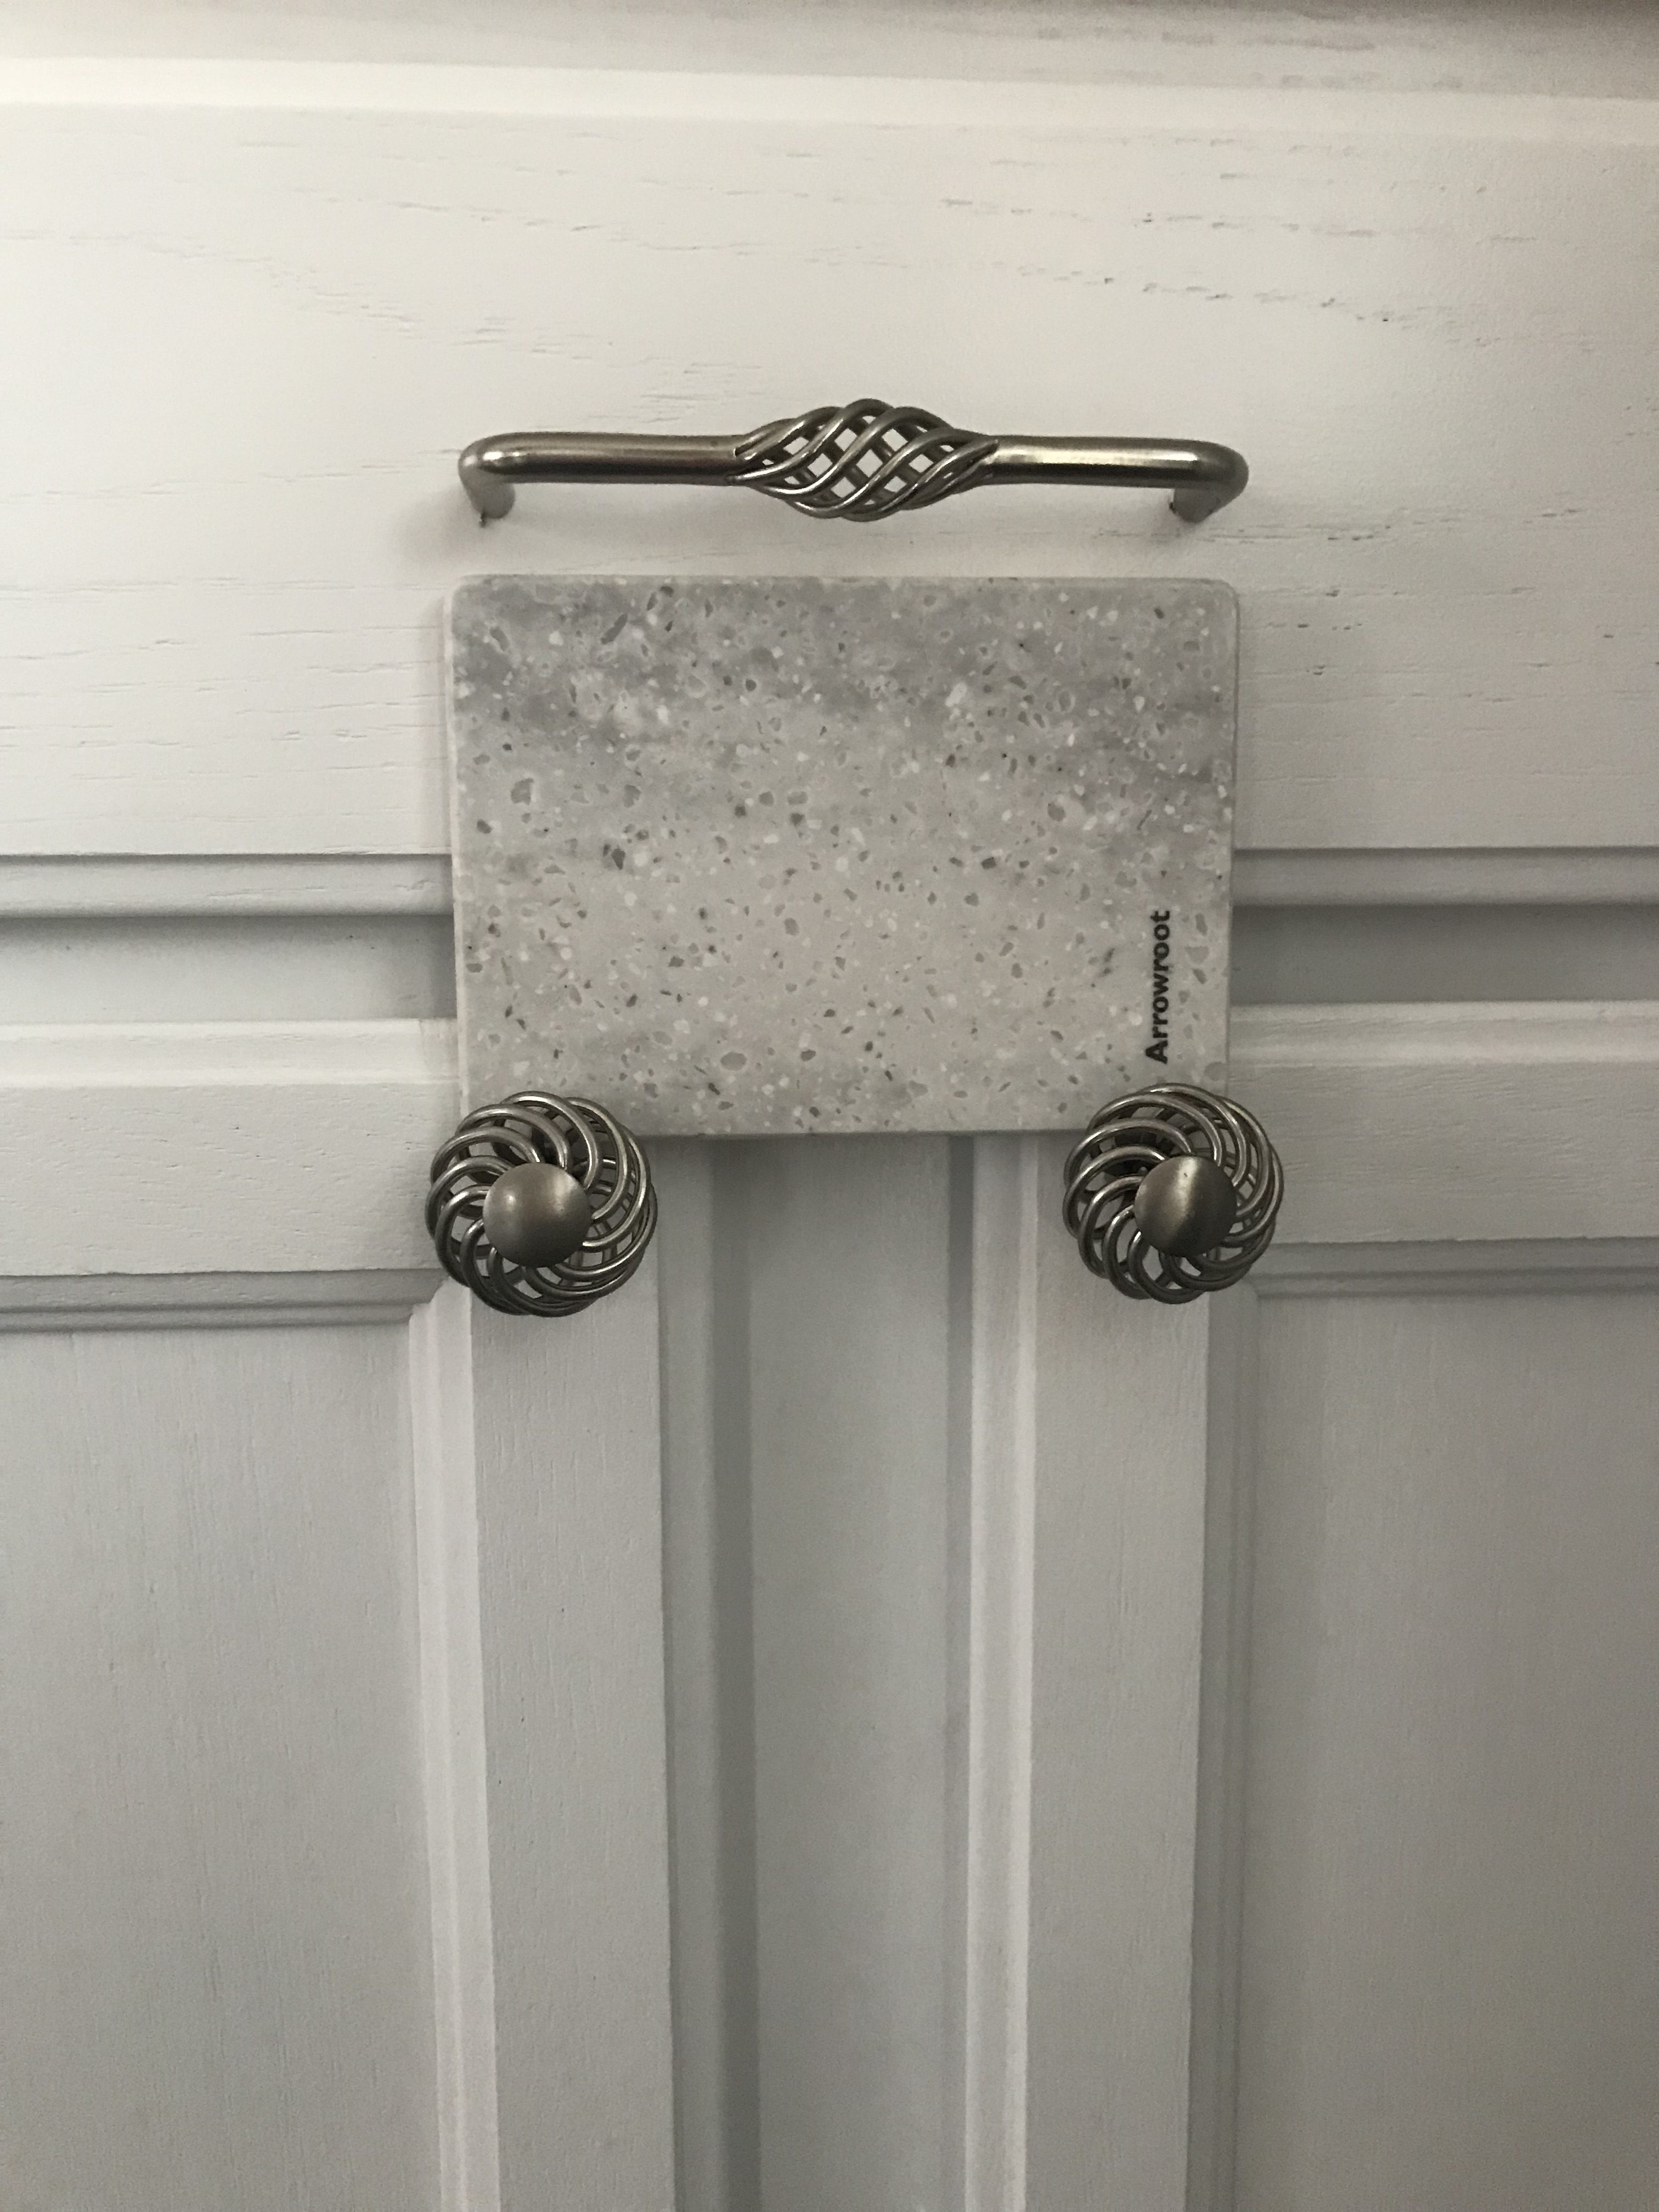
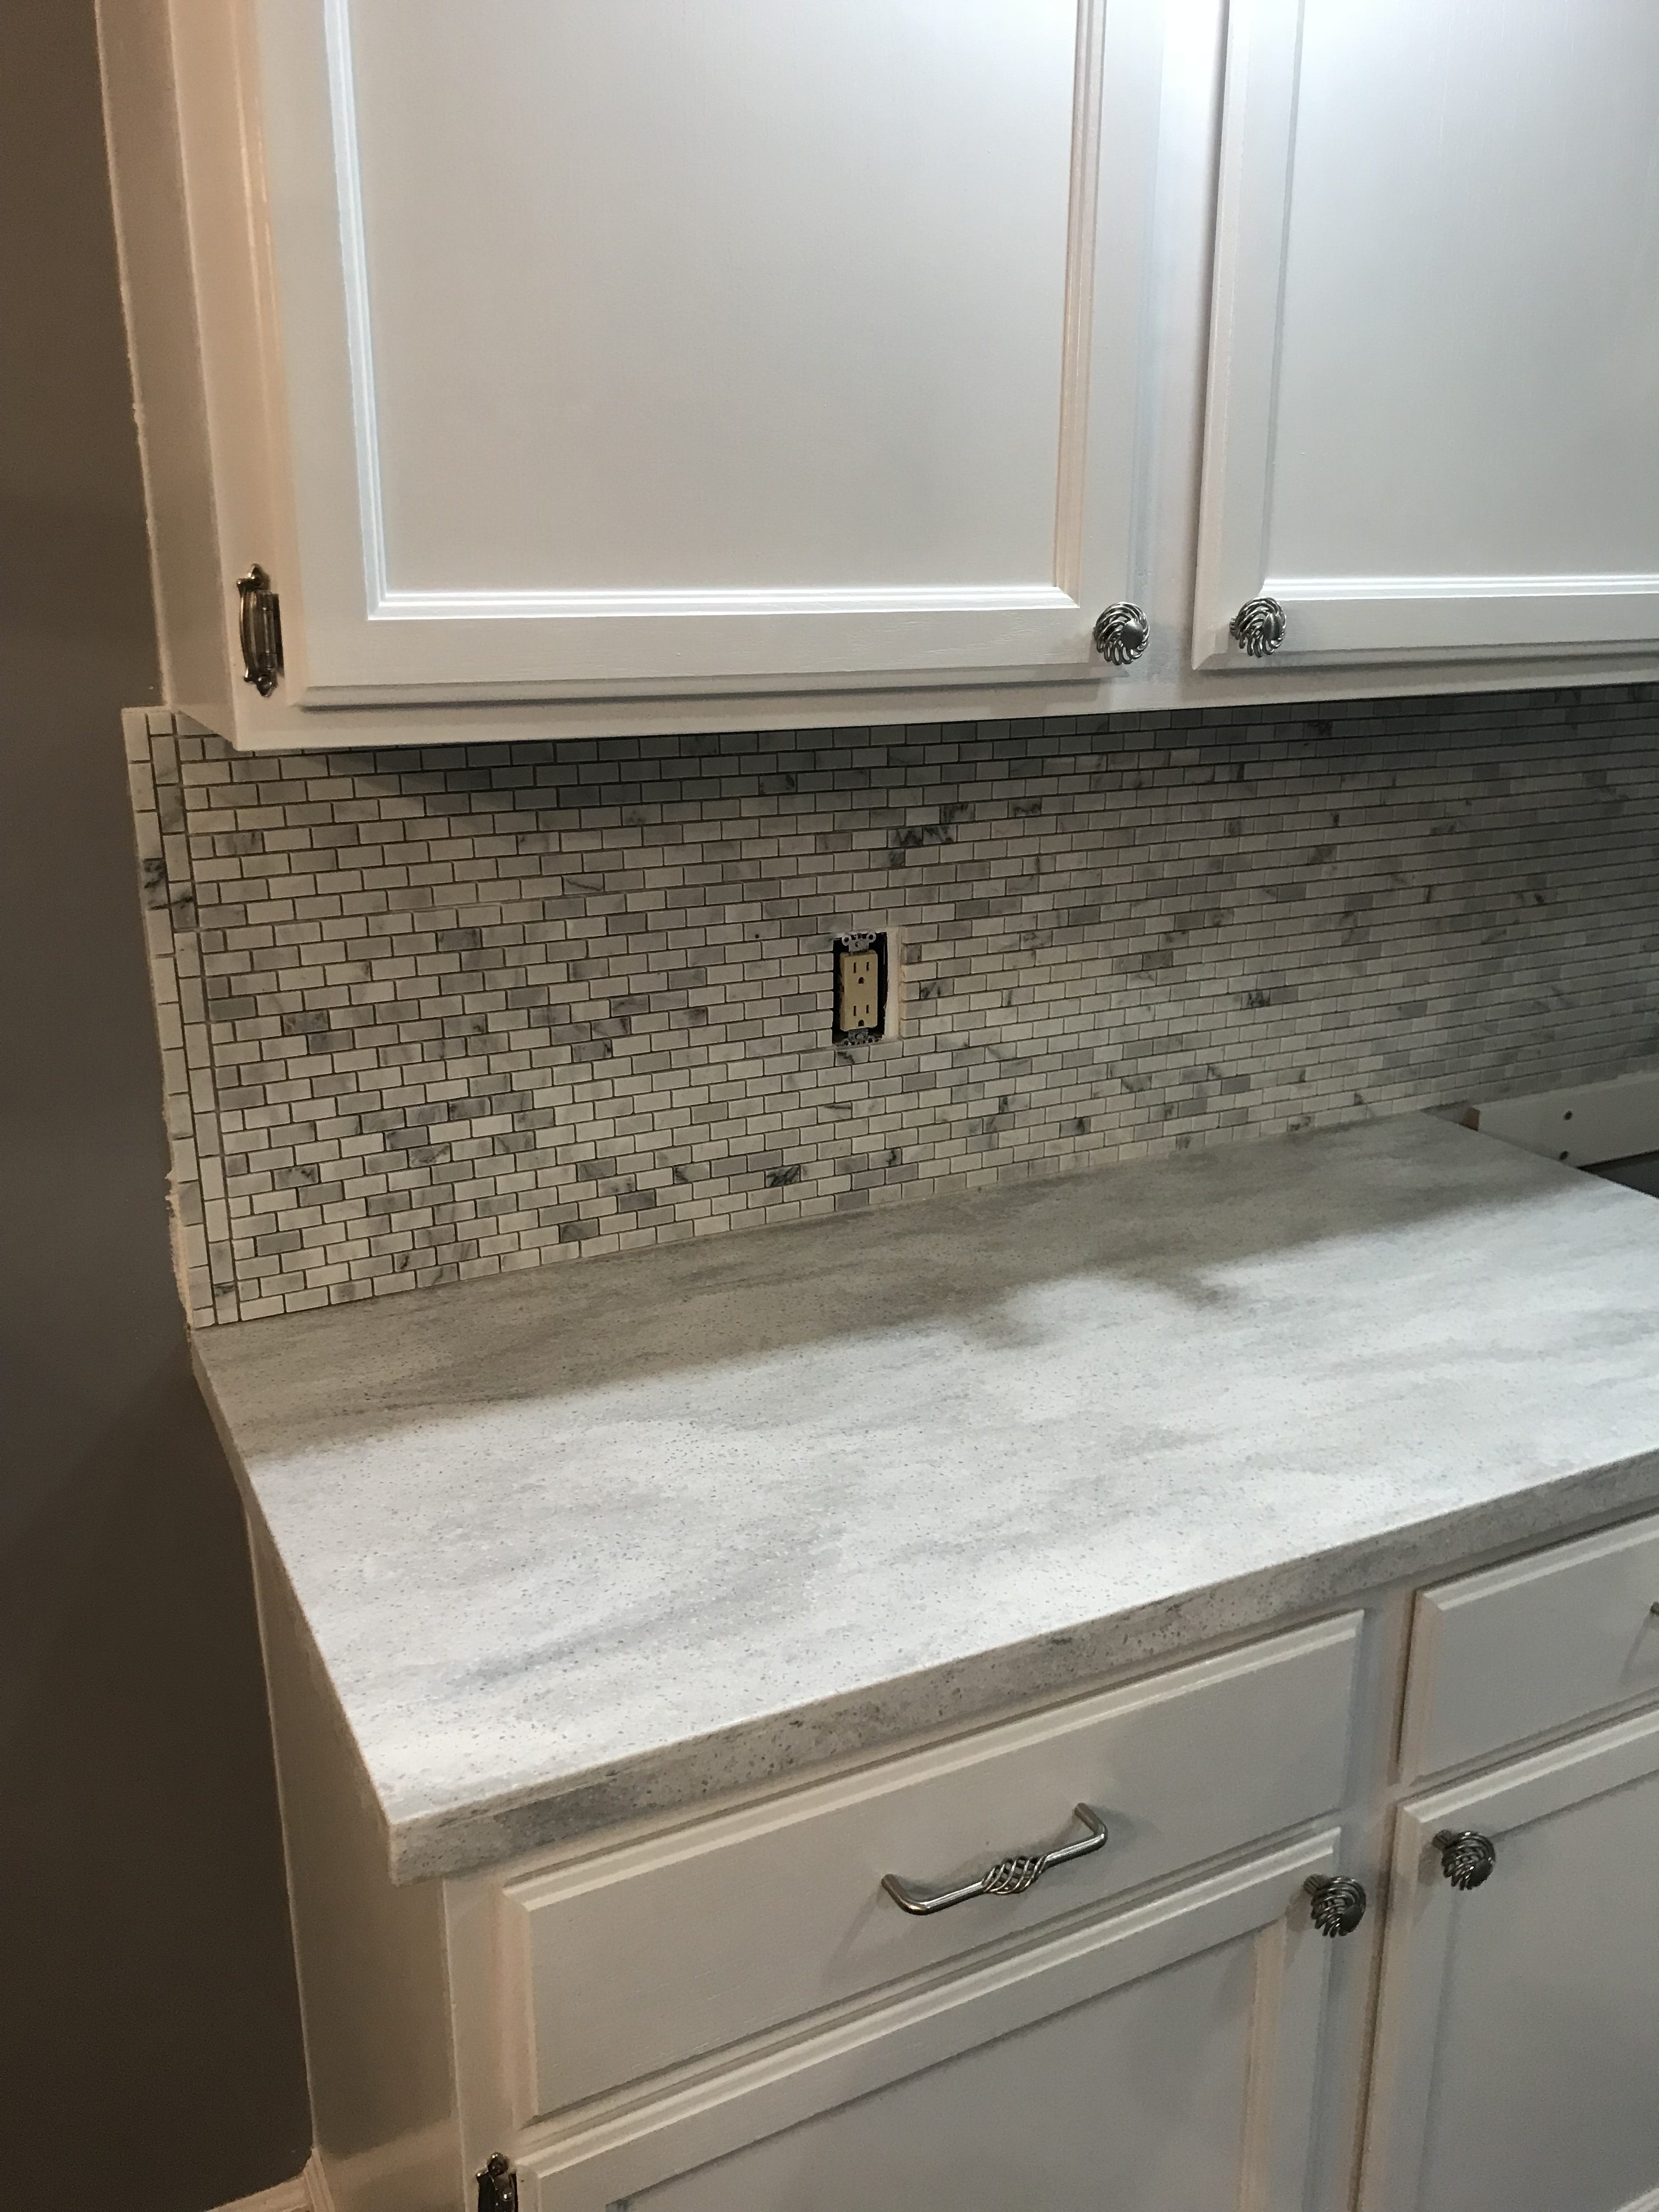
COUNTERTOP: Corian / Terra Collection in Arrowroot
METAL FINISHES: Satin Brushed Nickle
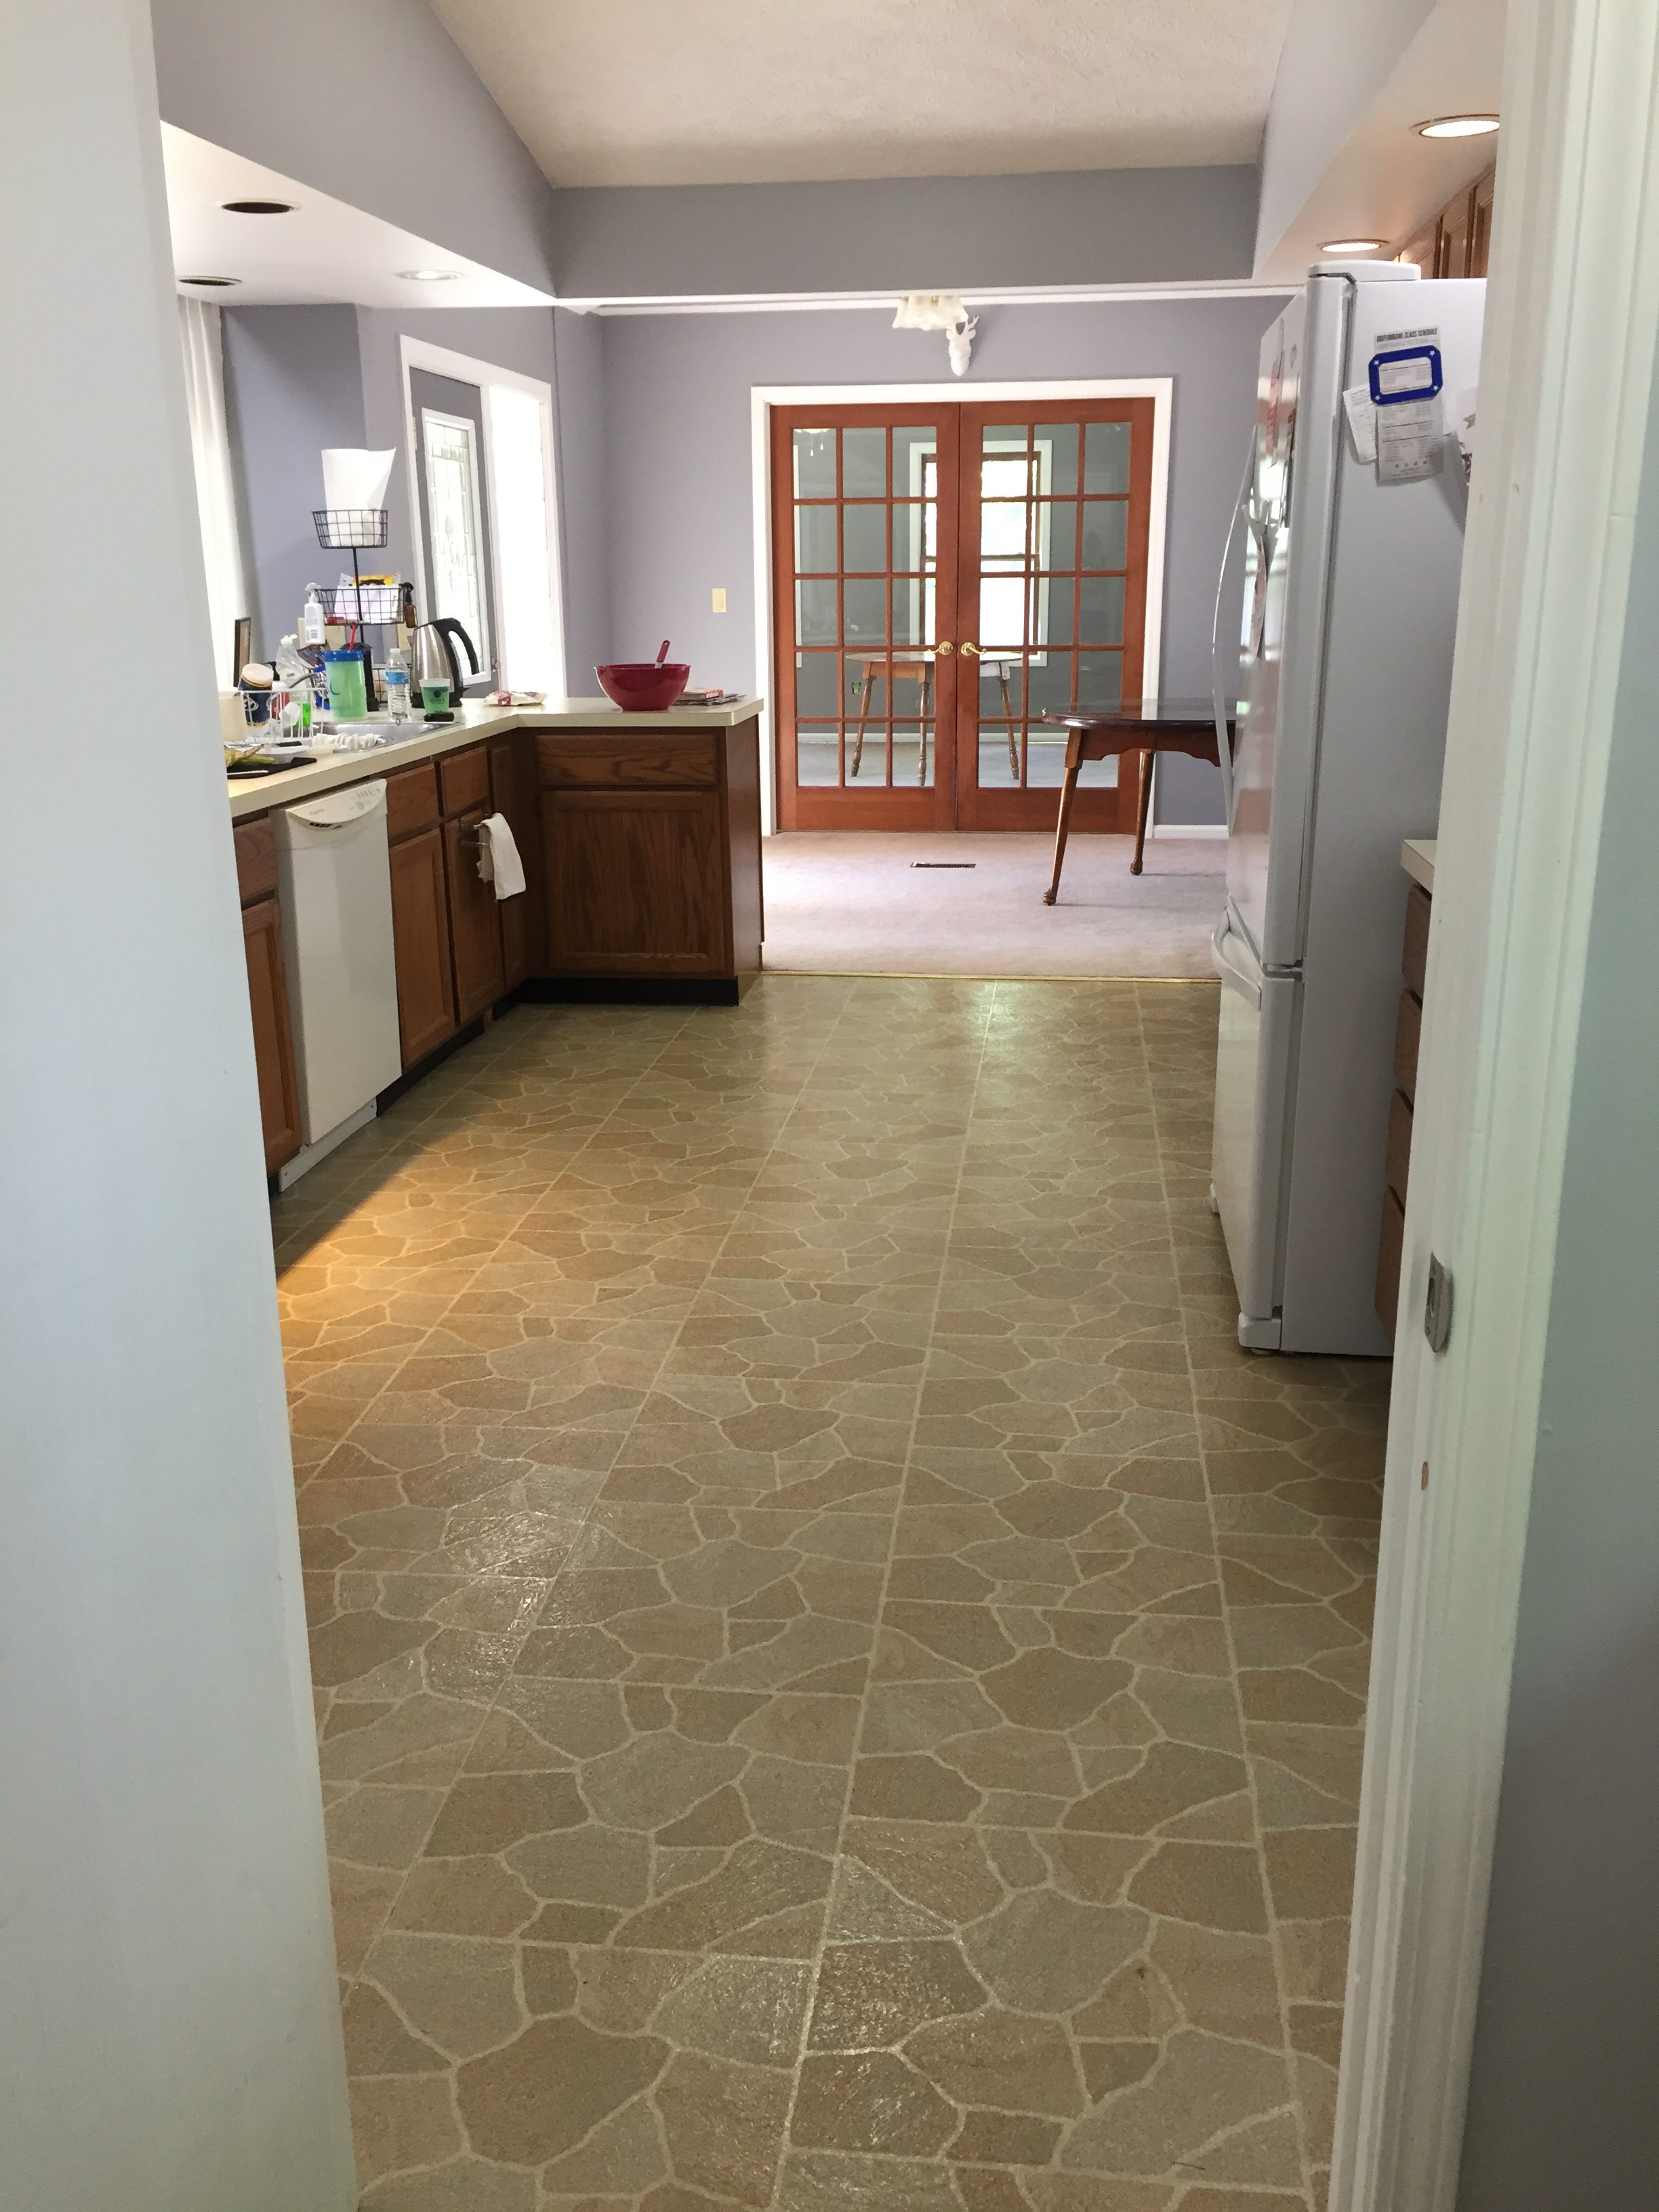
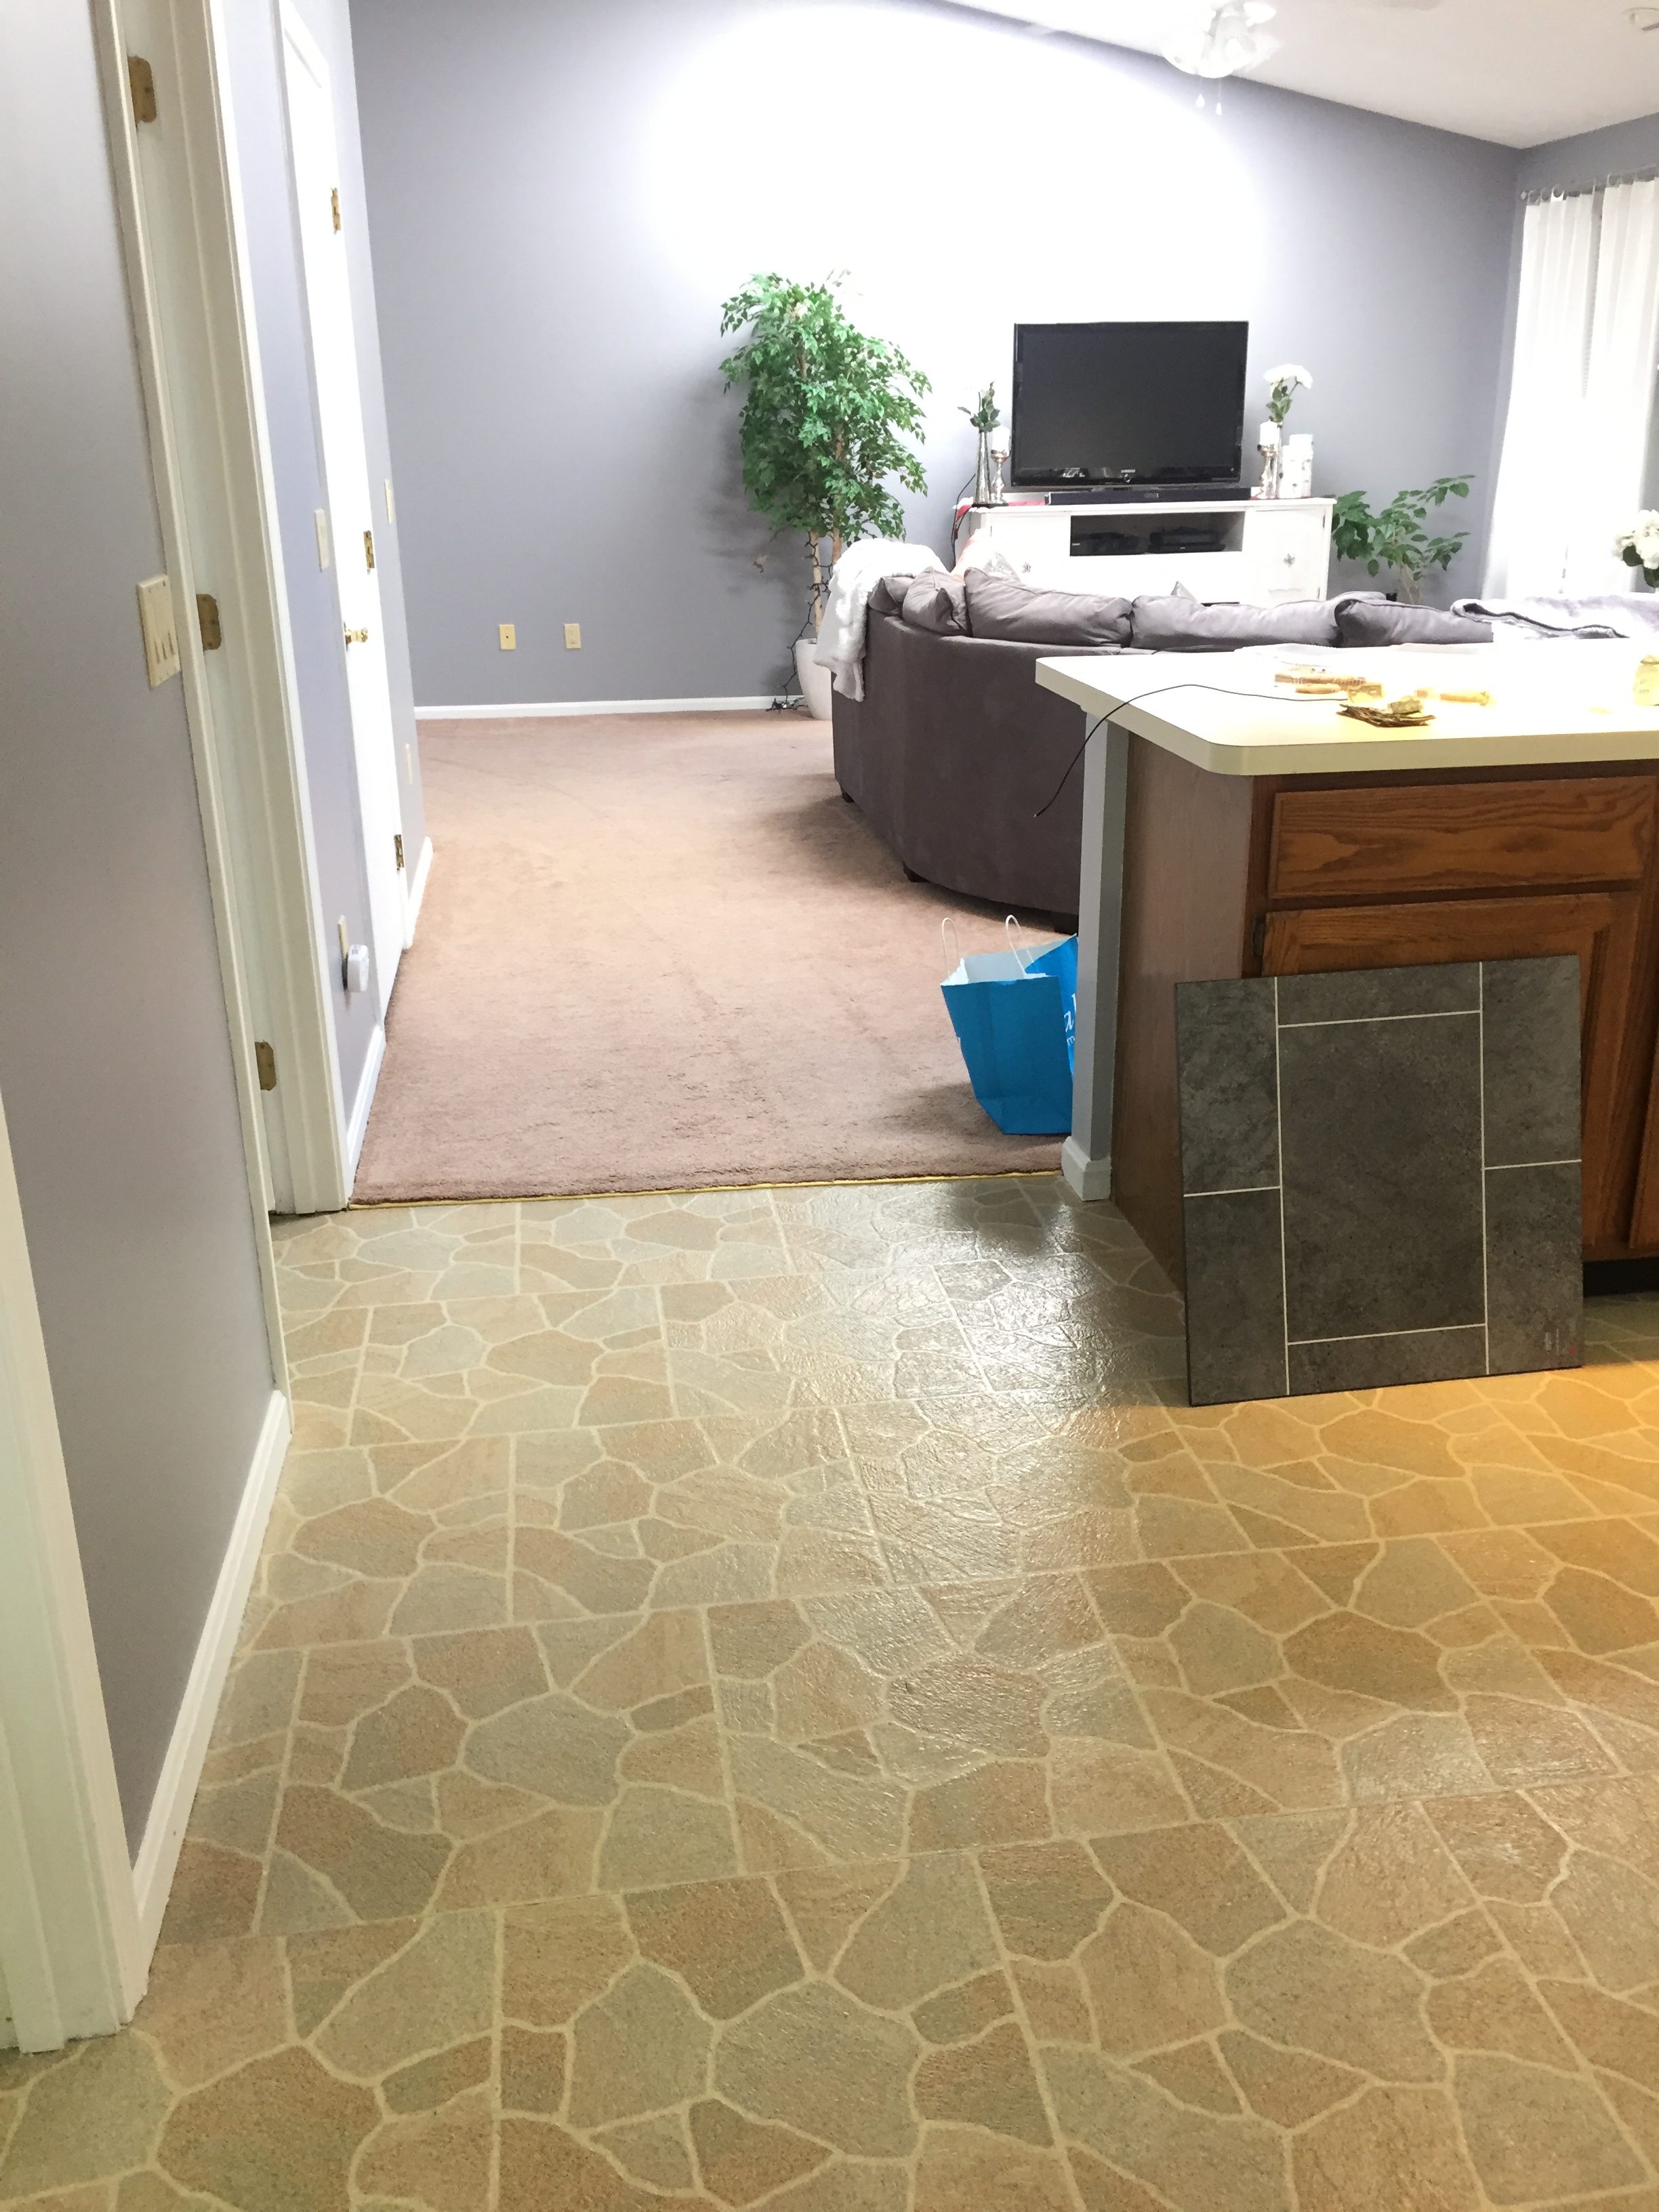
Flooring was done in 2016
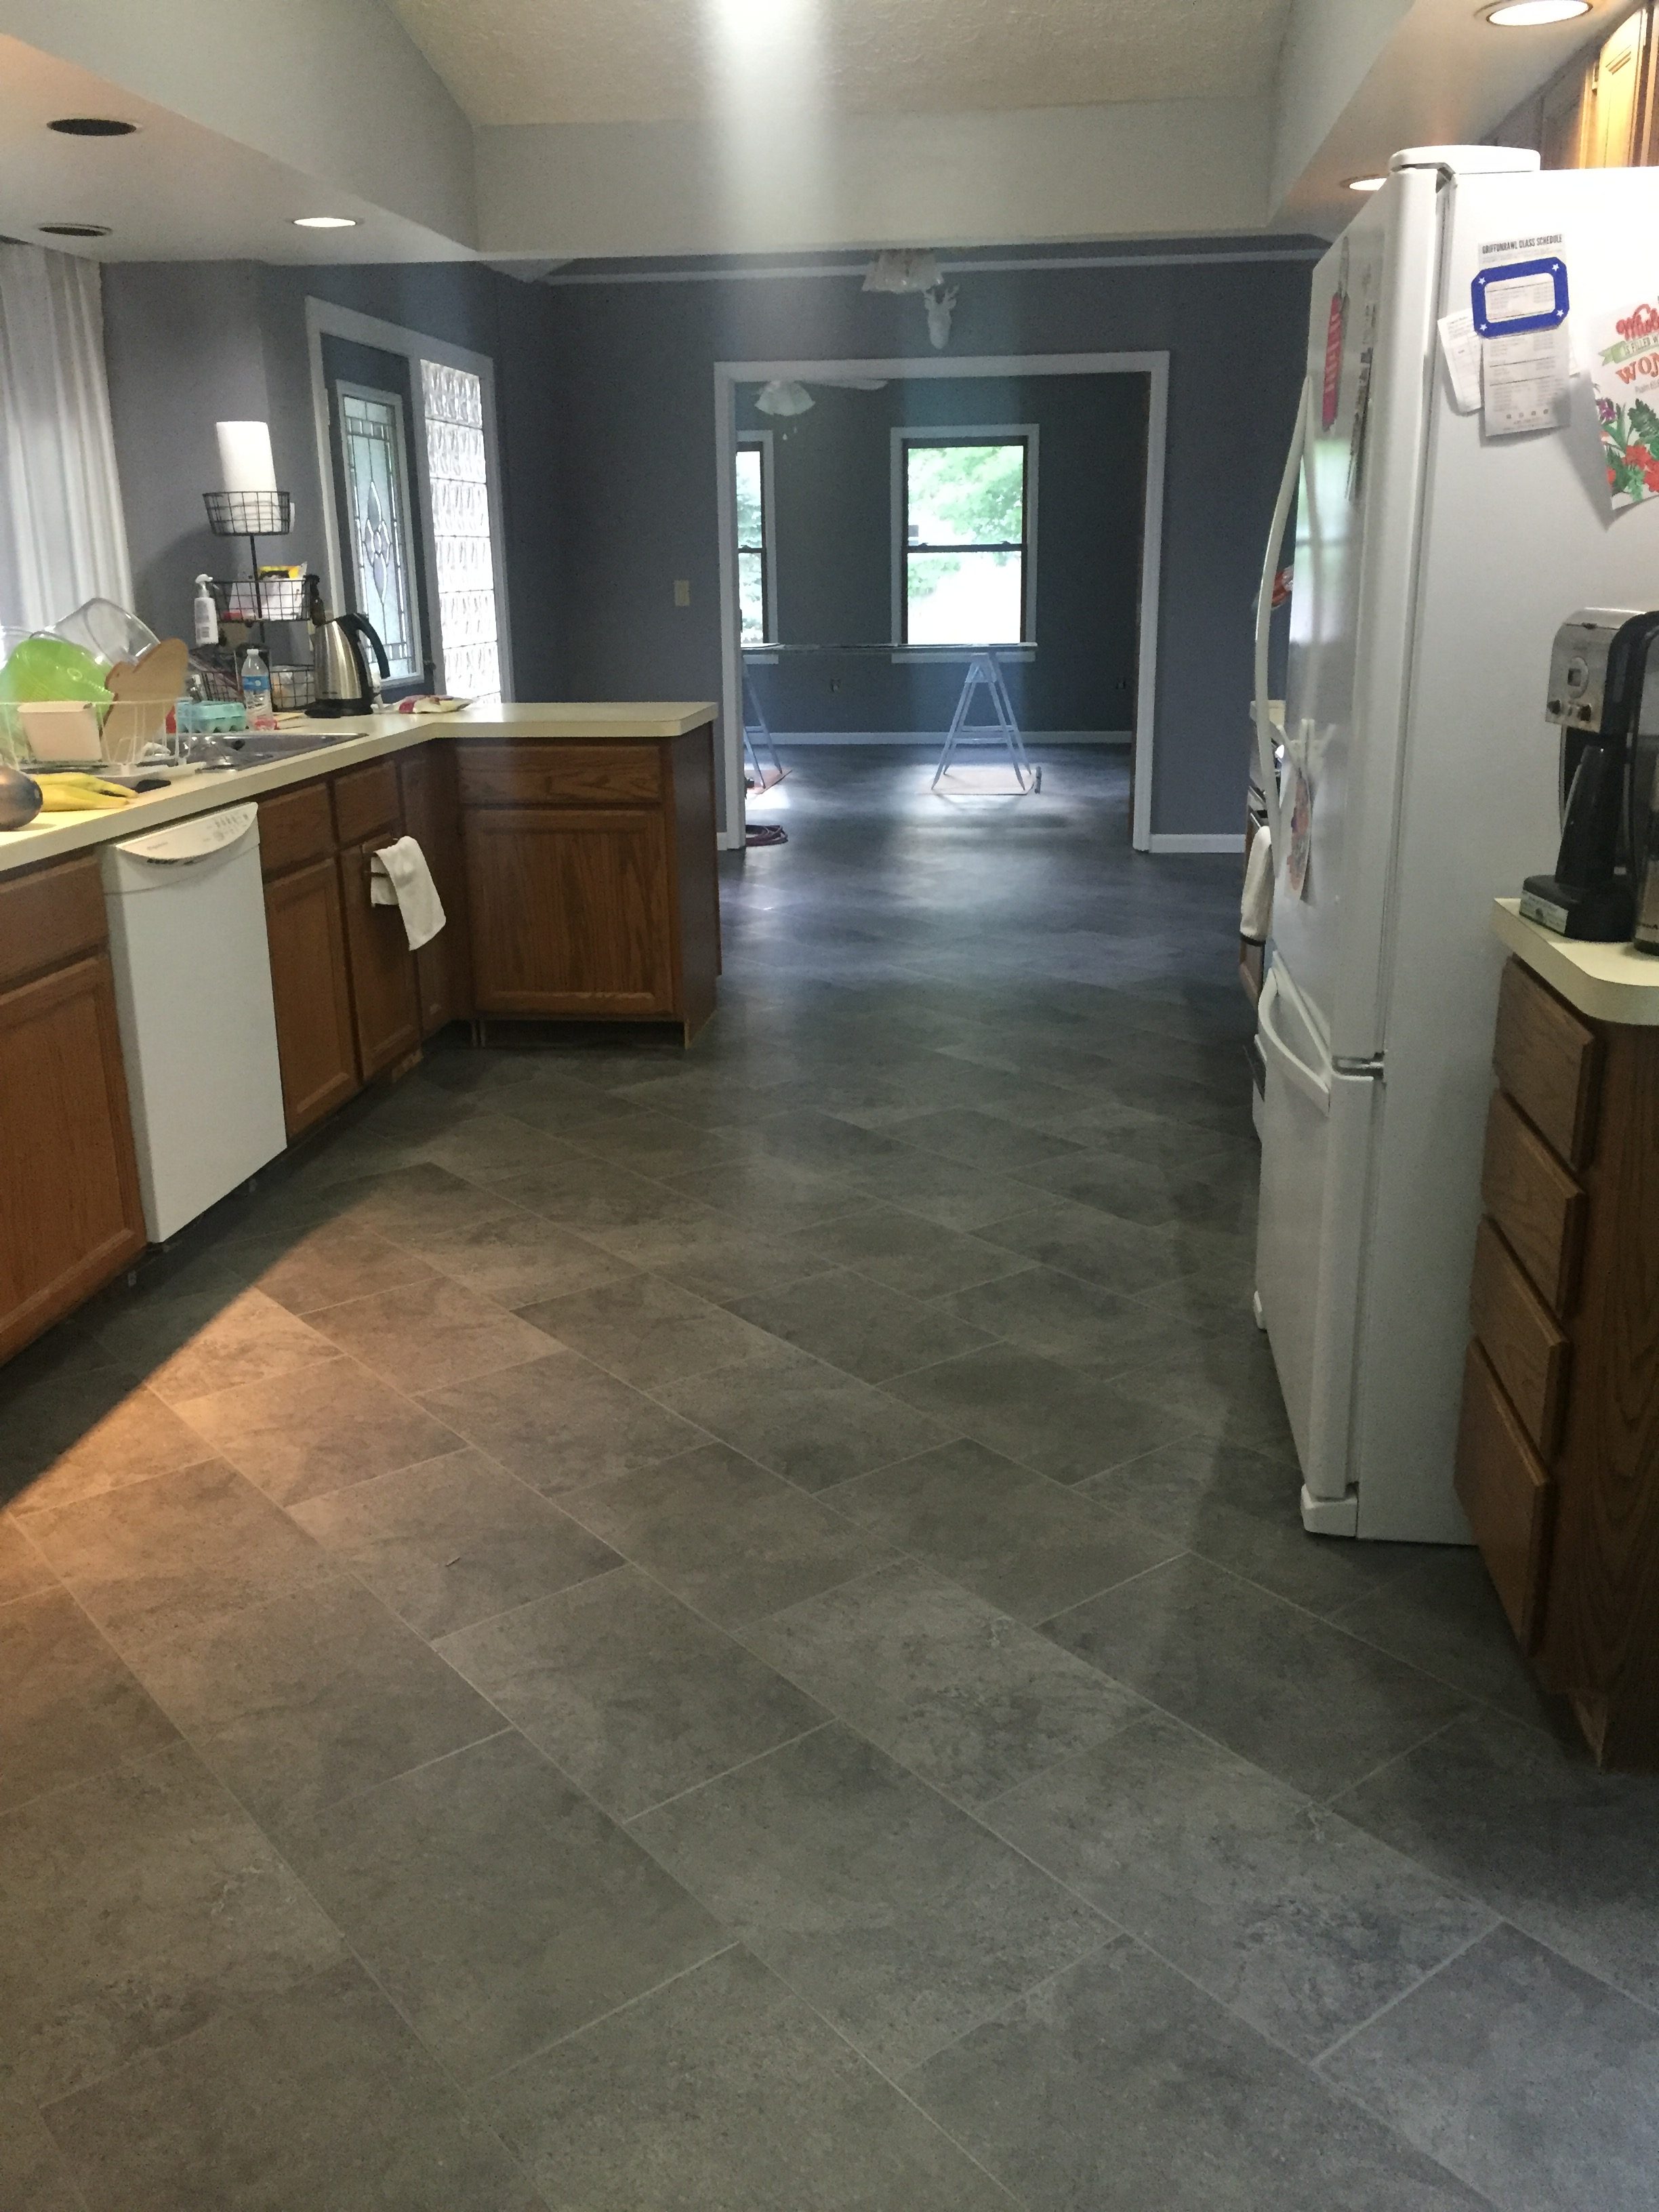
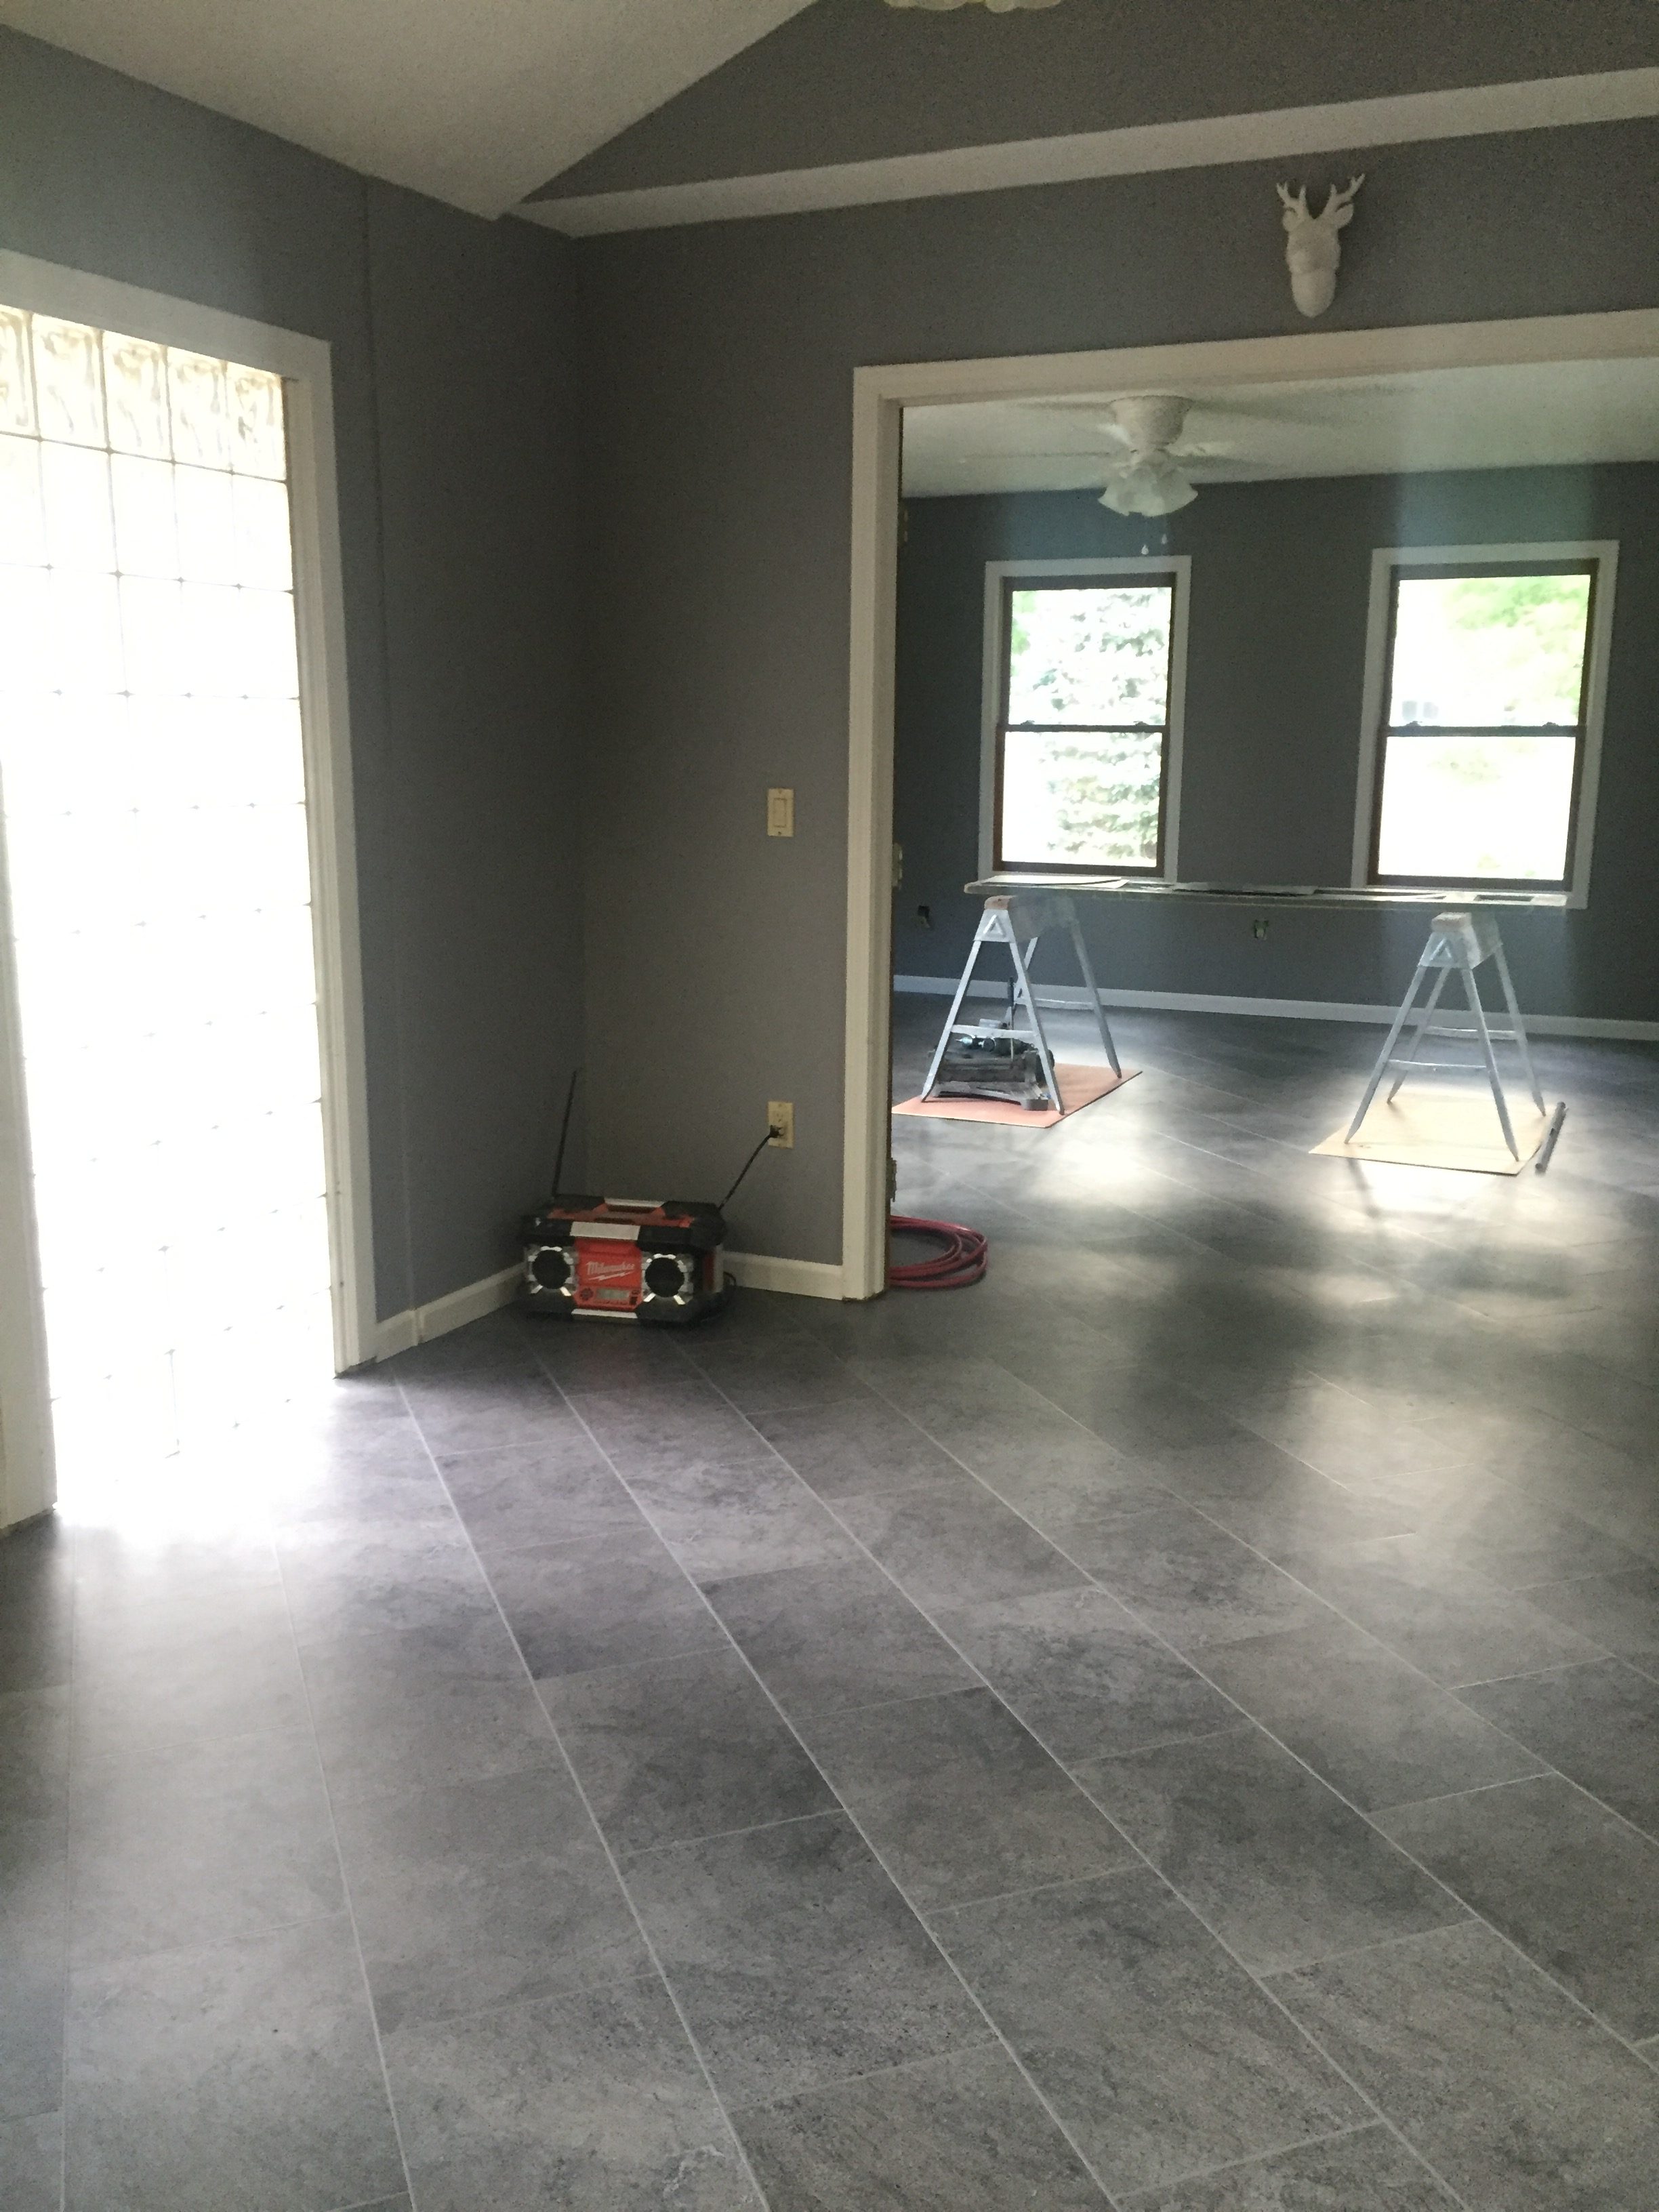

Color Pallet for my whole house


There is also a learning curve of project management. How long will it take me to do a, b and c, so the installers can bring in the countertop…? And oh, I need a sink for the countertop so what kind of sink do I want so I can get them the specs to cut the countertop.
Nothing ever goes as fast as you want it but I tried to lay out below all I needed to do/know for each part of the kitchen reno.
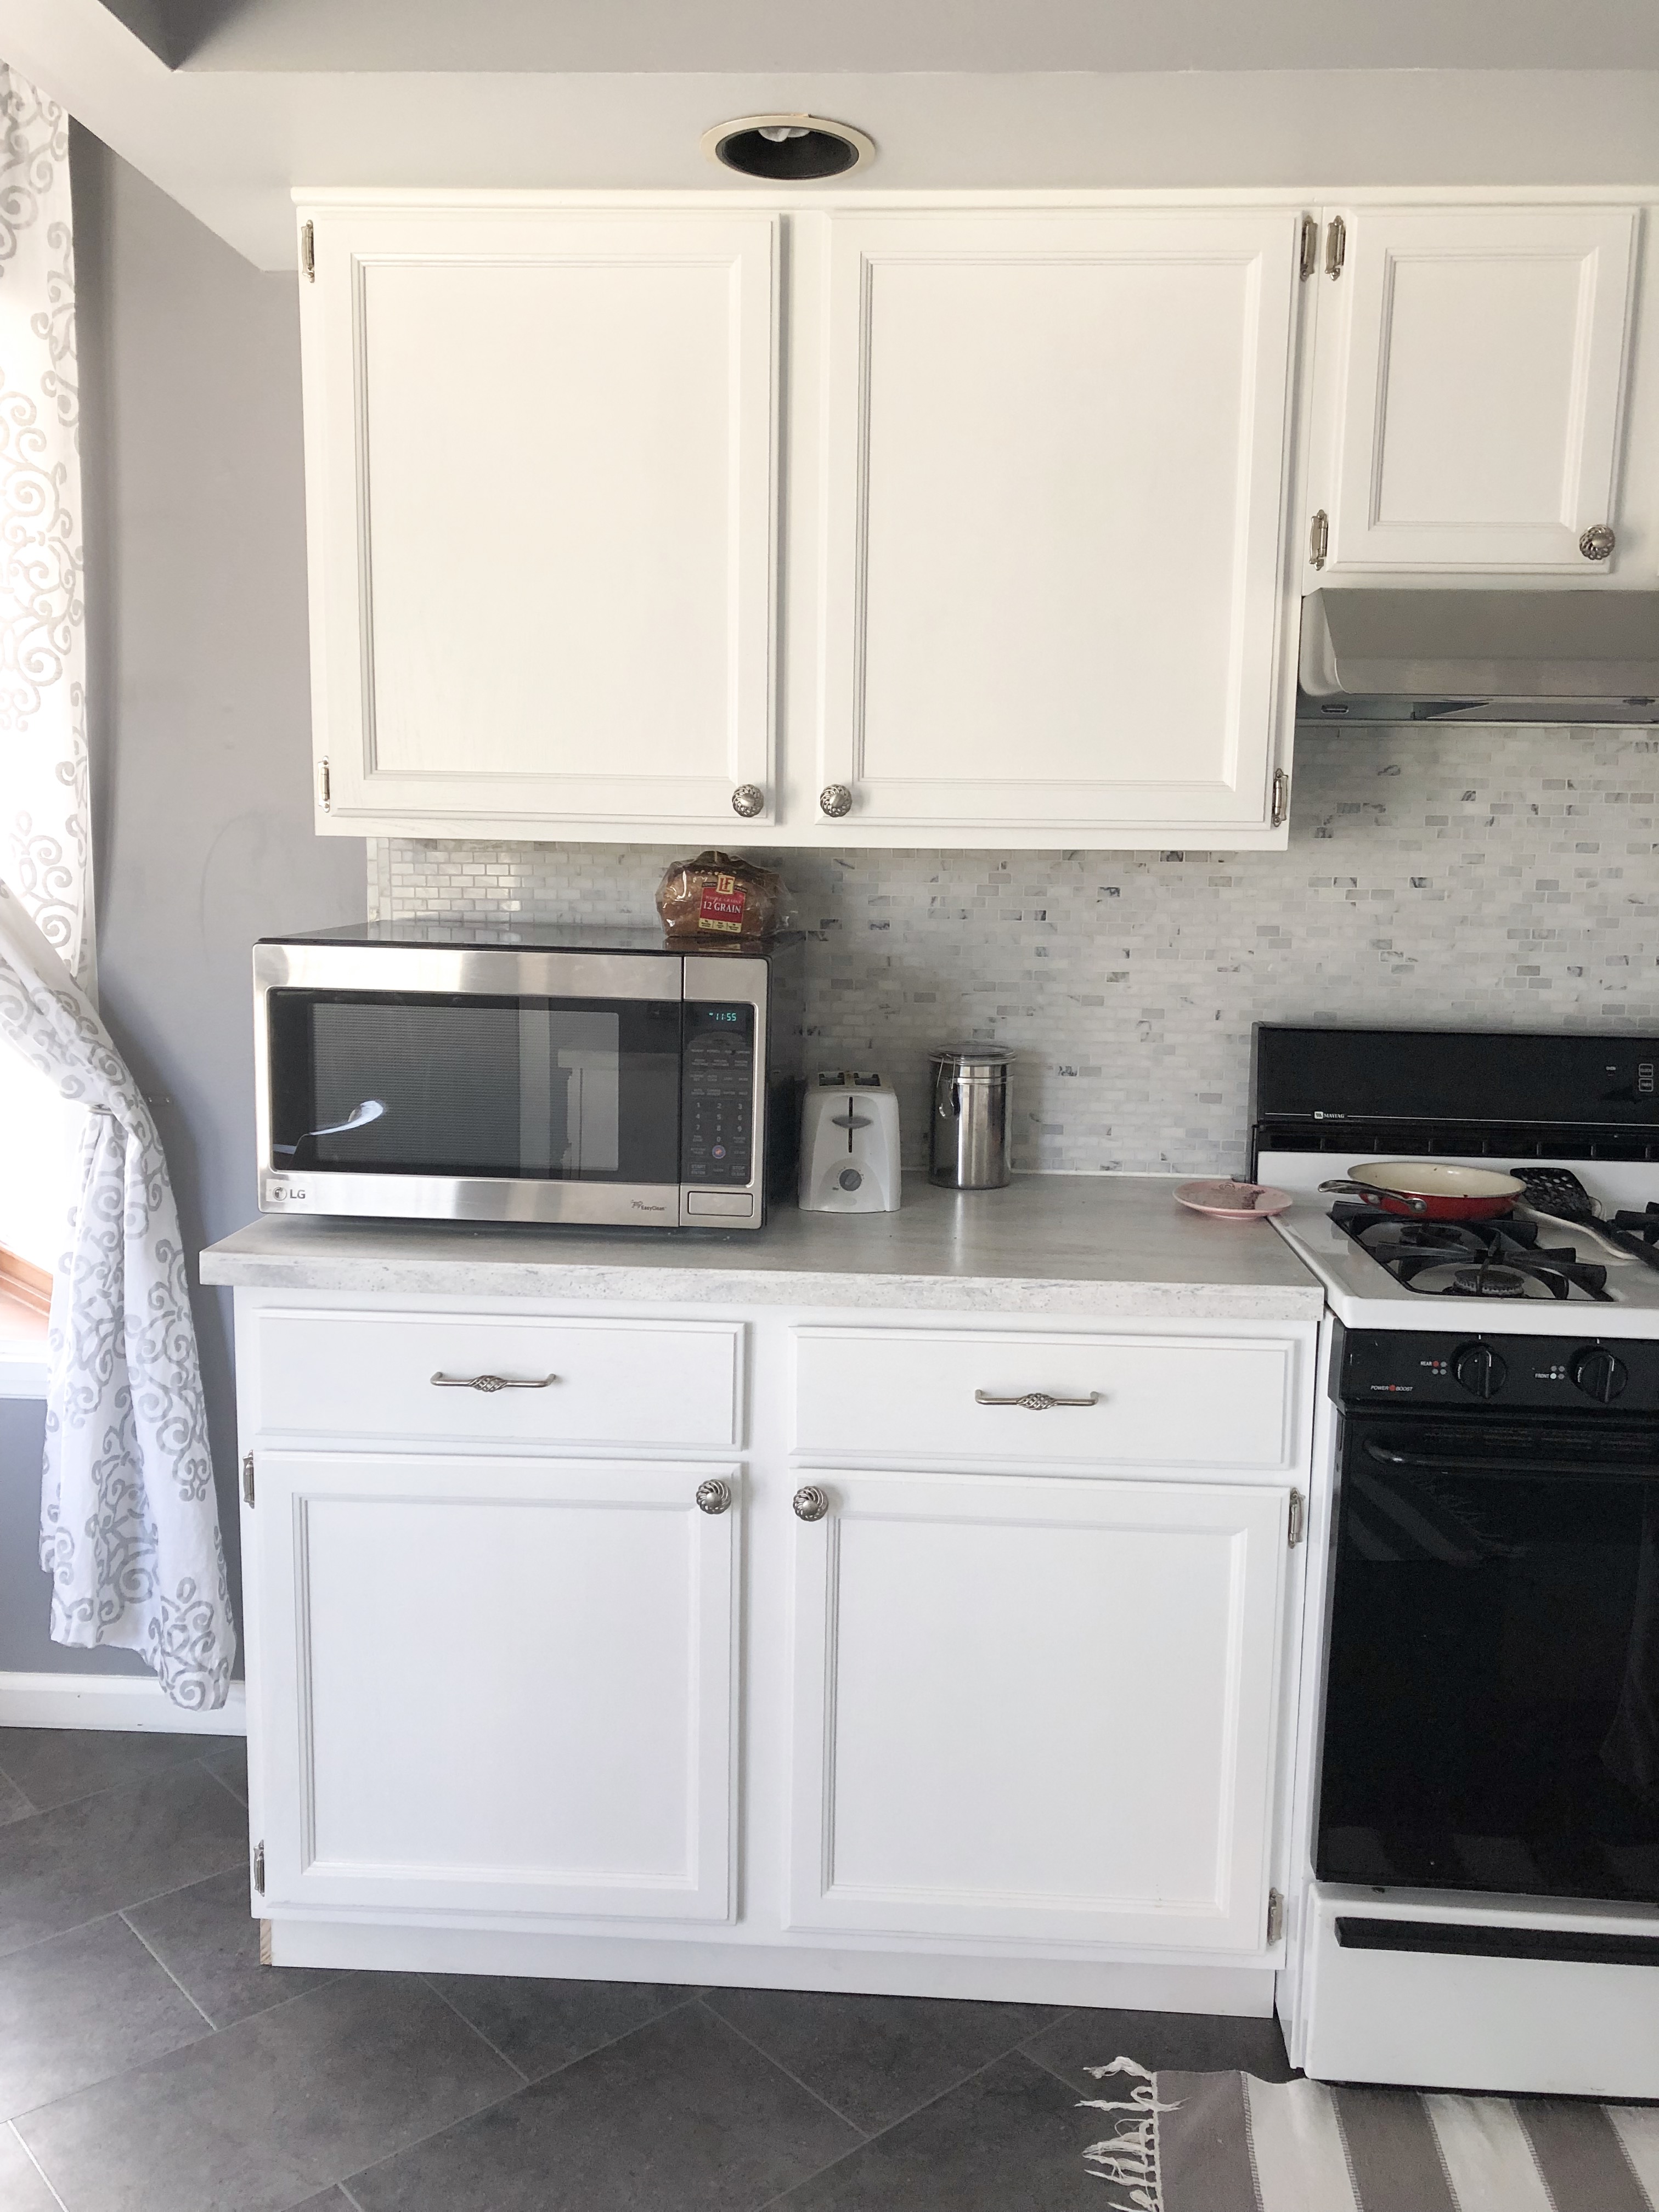
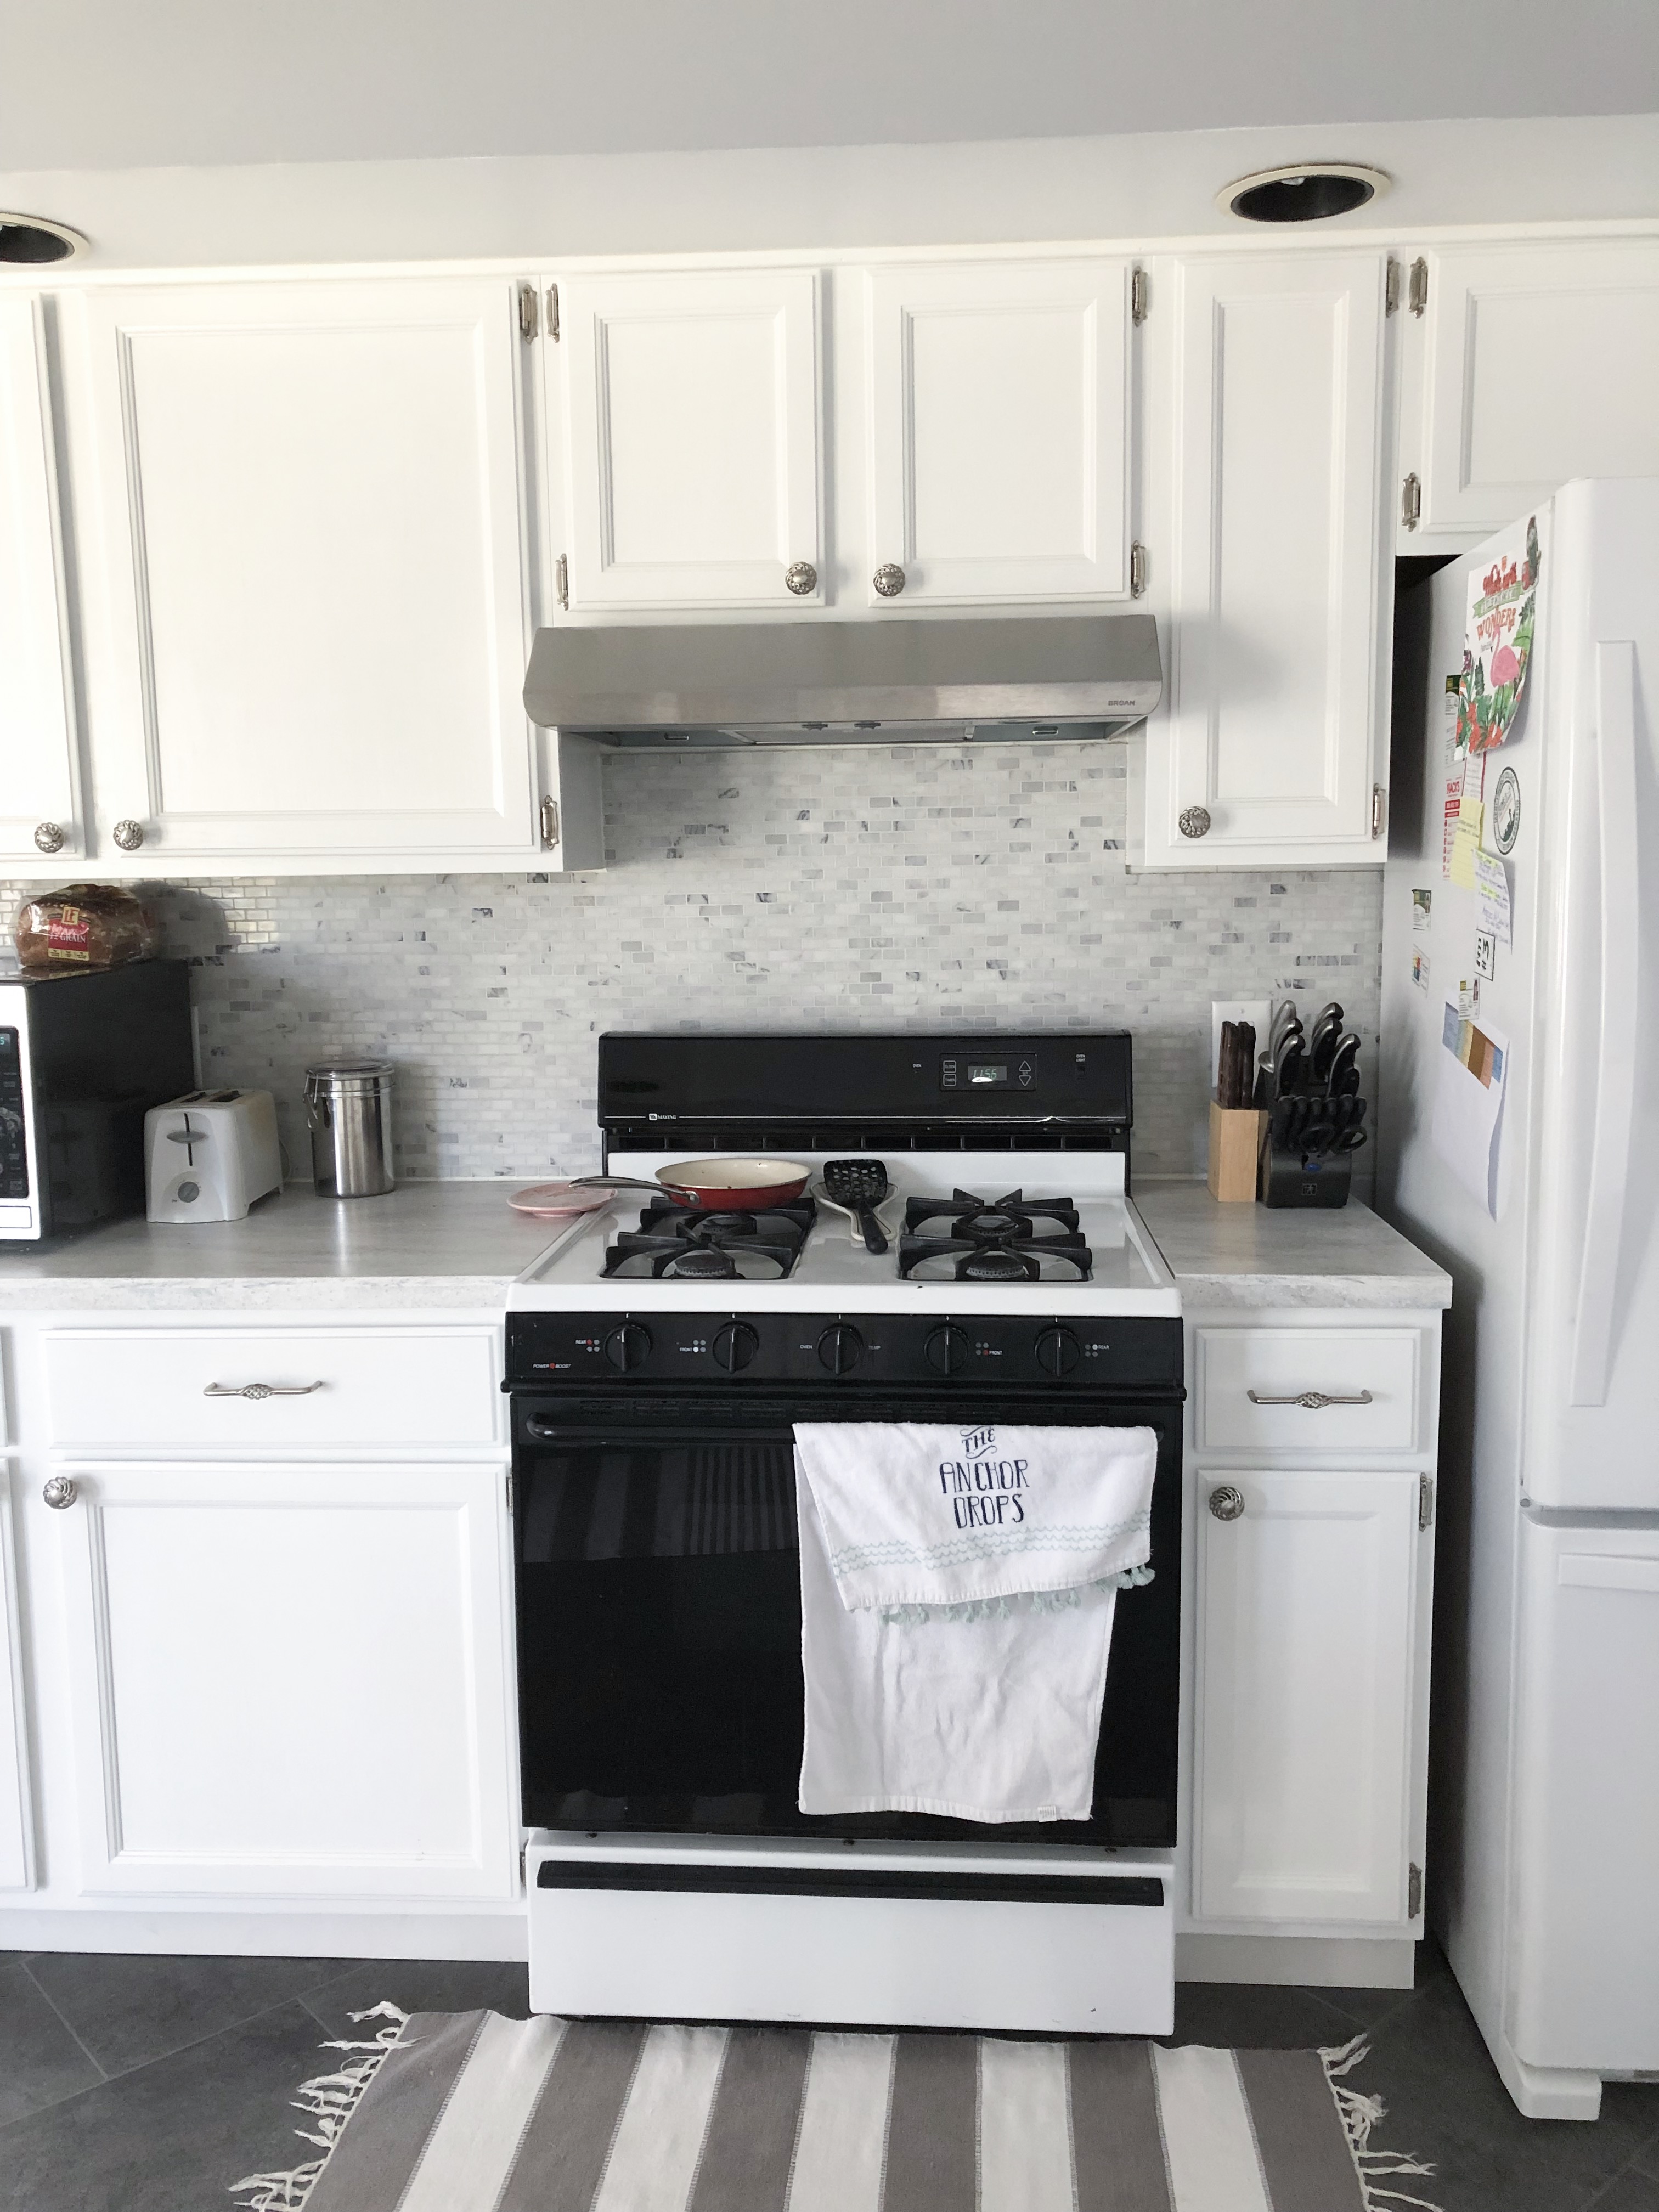
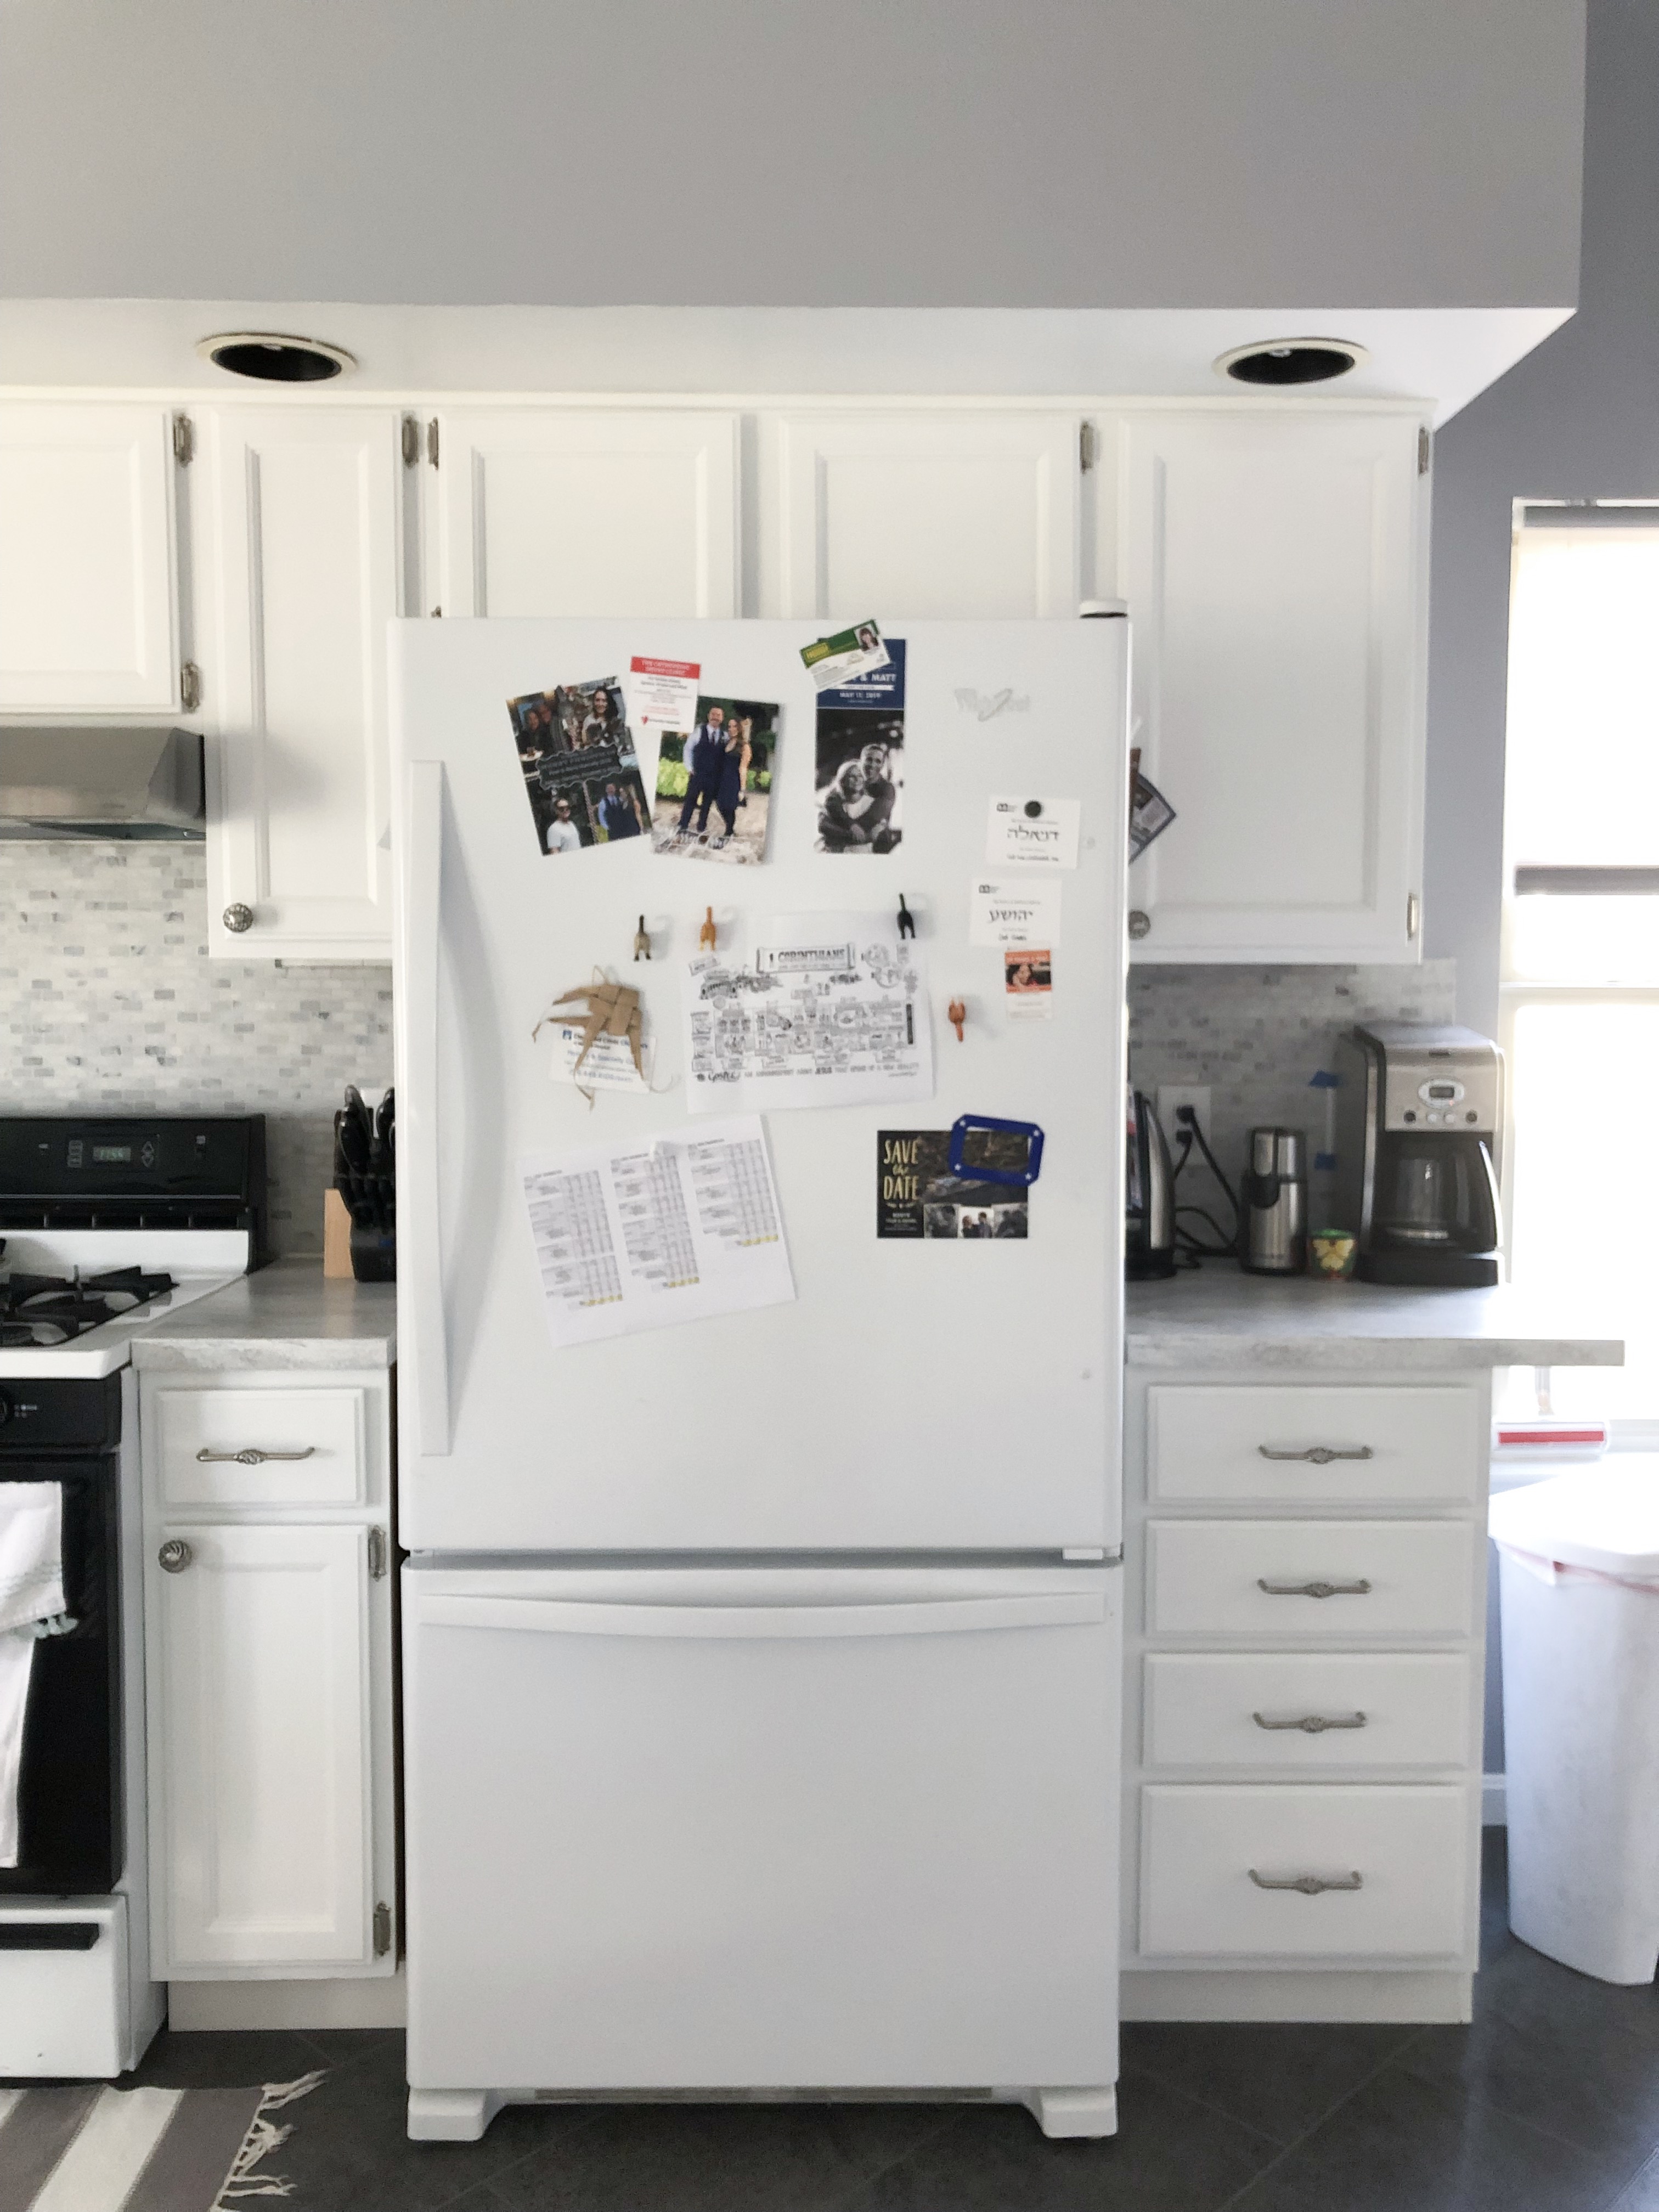
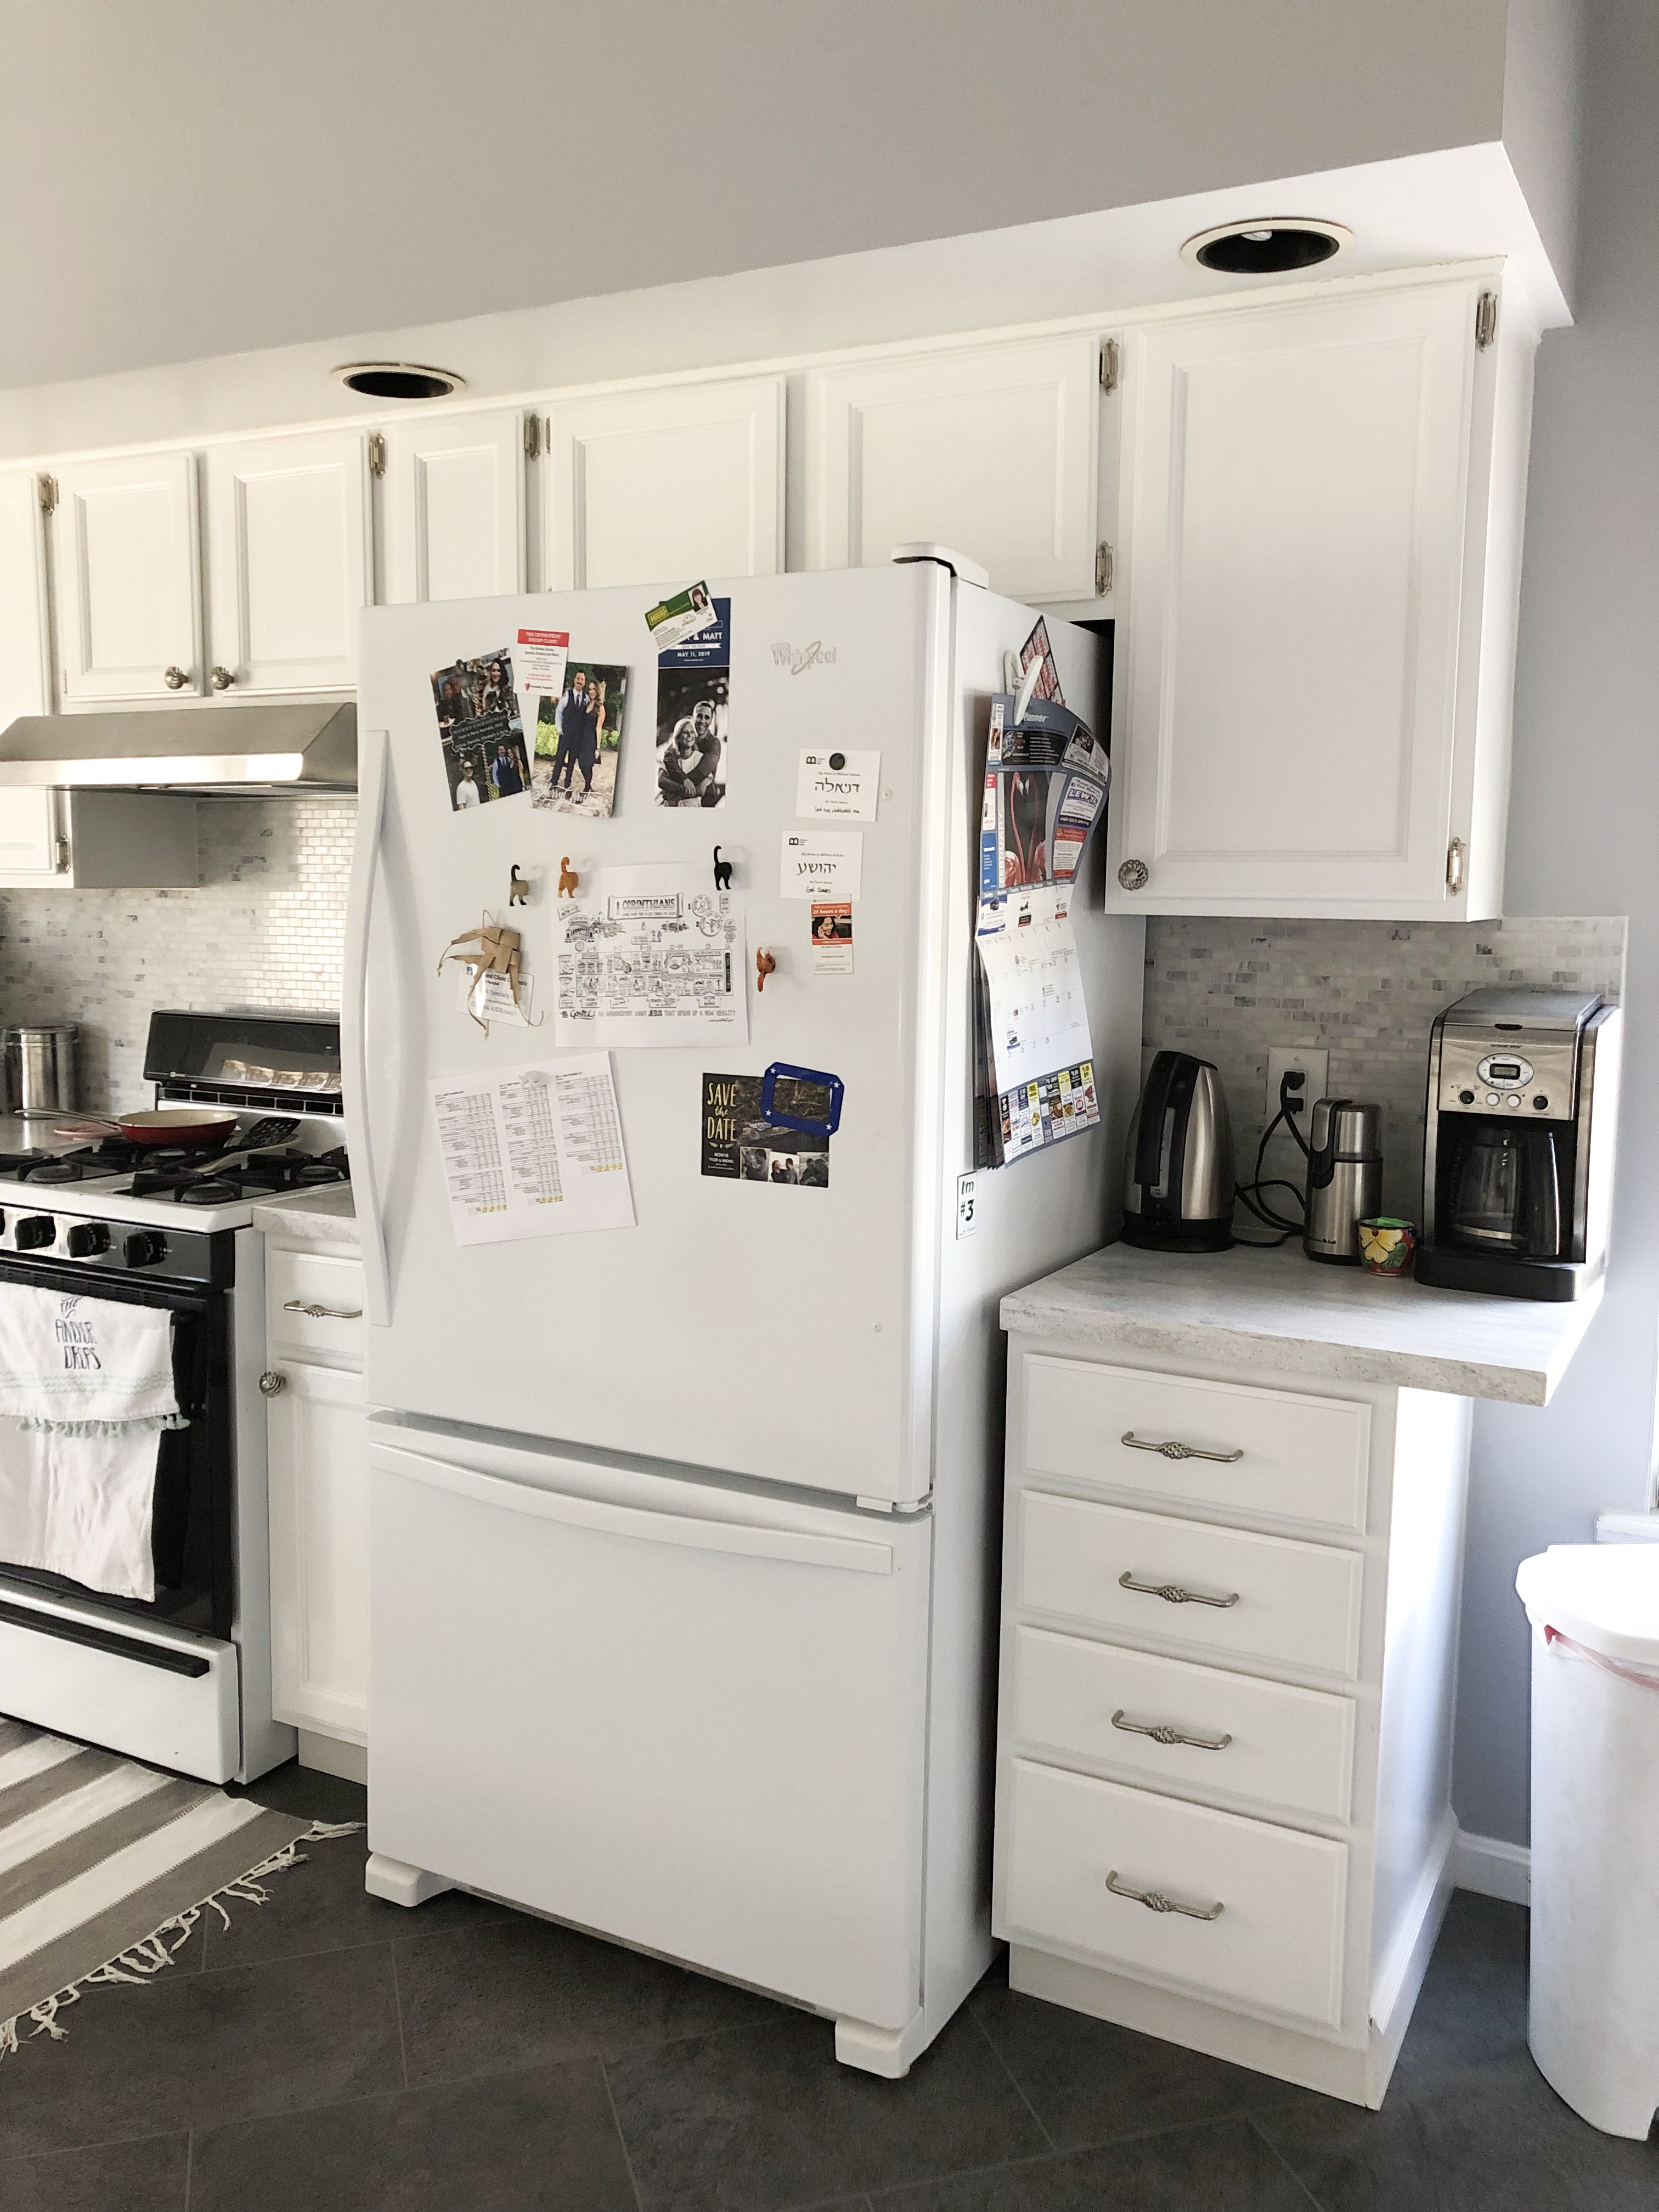
CABINETS:
- Remove all items from cabinets that can be stored elsewhere for a month
- yes, I said a month! Do not go into this project thinking you can do this in a weekend.
- Find your layout space
- I used spaces in my home like counter space, I set up tables as well as used tables in the garage. I had a LOT of faces to work on. Cover everything with old sheets. If you don’t have any, go to Goodwill and buy some. Be careful with your floors too.
- Remove Cabinet Doors
- As you’re doing this LABEL each door with a number and put a piece of tape on the inside of the drawer with the corresponding number.
- Take off all the old hardware but keep them to match new
- I used wood filler to fill in all the holes on the frames and face. Wood filler shrinks so if you have some shrinkage that is ok because you’ll want to kind of see where the old holes were for reference. Do not spend a lot of time on this.
- Wash and degrease all frames and faces –
- I used hot water with TPX – Use gloves.
- https://www.lowes.com/pd/TSP-Deck-Cleaner/3014064
- SAND:
- Ok I’ll say this – this is highly controversial based on who you talk to. You will get all sides telling you what to do and not do.
- My personal choice was to use Jasco Easy Liquid Sander Deglosser for the following reasons
- https://www.lowes.com/pd/Jasco-32-oz-Indoor-Outdoor-Paint-Preparation-Cleaner/50298105
- Time – this is literally a wipe down and let it sit – no cleaning after
- Sanding indoor was not an option with my pets and new carpet
- My cabinet faces and frames are real wood & have detailed panes. I did not want to over sand and destroy the nice beveled edges off the wood.
- Buy Nitrile Gloves to hand this stuff – it stinks and is caustic.
6. PRIME:
- Another topic that some choose to do and some skip. I chose to prime everything with Kilz 3 Premium because my cabinets are real wood. With real wood, I didn’t want the tannins to seep through and streak my white color to yellow.
- PAINT BRUSHES:
- I chose the Wooster Shortcut brush to put the primer on and do my first coat of paint. This is a short brush and the handle is rubber for a softer grip and easier control.
- Final coat was all done with a mini dense foam roller for a nice finish without the brush strokes.
- PAINT:
- You would probably laugh at how stressed I was at picking the RIGHT ‘white’. This was so irritating, and I read so much on the different hues of white that I finally thought I had it when I went to Sherwin Williams. Going to Sherwin was what I needed to do though. They introduced me to a Hi-Hide Interior Latex that has a non-reflective appearance that helps hide surface imperfections.
- Sherwin actually had a few pieces of wood painted with different types of paint and finishes that helped me choose.
- I thought this would be a good choice for my cabinets seeing as they’re not new wood and the hi-hide would cover imperfections.
- This paint is a bit tricky to use as it goes on like an enamel (thinner) but is latex and actually dries like an enamel (hard).
- This paint does say it’s a flat but my whole kitchen has a really nice sheen to it and the paint dried so hard that it’s easily wipeable.
- HINGES
- Hinges were really hard to find to match the type of cabinets I had from the 80’s. They were a Self-closing Single Door Hinge. I got lucky and found the style I wanted at a local hardware store in Painesville. They were able to order me these in Satin Nickle.
- Joughin Hardware in Painesville, OH.
- https://www.wayfair.com/home-improvement/pdp/hardware-house-275-h-x-2-w-self-closing-single-door-hinge-haw1476.html (these are what they looked like)
- Assume these will not align with the old holes on your cabinets as manufactures are different and sometimes sizing changes. Don’t get frustrated, just re-drill new holes in the frames and faces. Pilot hole first then drill the nail size.
- Hinges were really hard to find to match the type of cabinets I had from the 80’s. They were a Self-closing Single Door Hinge. I got lucky and found the style I wanted at a local hardware store in Painesville. They were able to order me these in Satin Nickle.
- HARDWARE
- My cabinets did not have any hardware on them to begin with, so I bought all new knobs and pulls. I did a combo of both depending on the drawer.
- Make sure you measure and understand how big or small the knobs/pulls will be and make a template before you buy so they’re not too small or large
- Once I received these, I made a drilling template out of a piece of cardboard the exact size of my drawers and measured them up.
- Drill a small pilot hole first then the actual size & go slow with wood so you do not split it.
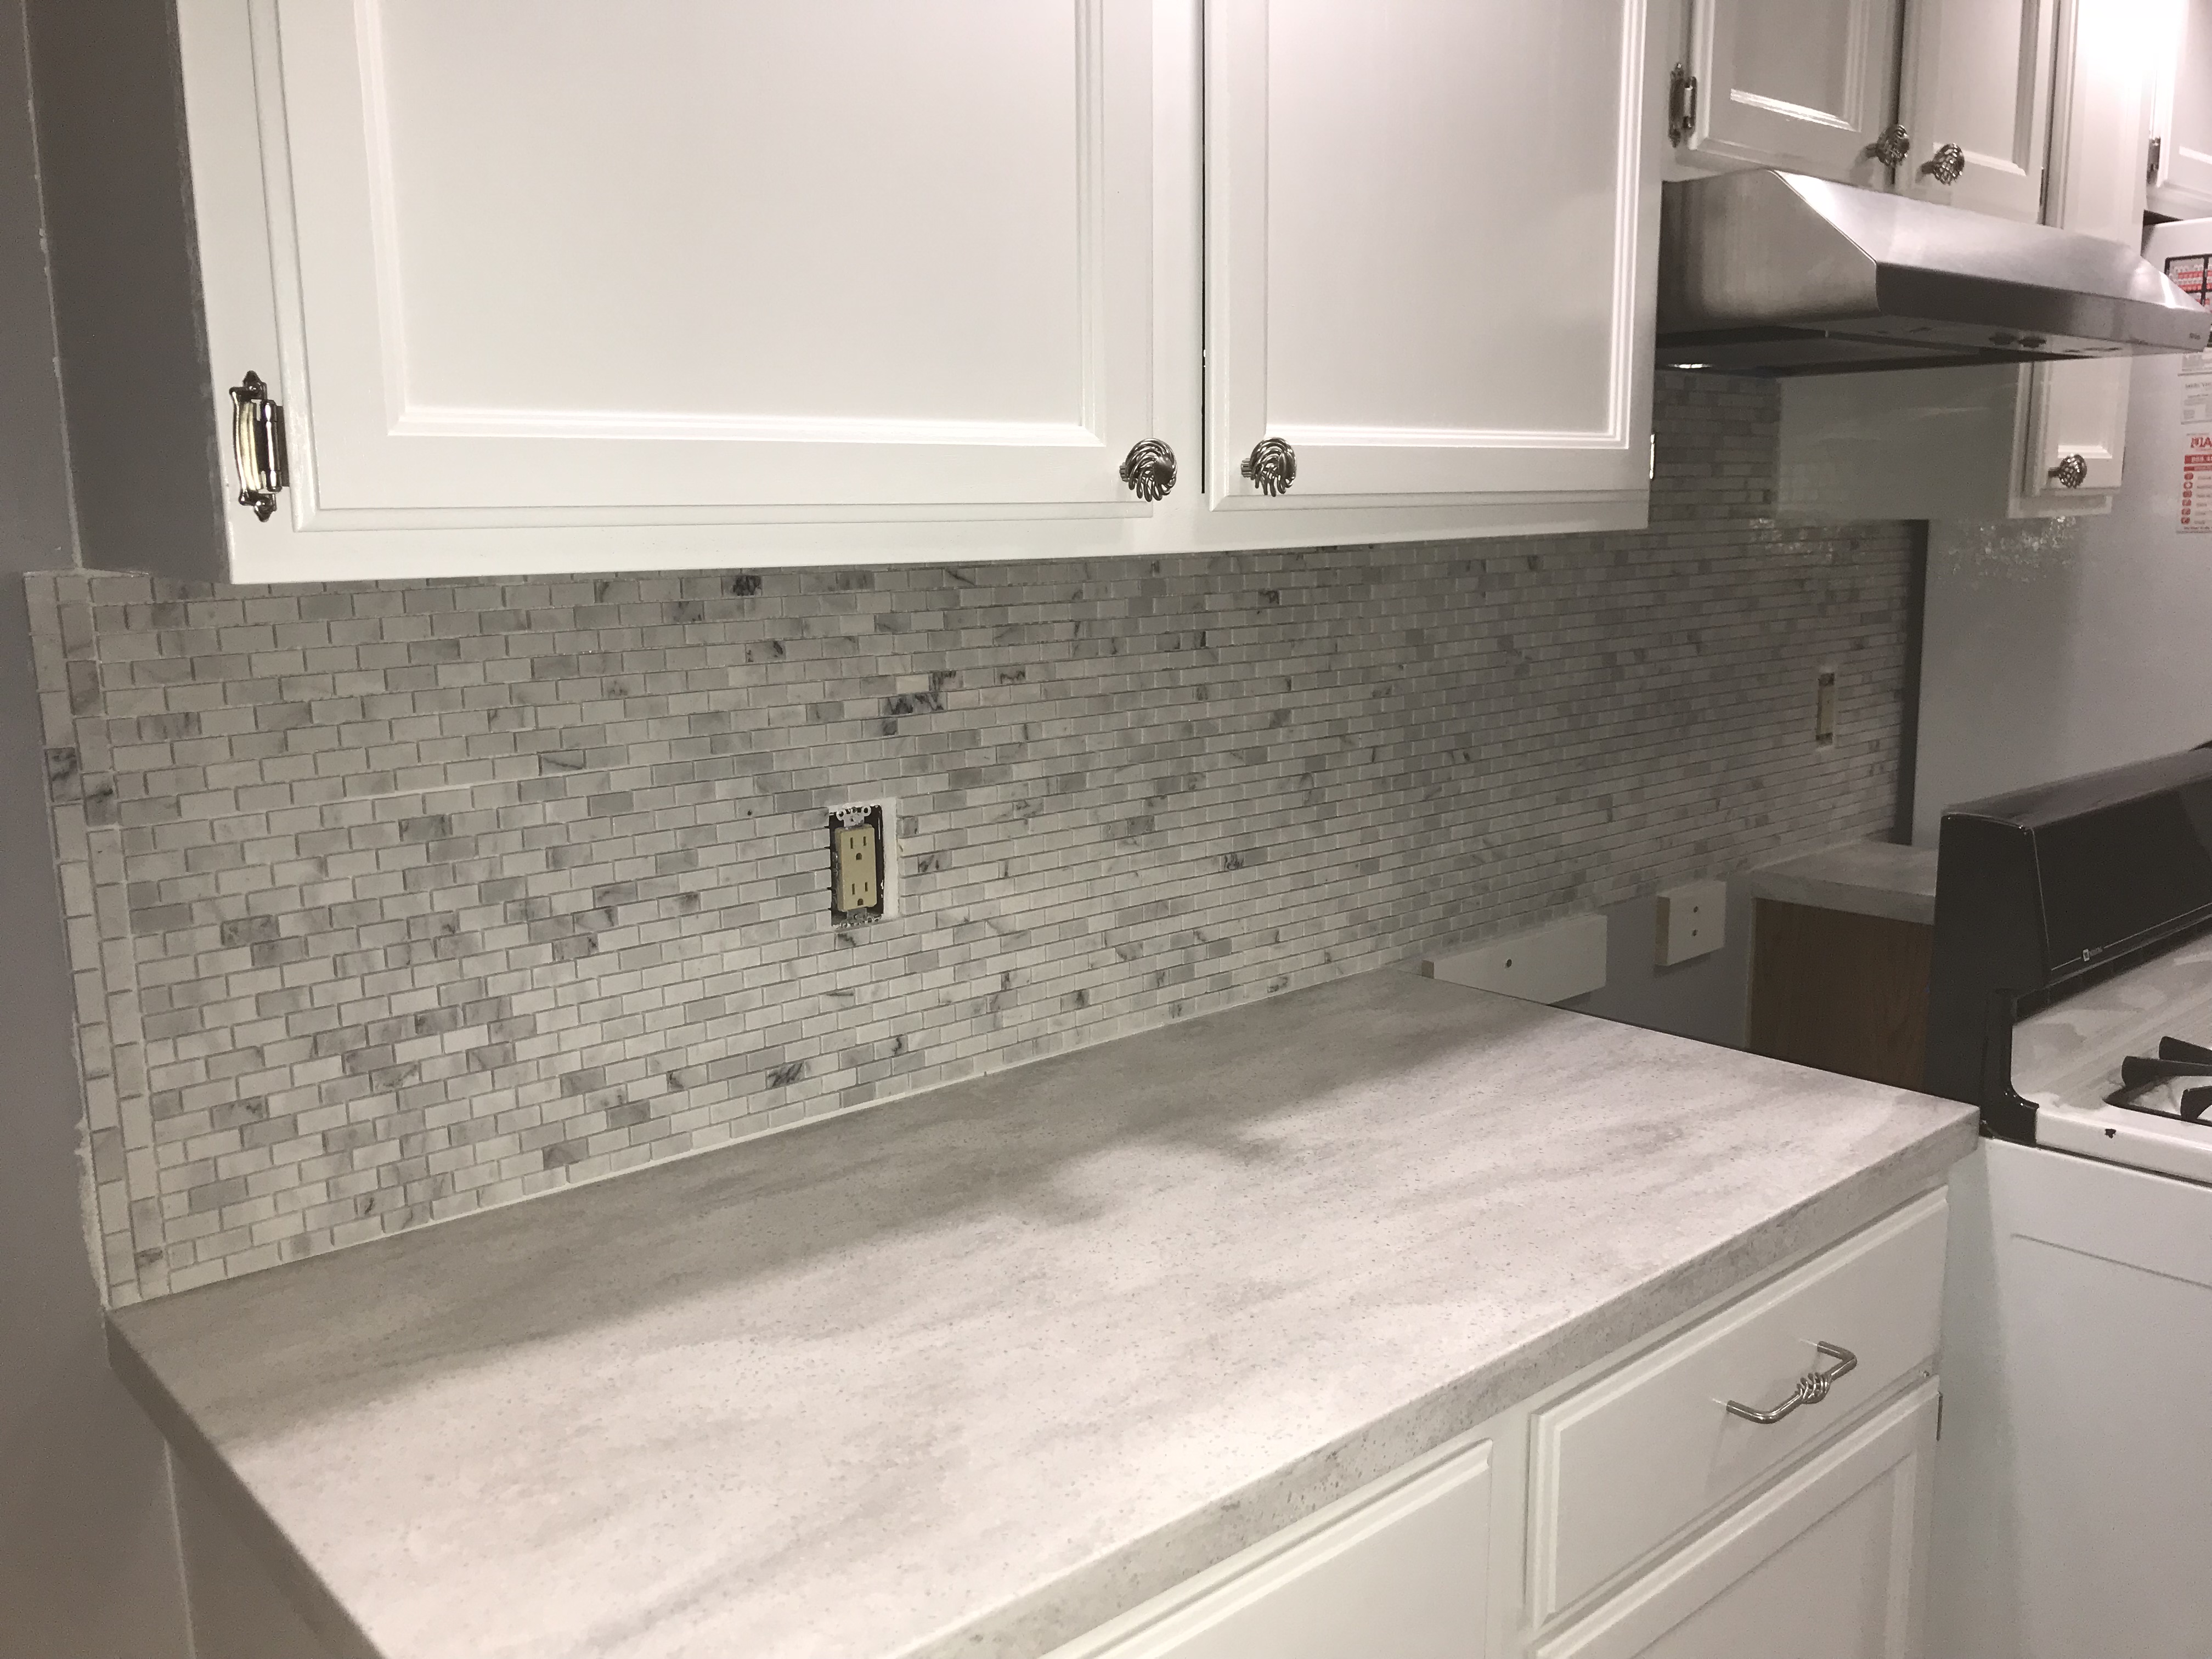
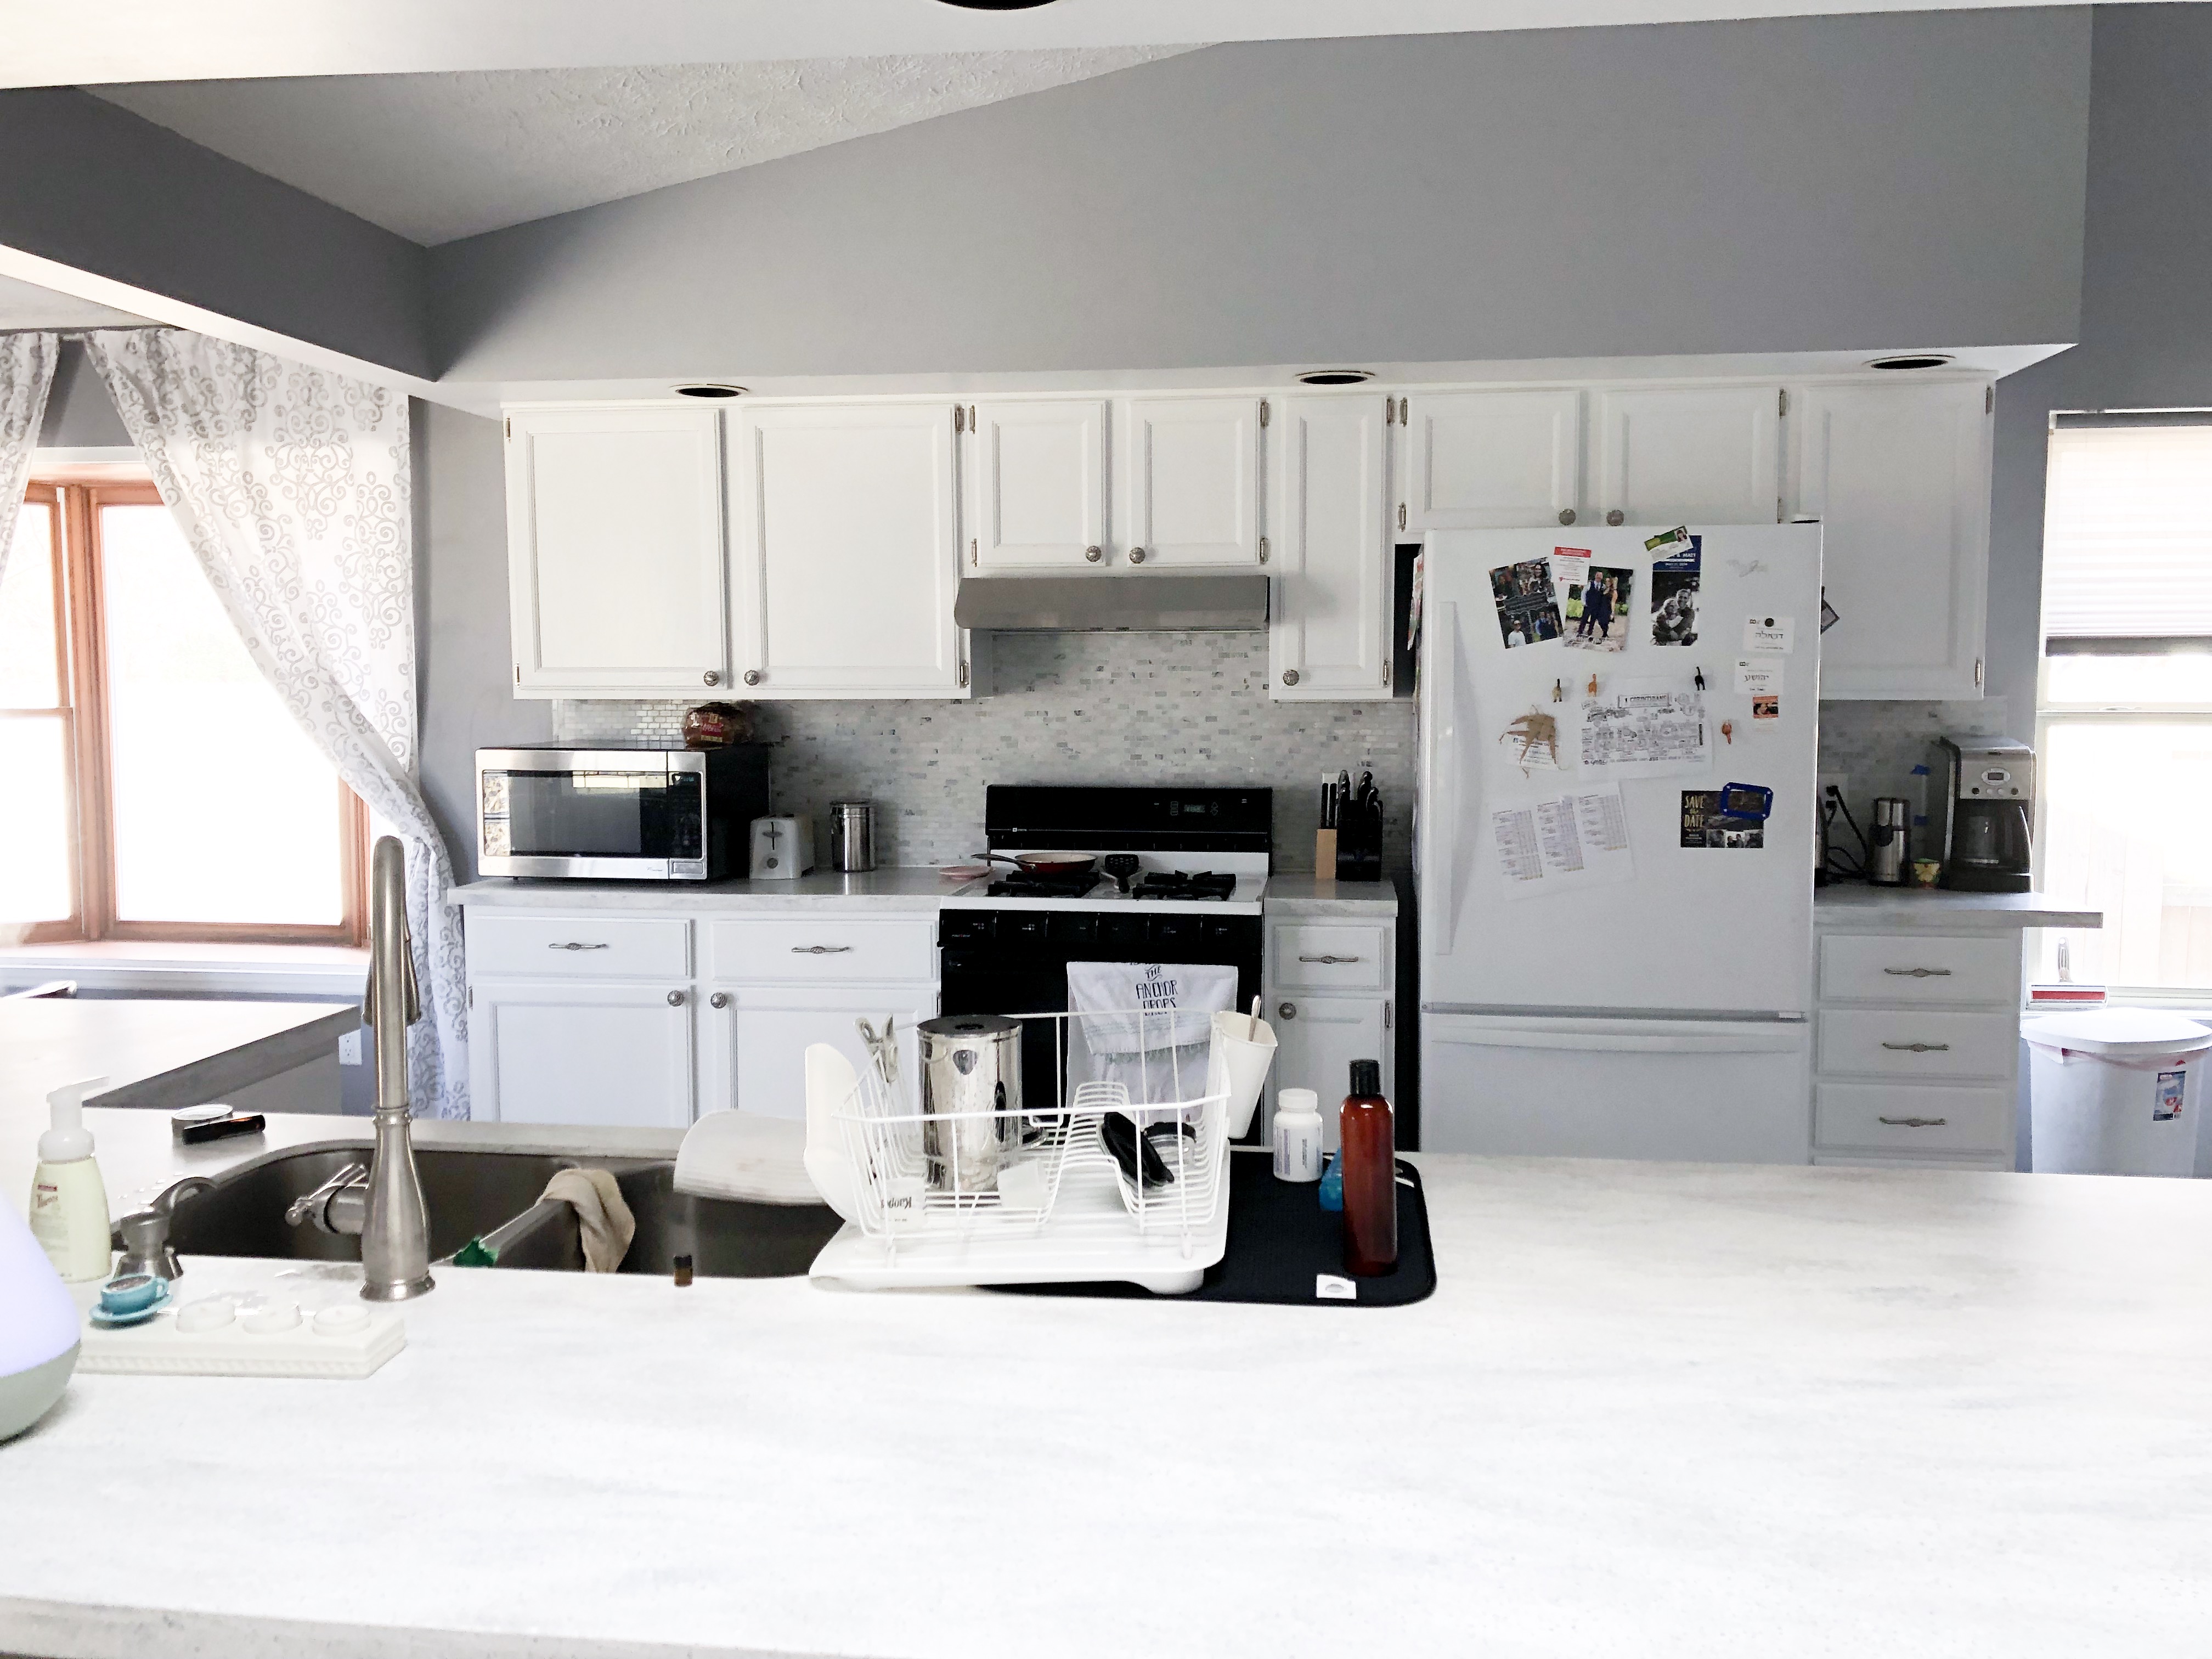
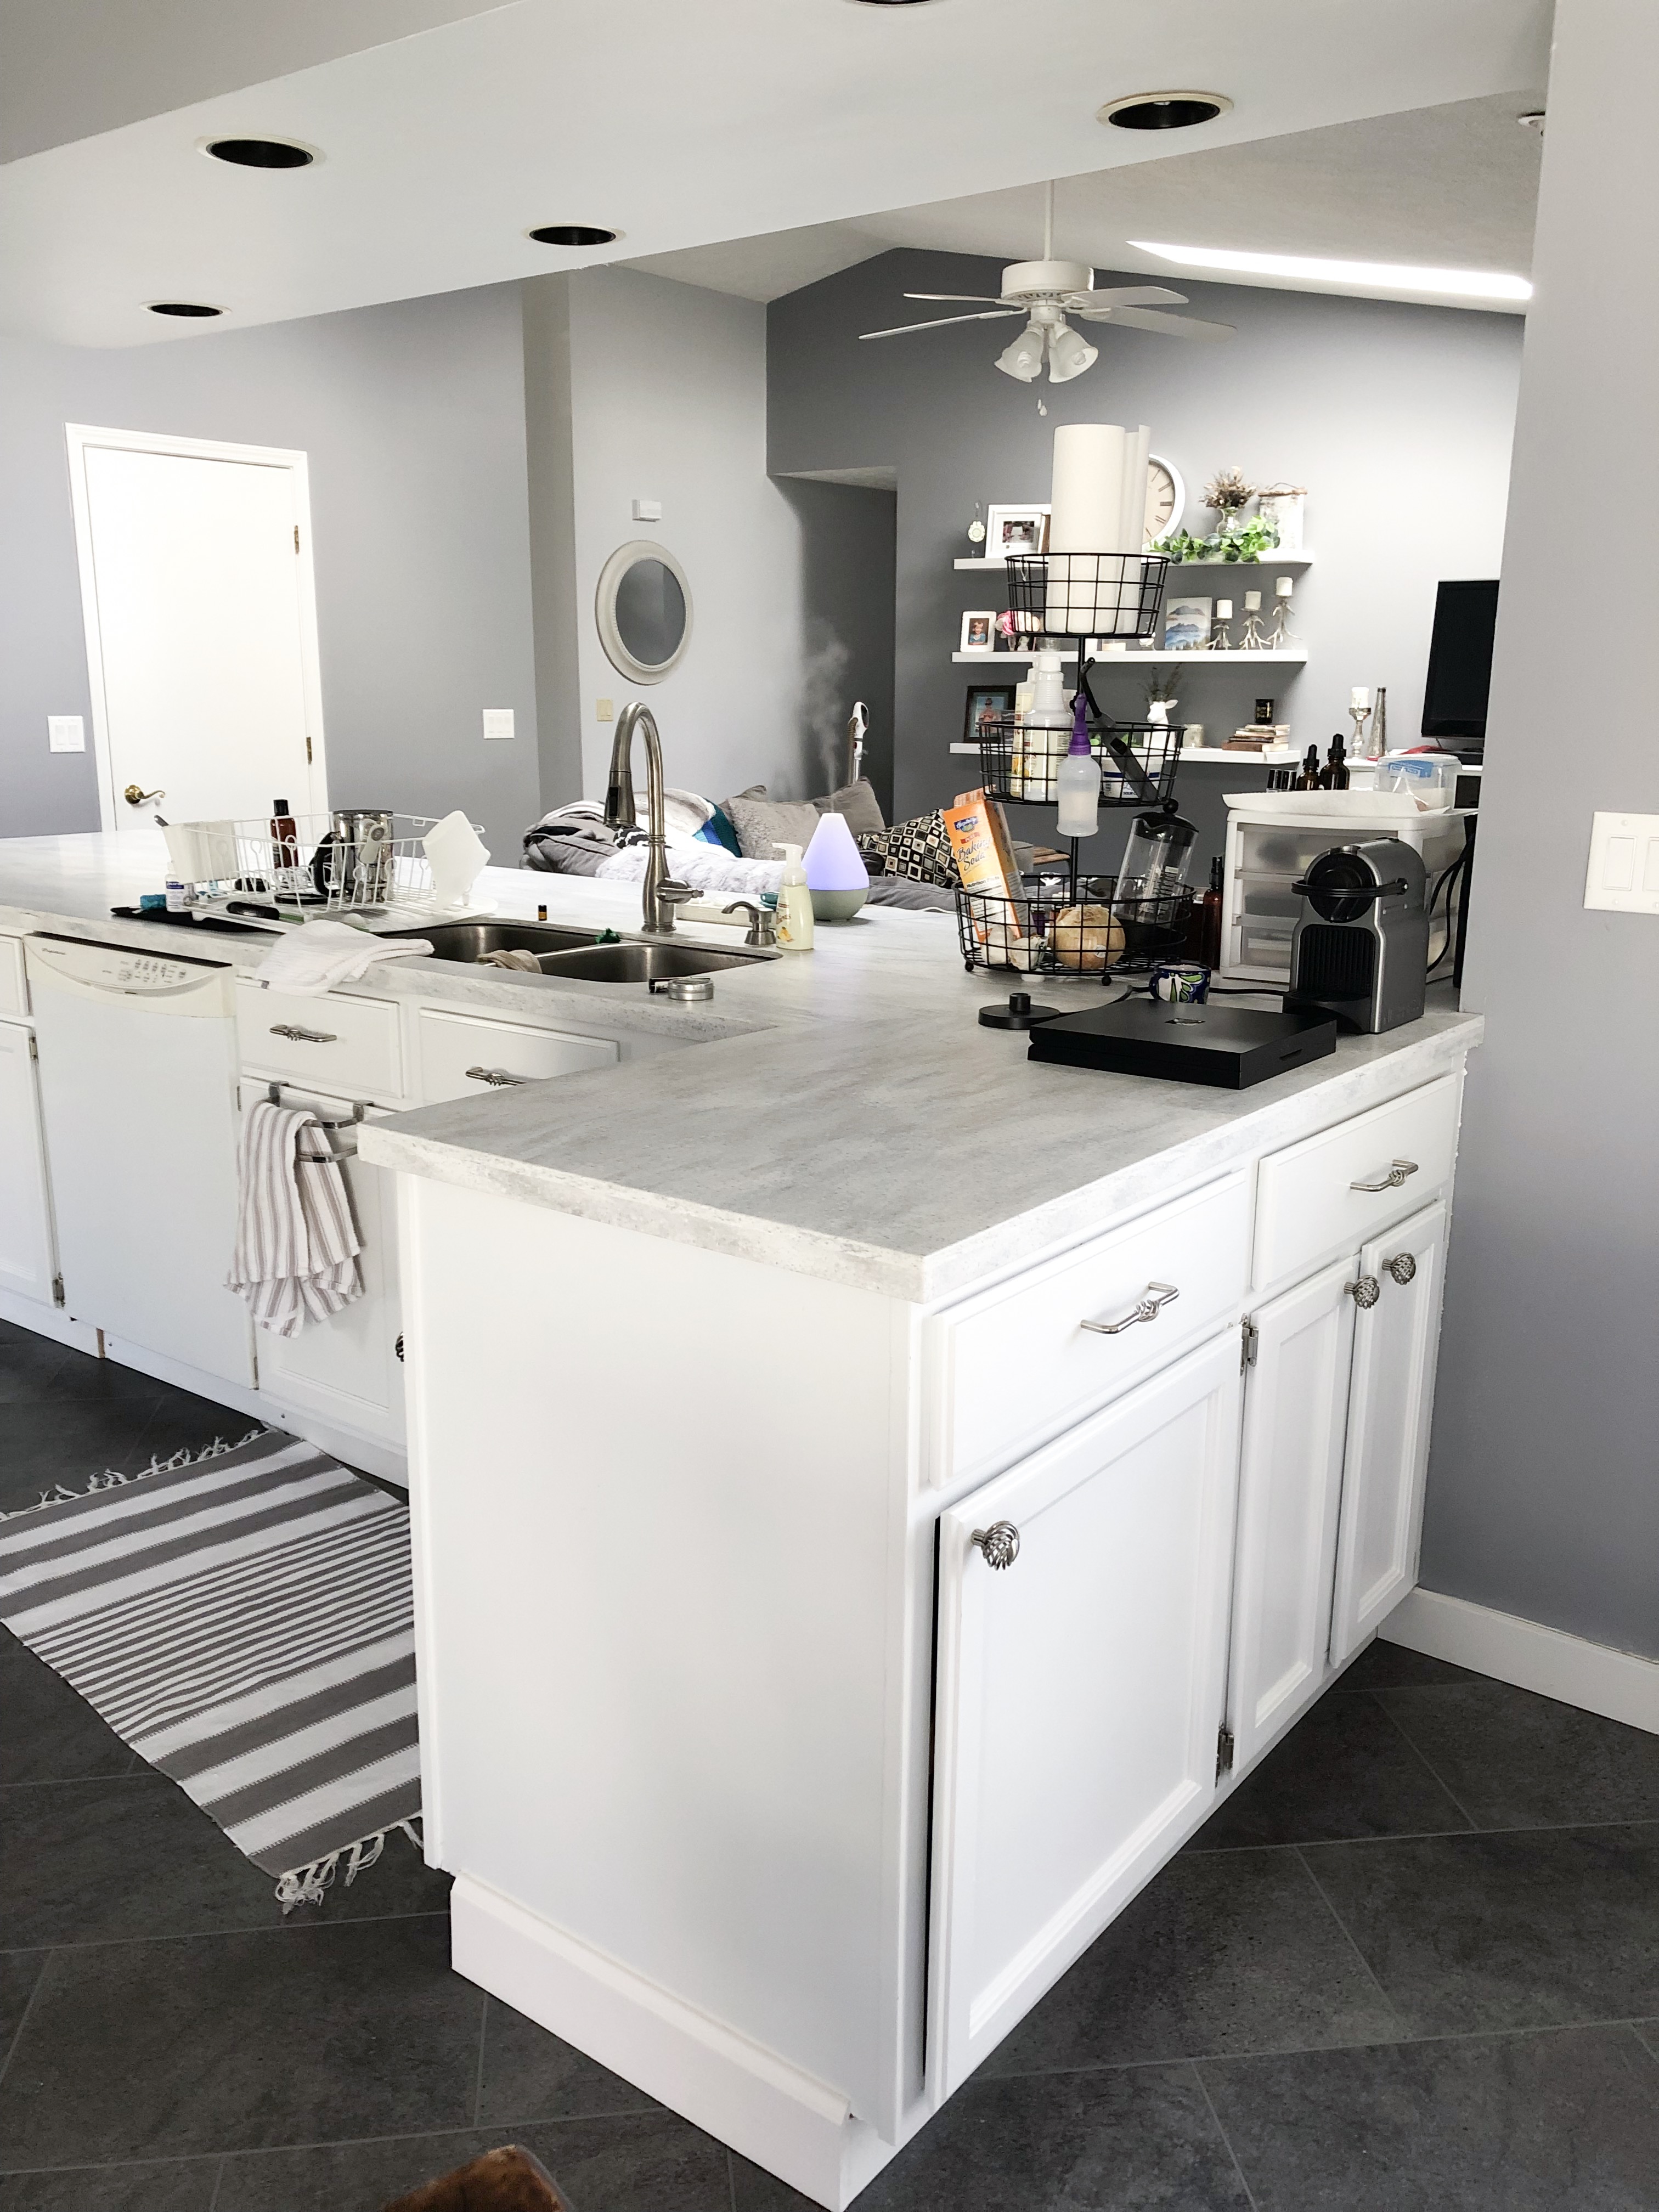
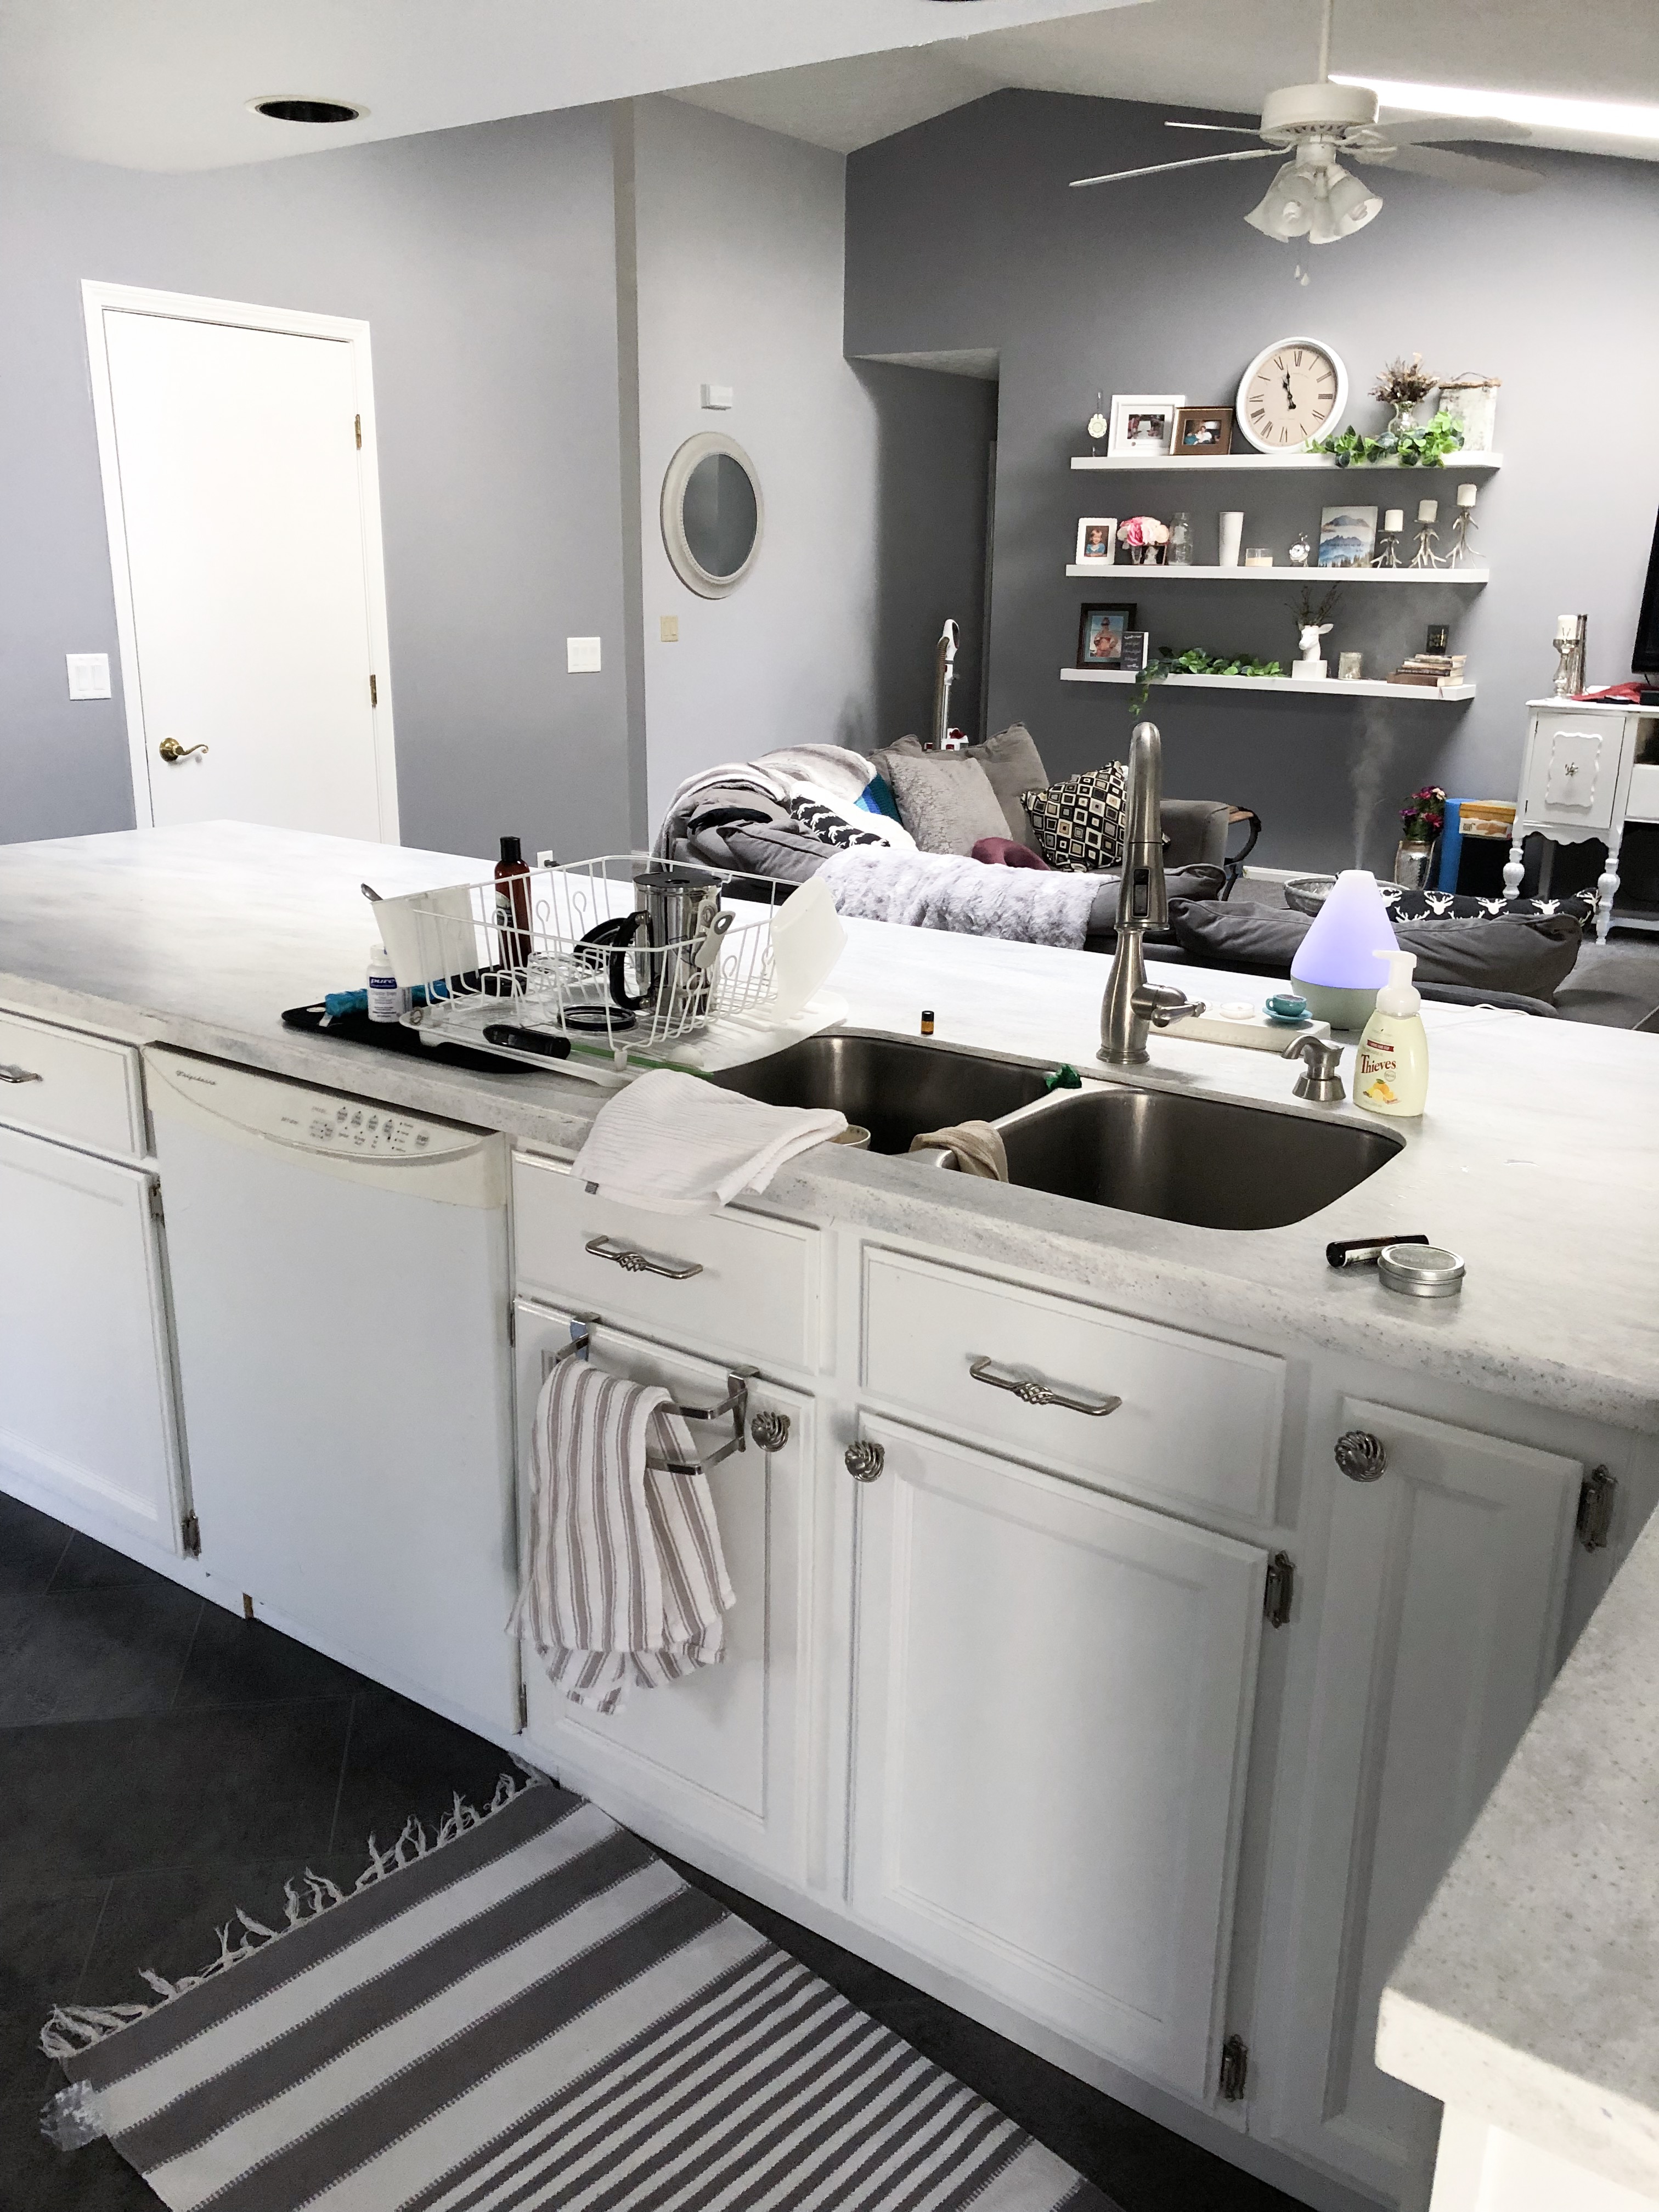
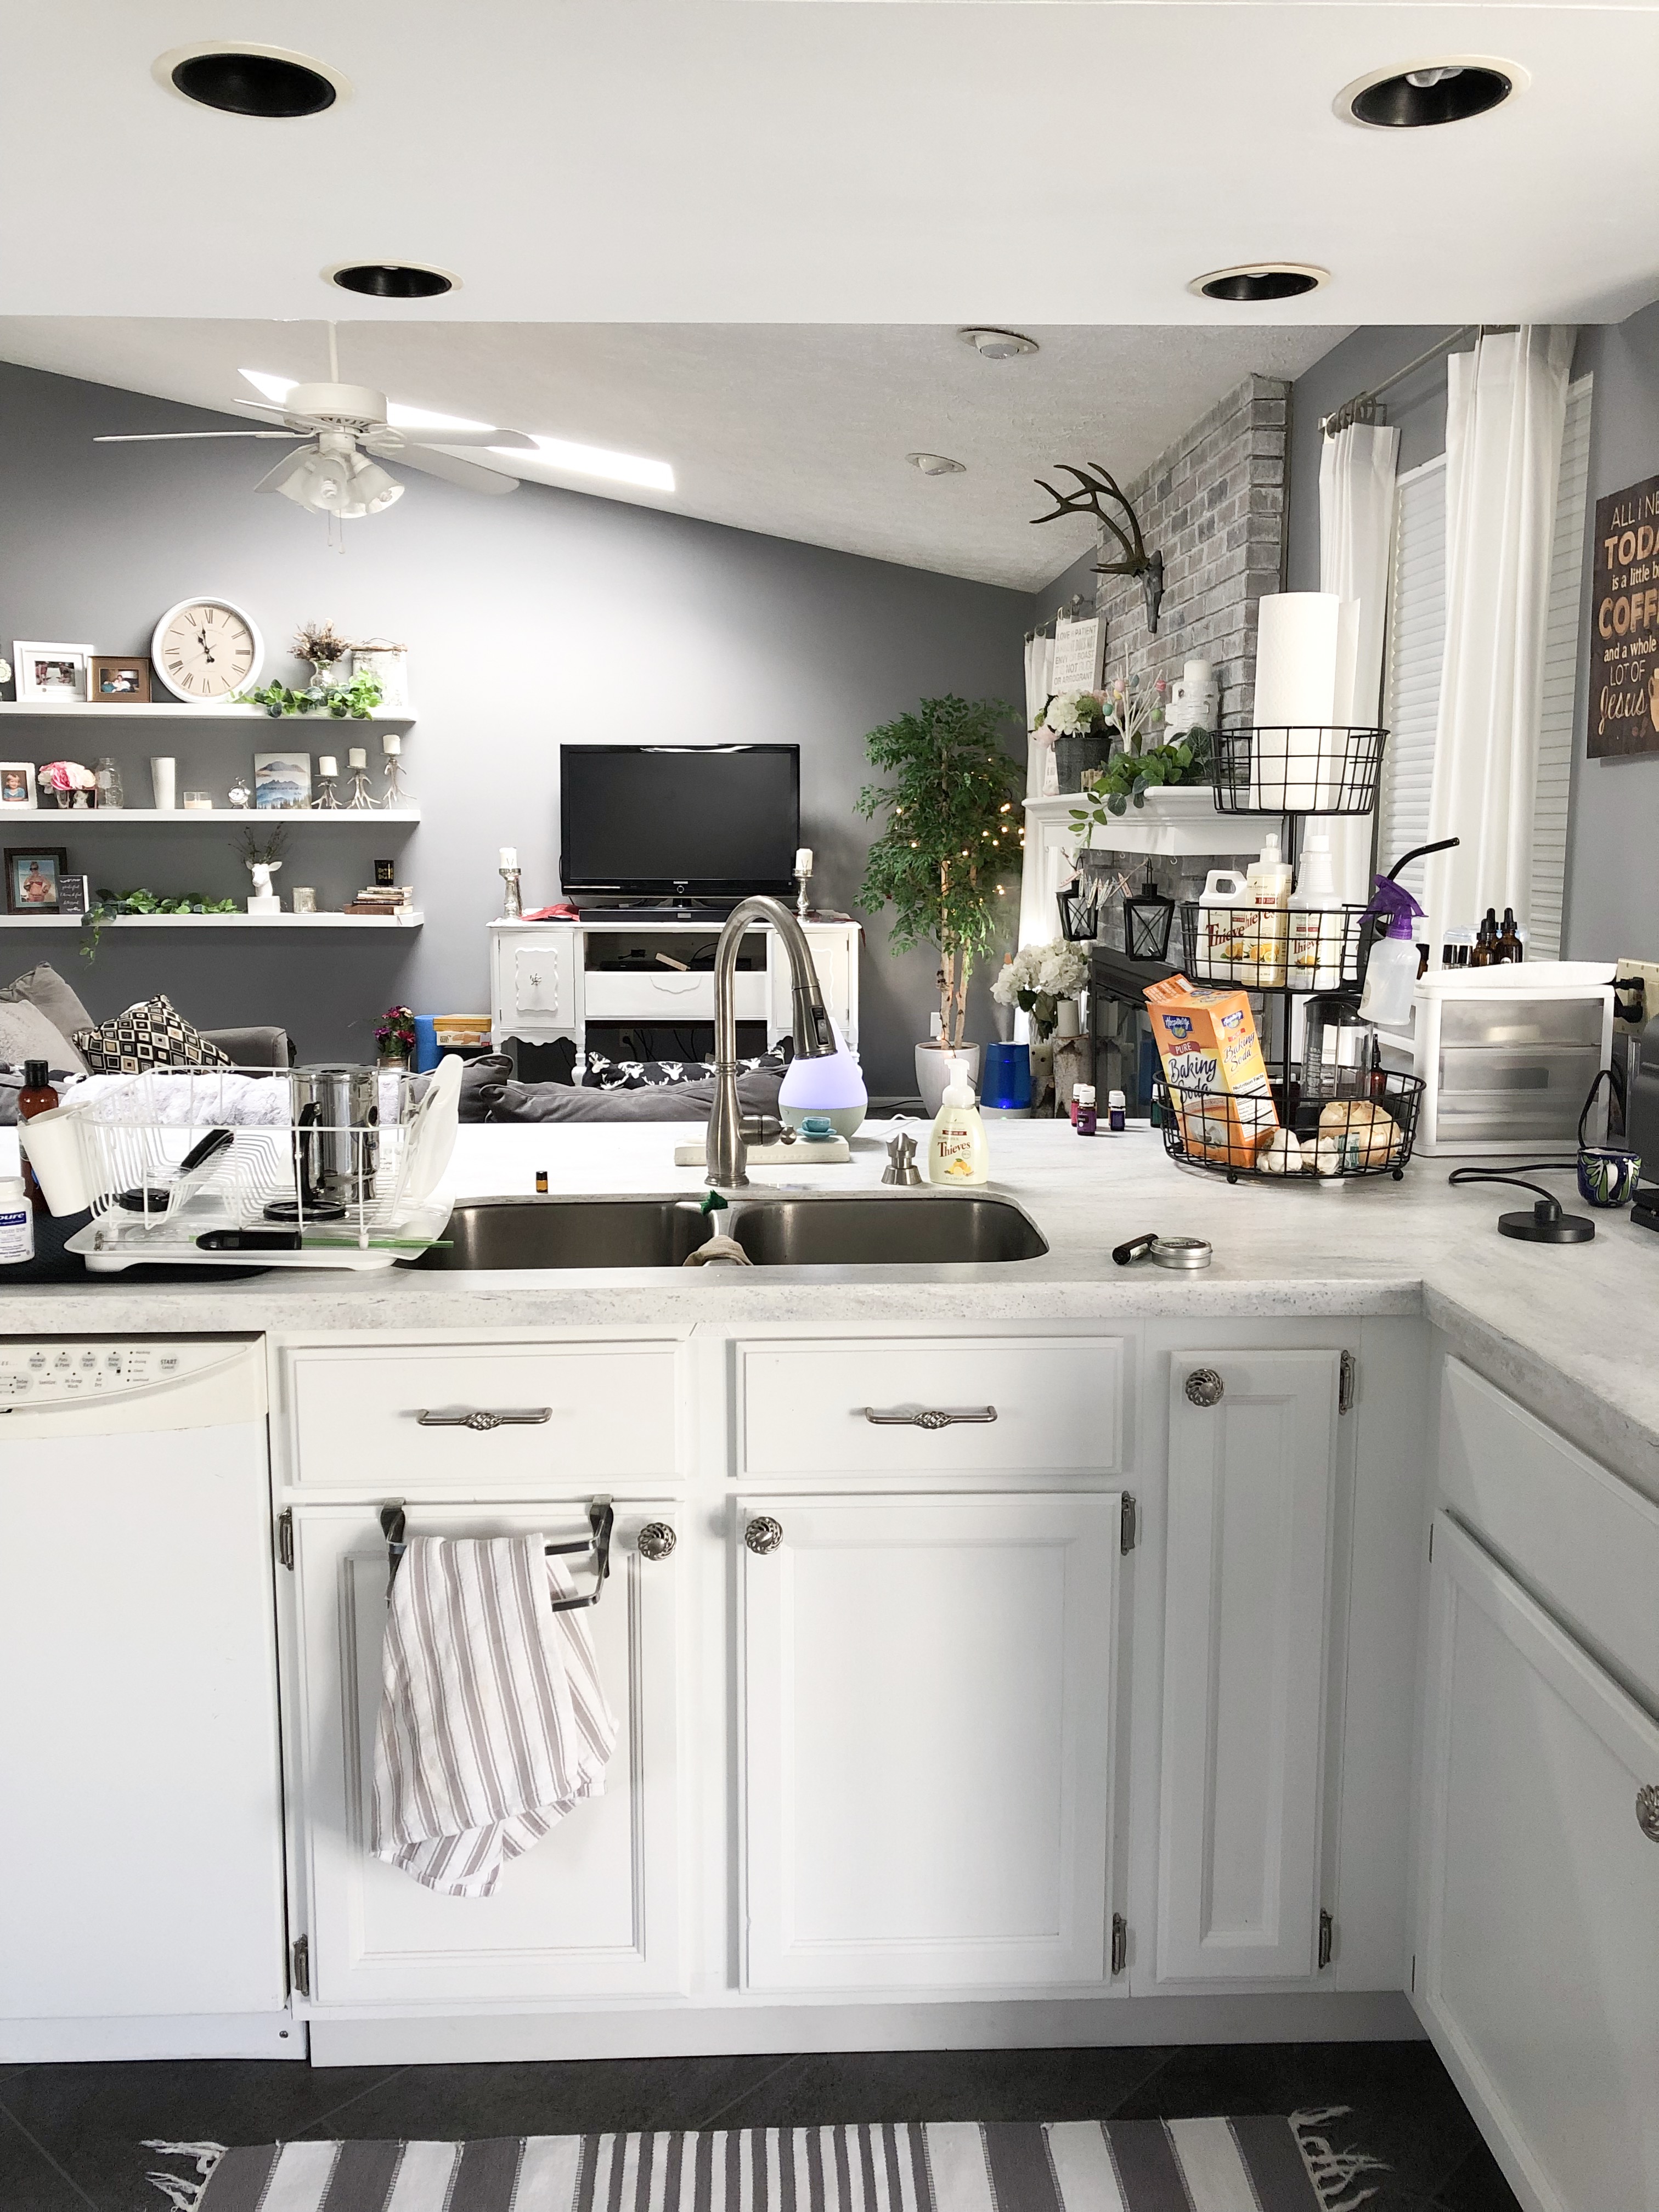
11. COUNTERTOPS:
- I have a friend who does countertops, so this was a MASSIVE blessing for me to be able to use him. When I first started looking and getting pricing, I went to Home Depot and they quoted me about $10,000 for granite. I was in utter shock.
- I have approx. 100 sq ft of countertop which is a lot for a kitchen. Granite was not an option for me so I went with Corian solid surface in Arrowroot
12. SINK & FAUCET:
- There are many different sinks you can choose from, but I wanted a stainless steel undermount because I was afraid white would stain. Undermount was also important because I love the fact that you can wipe the counter right into the sink!
- https://www.homedepot.com/p/IPT-Sink-Company-Undermount-32-in-16-Gauge-Stainless-Steel-Kitchen-Sink-in-Brushed-Stainless-IPTLX5050P/301111035
- If you have a garbage disposal, you’ll need to buy the right drain for that to fit. I did not buy one and had to use my old sink drain for the left sink.
- Faucet choice was easy for me because I knew I wanted a single mount with the lever attached and then just one more hole for the soap dispenser

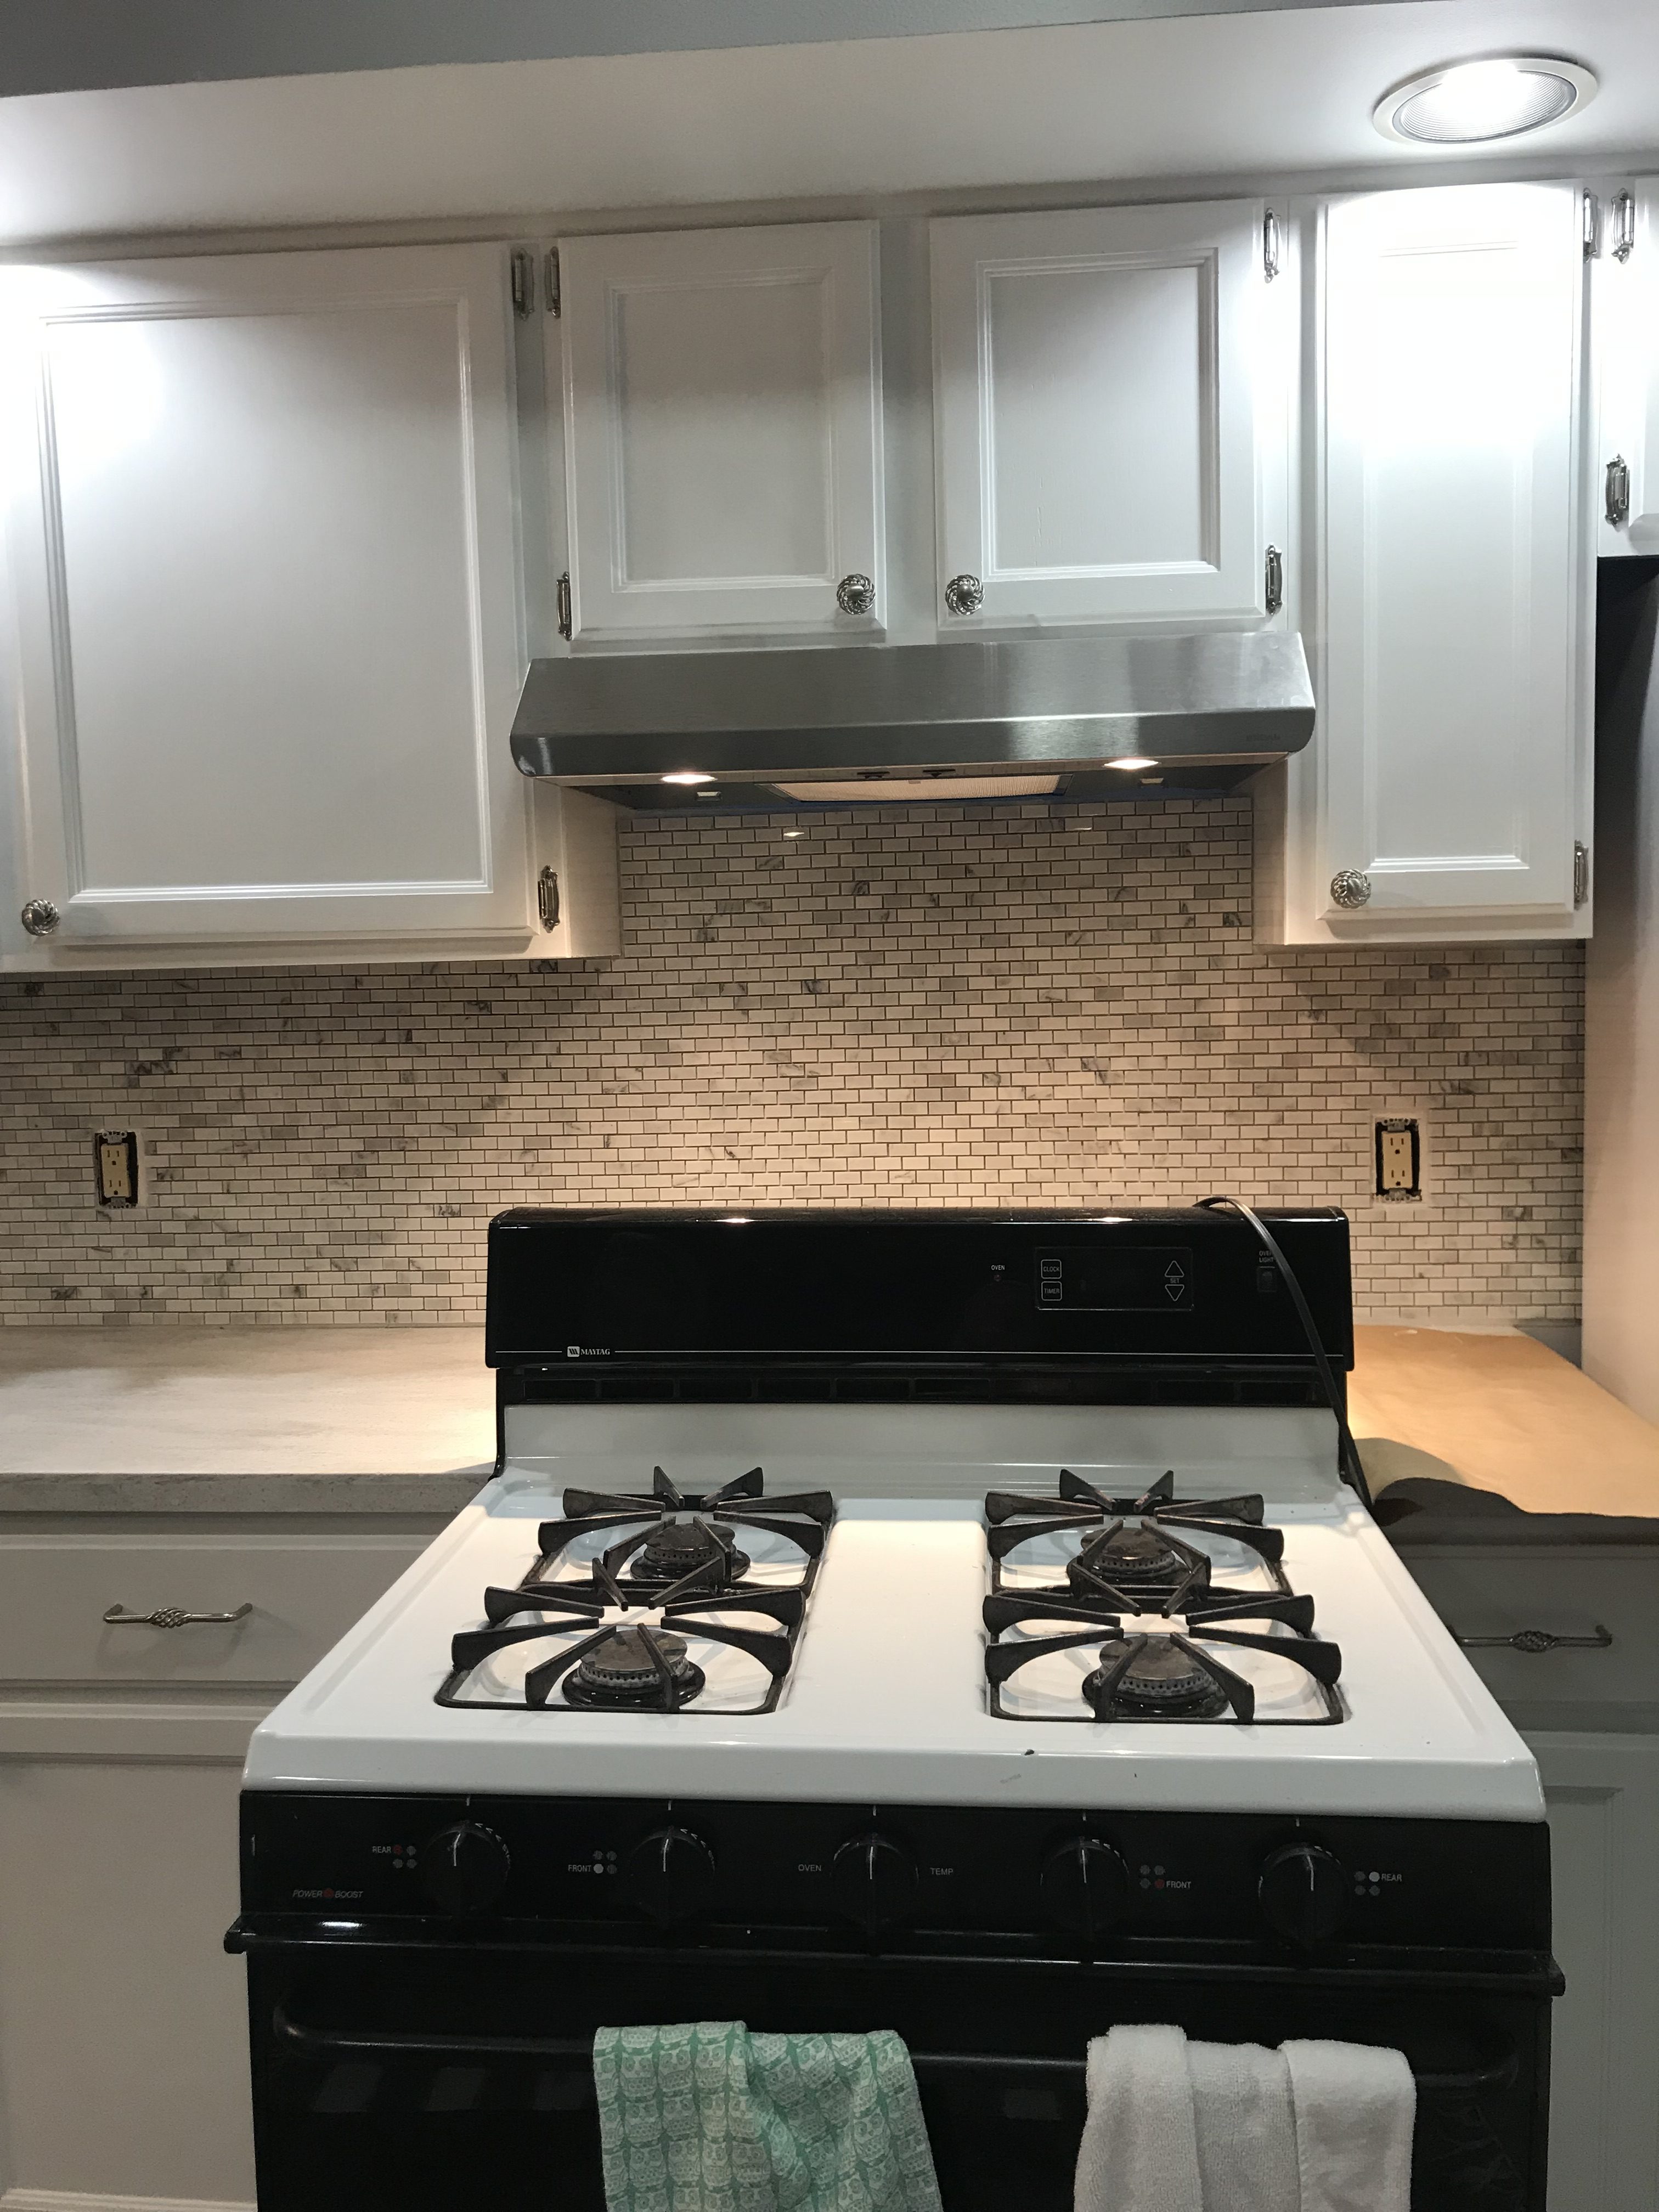
13. OVEN HOOD:
- Not much to say here except that when I was taking out the old range hood the contractor who installed it used screws that were 8 inches…?? And it’s just one of those moments you shake your head and wonder “why”?
- The directions were easy and I did have to add some extra shims to make this hood work due to sizing – but it all worked out just fine.
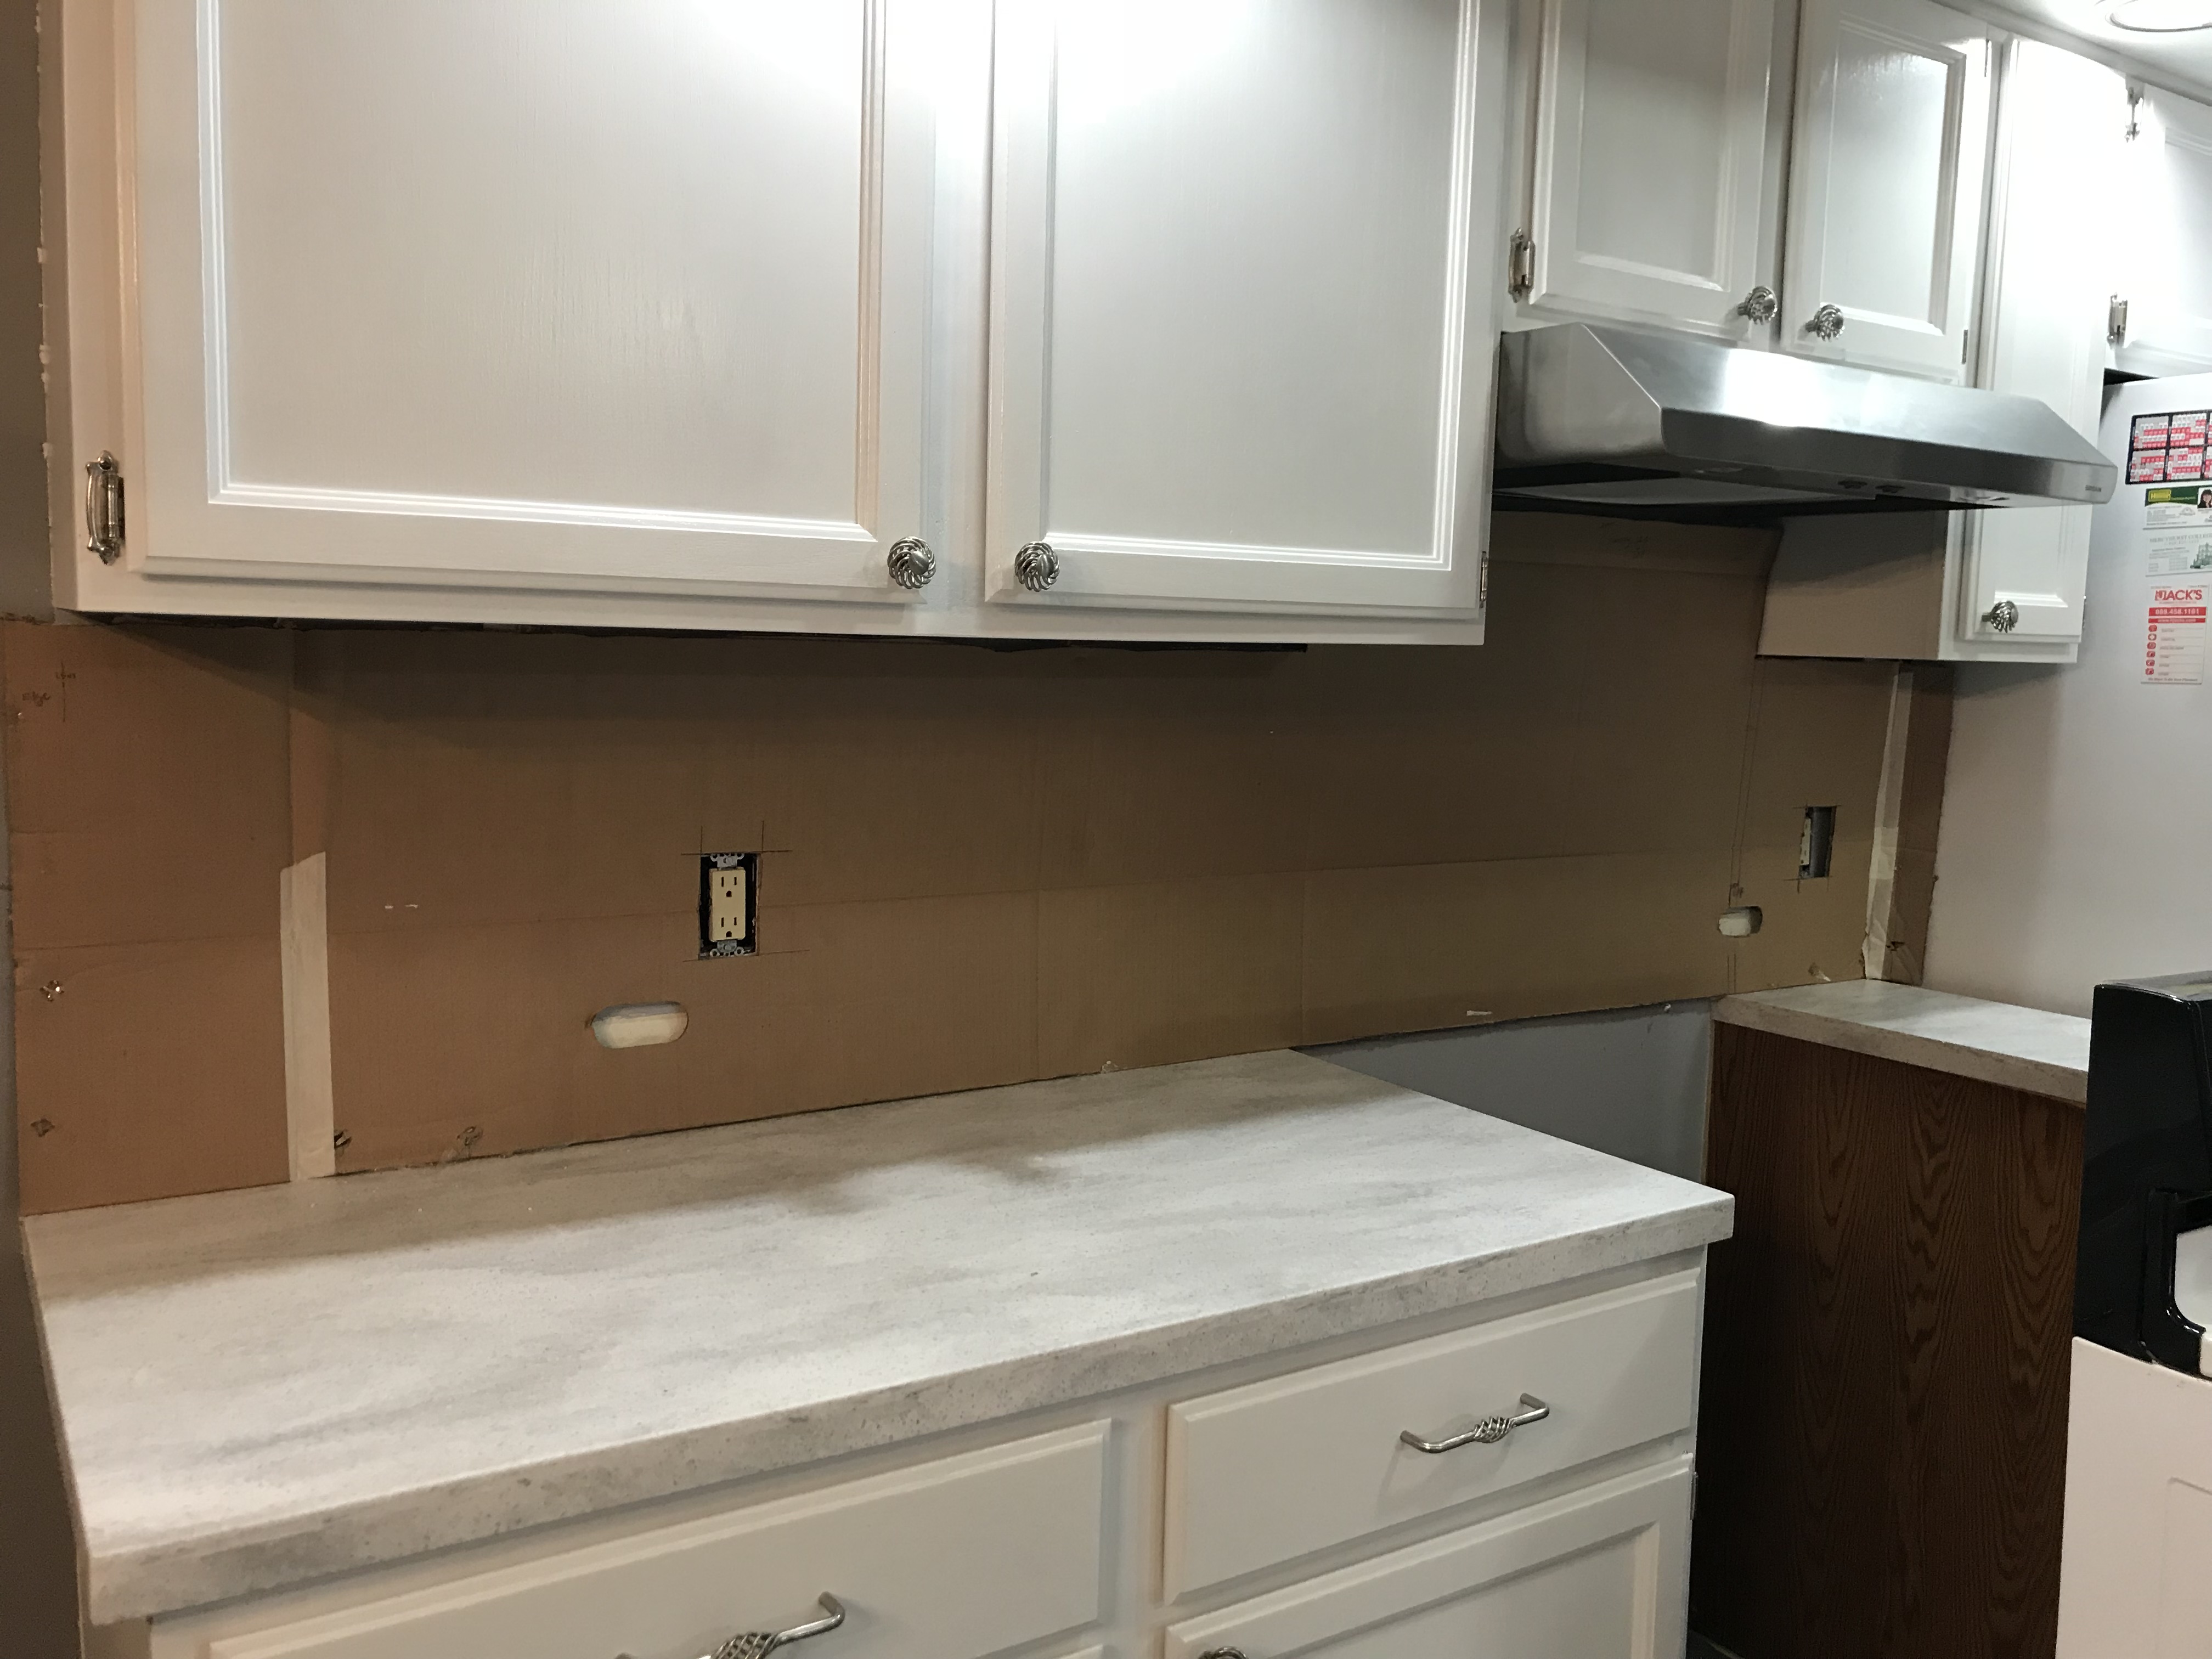
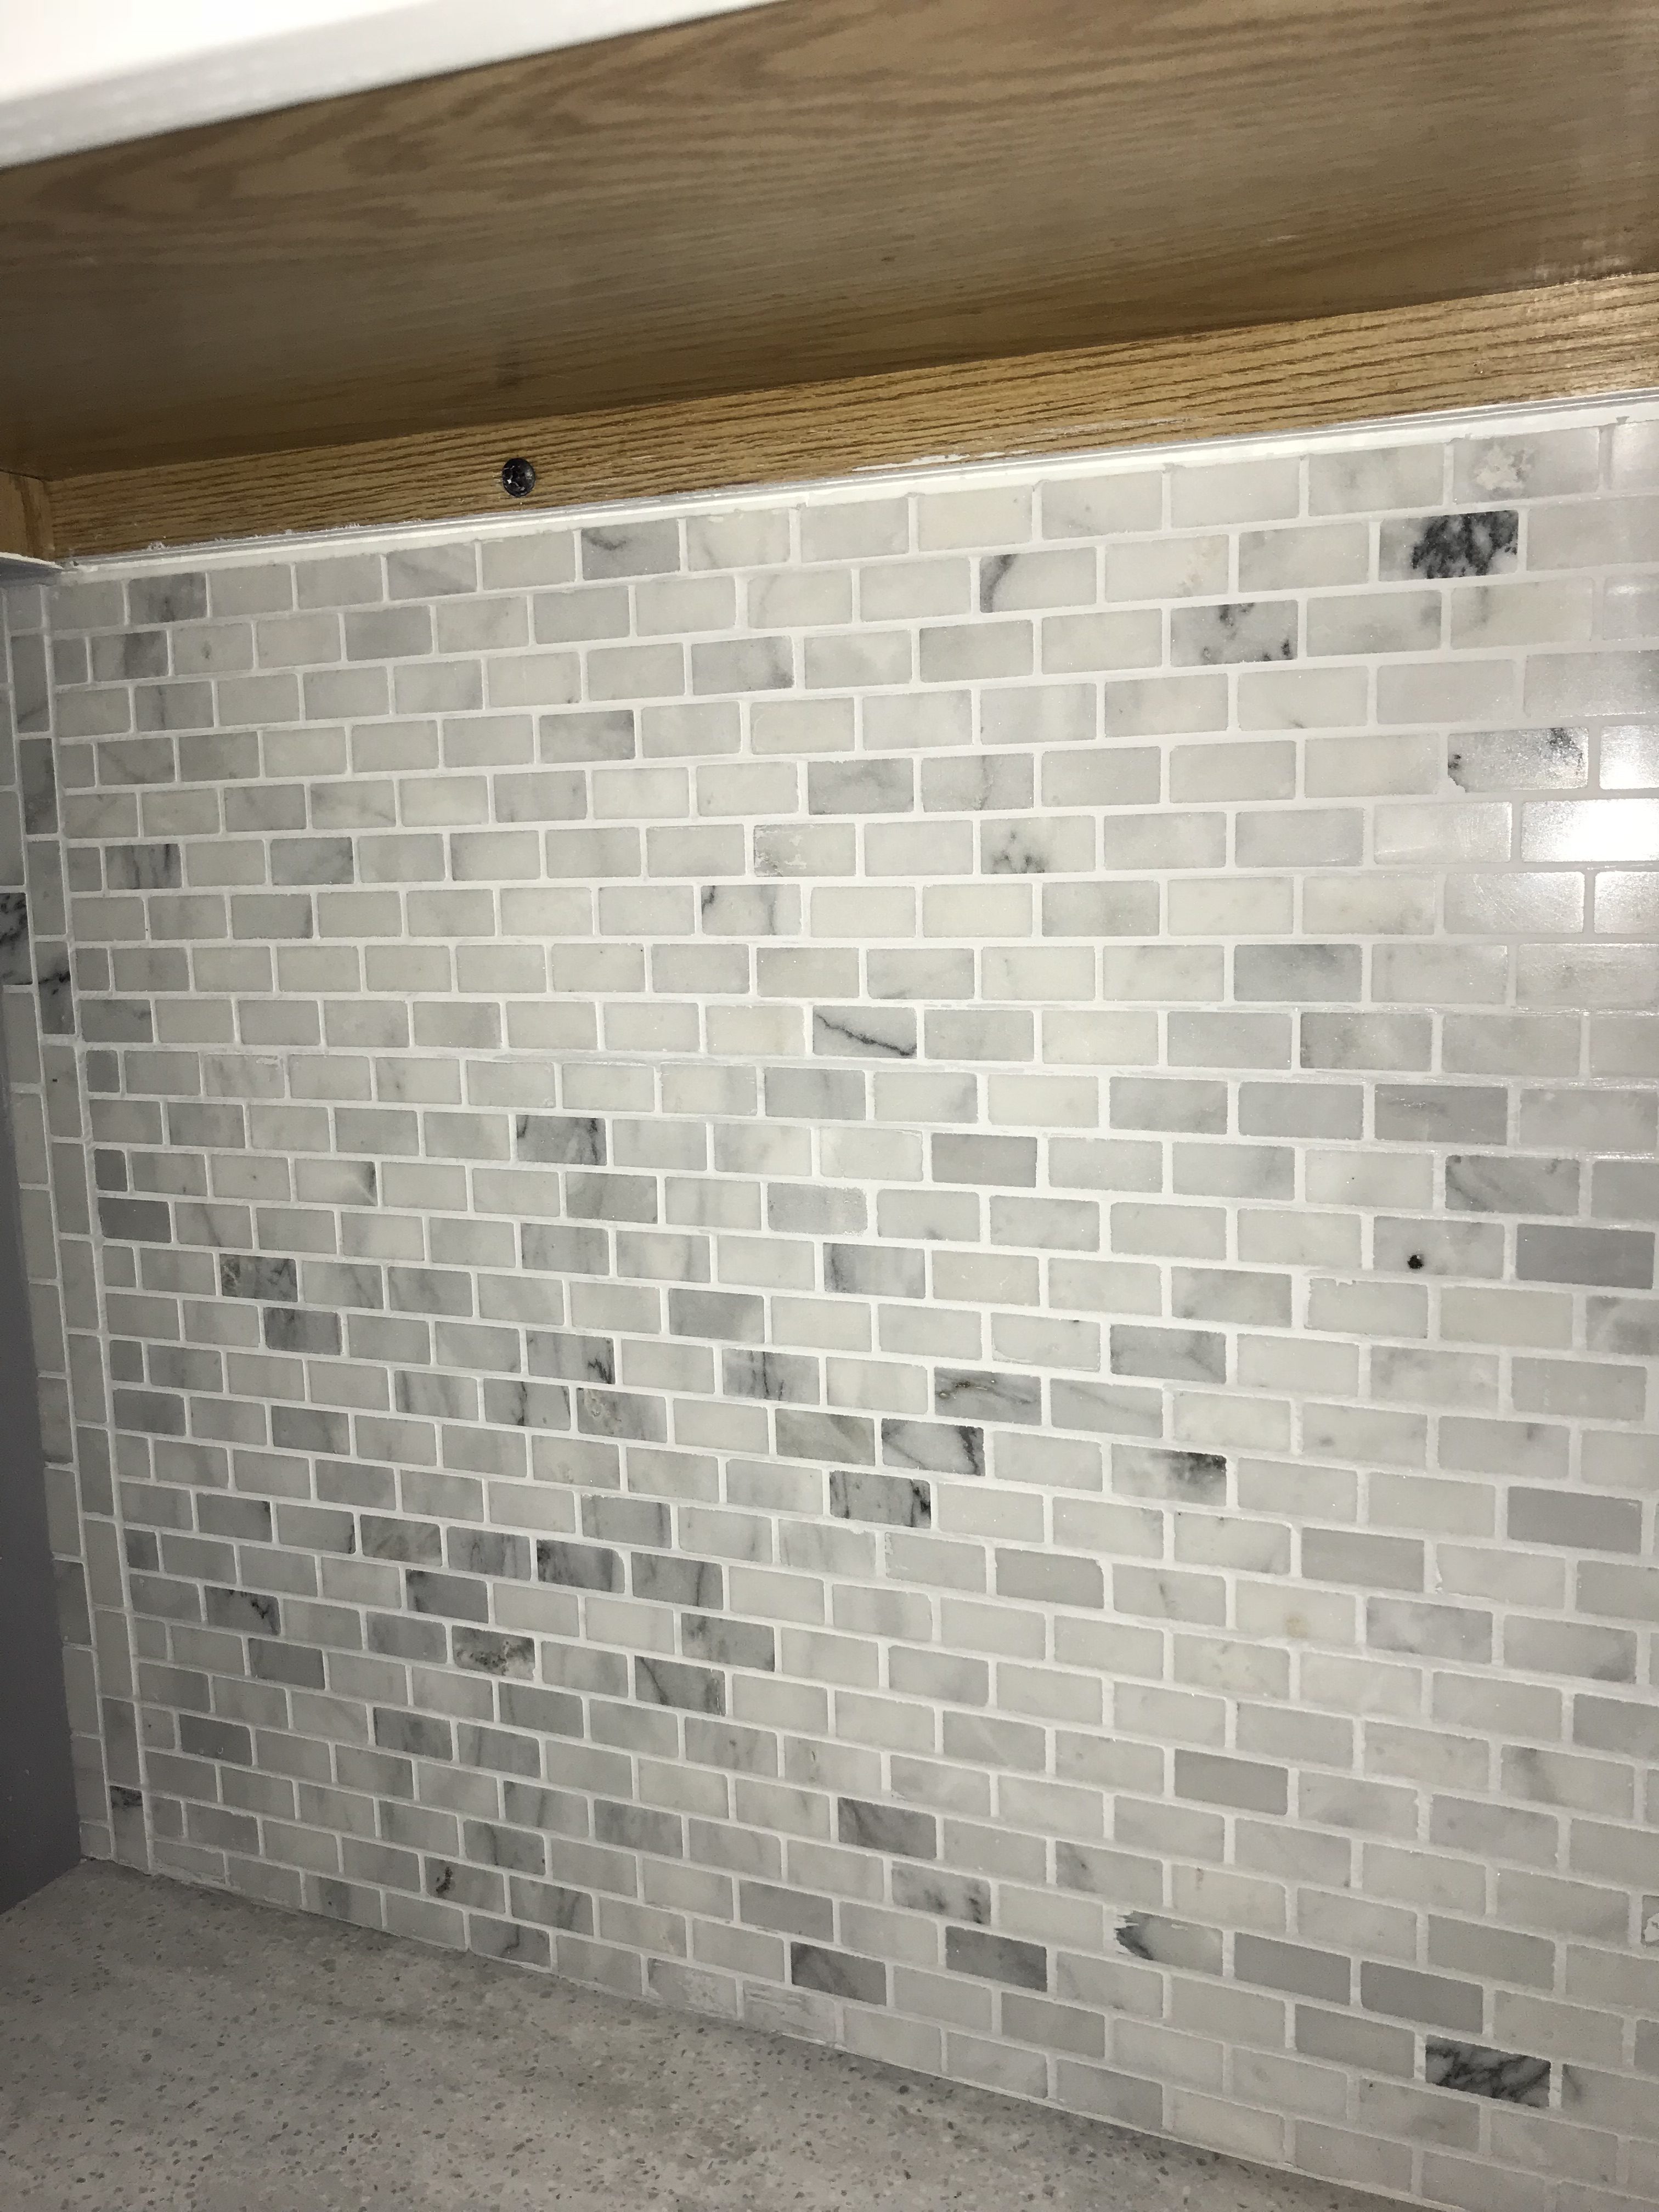
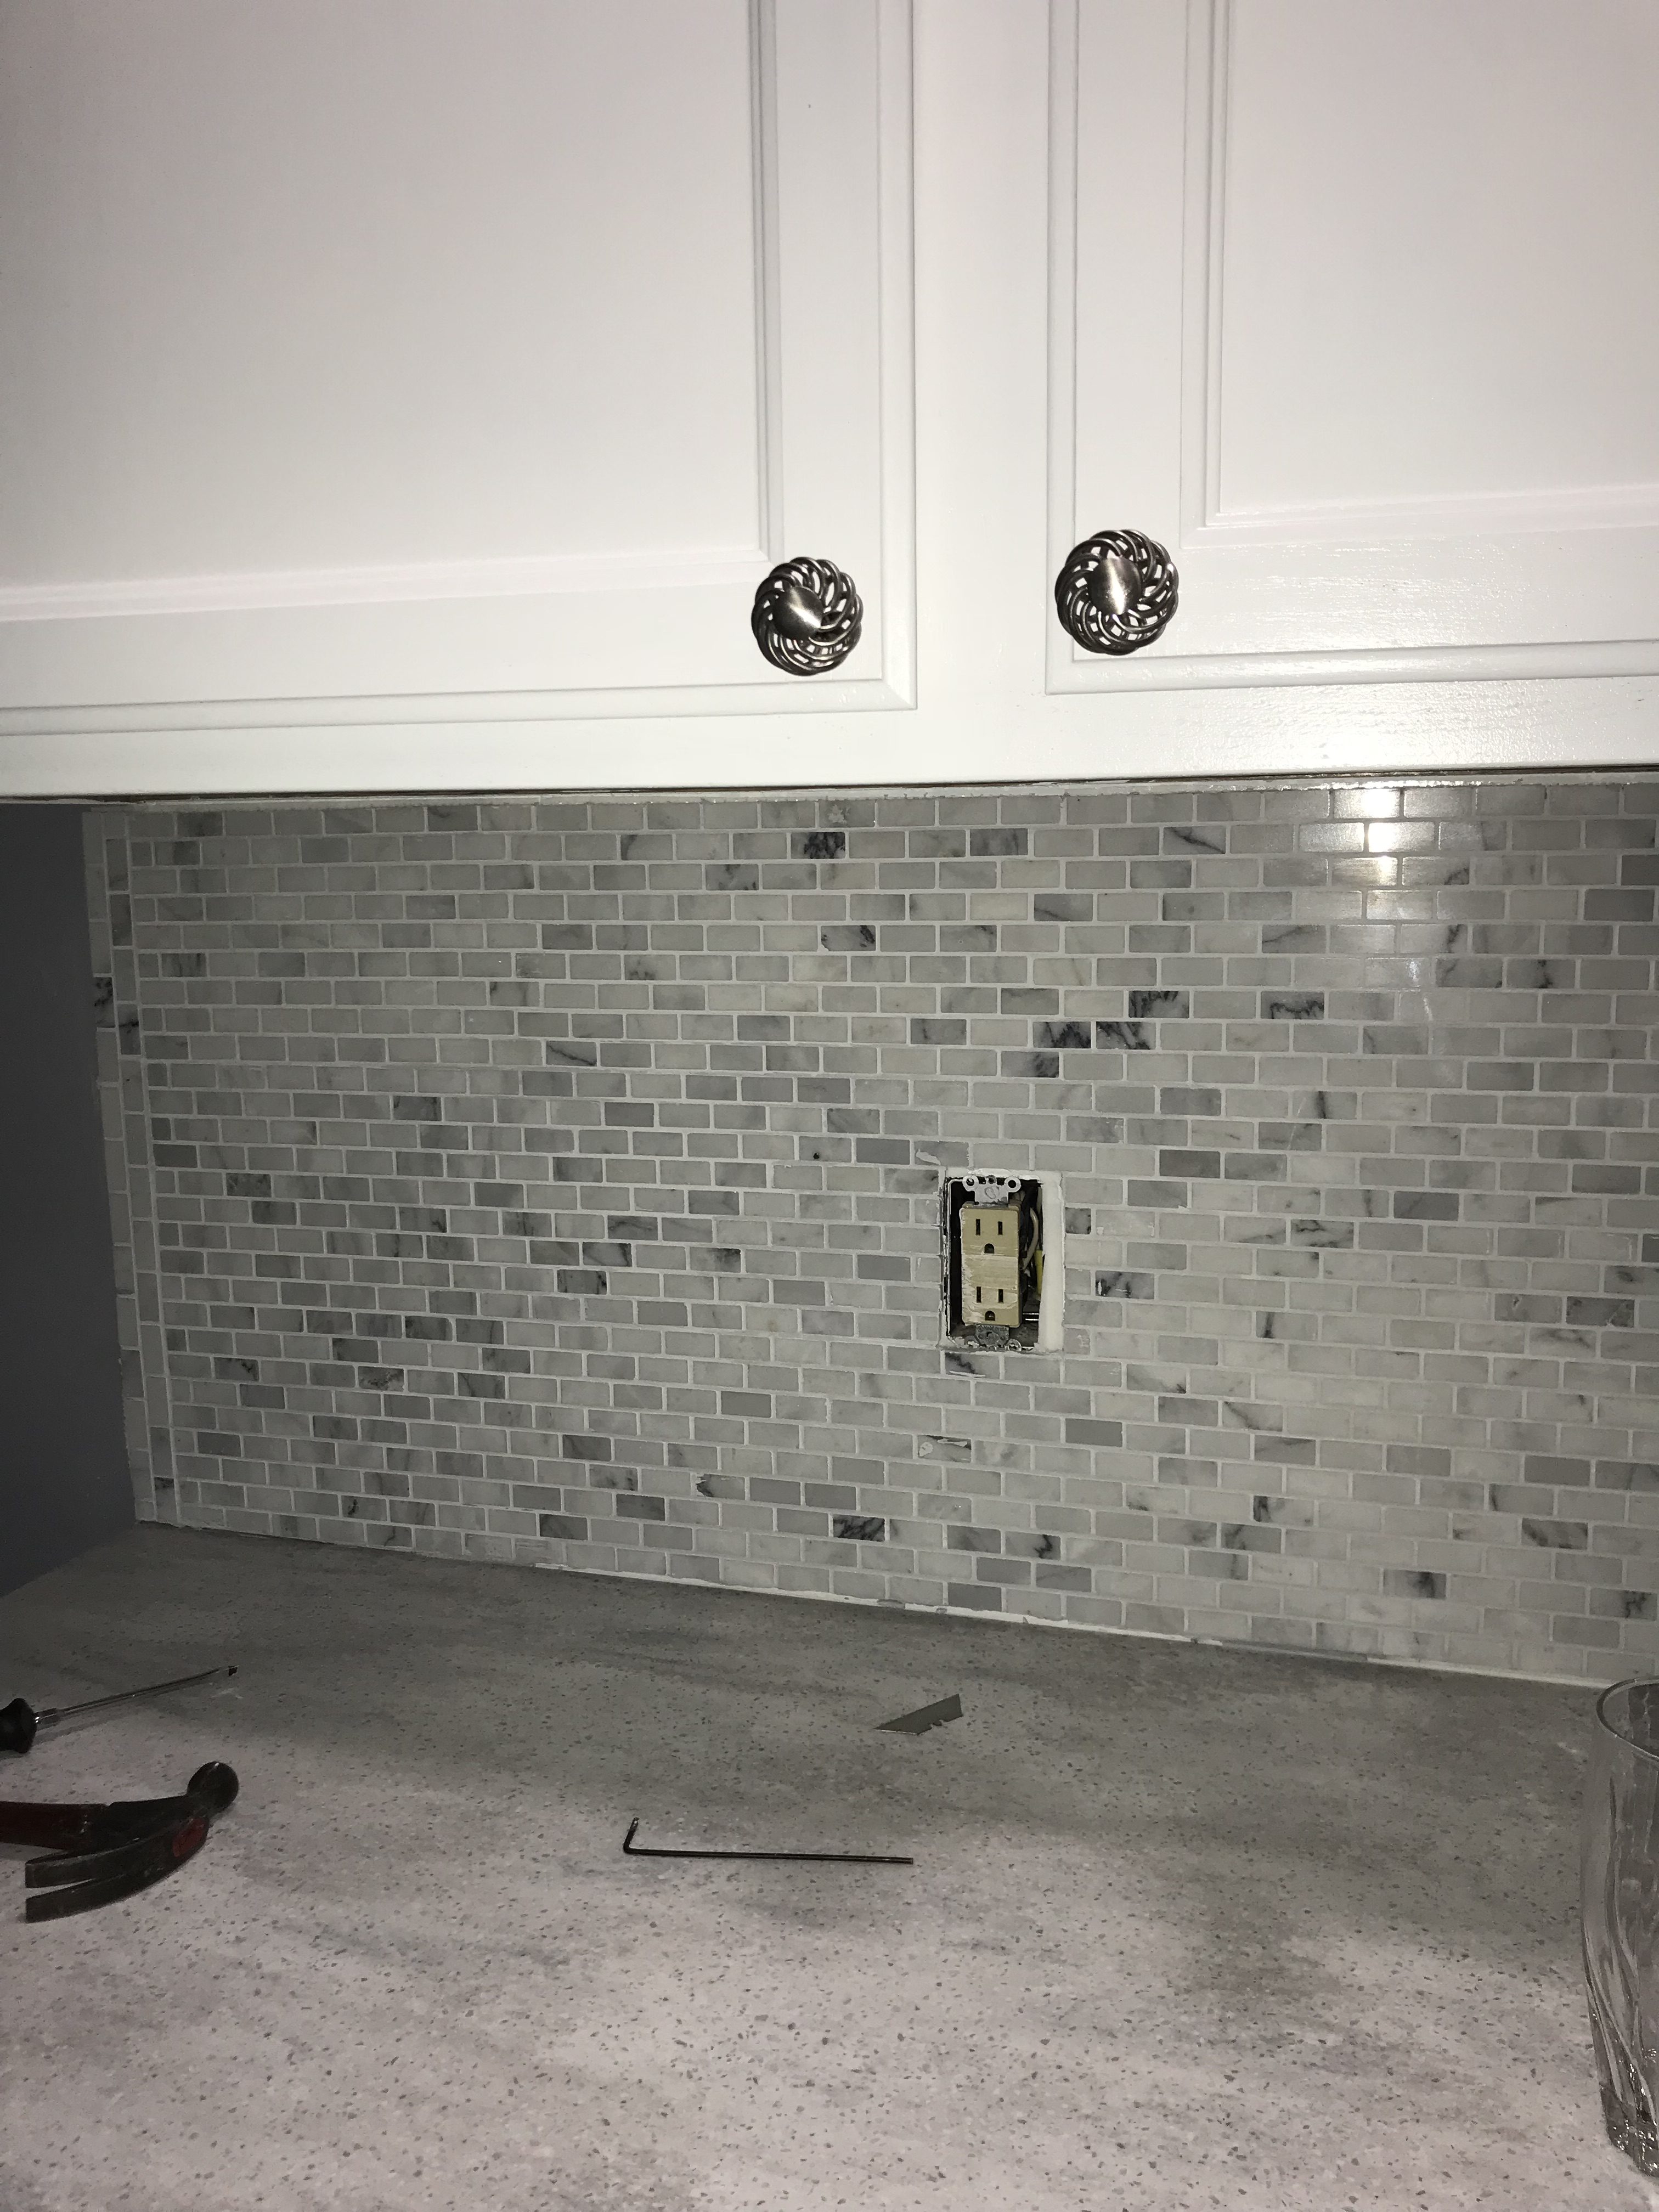
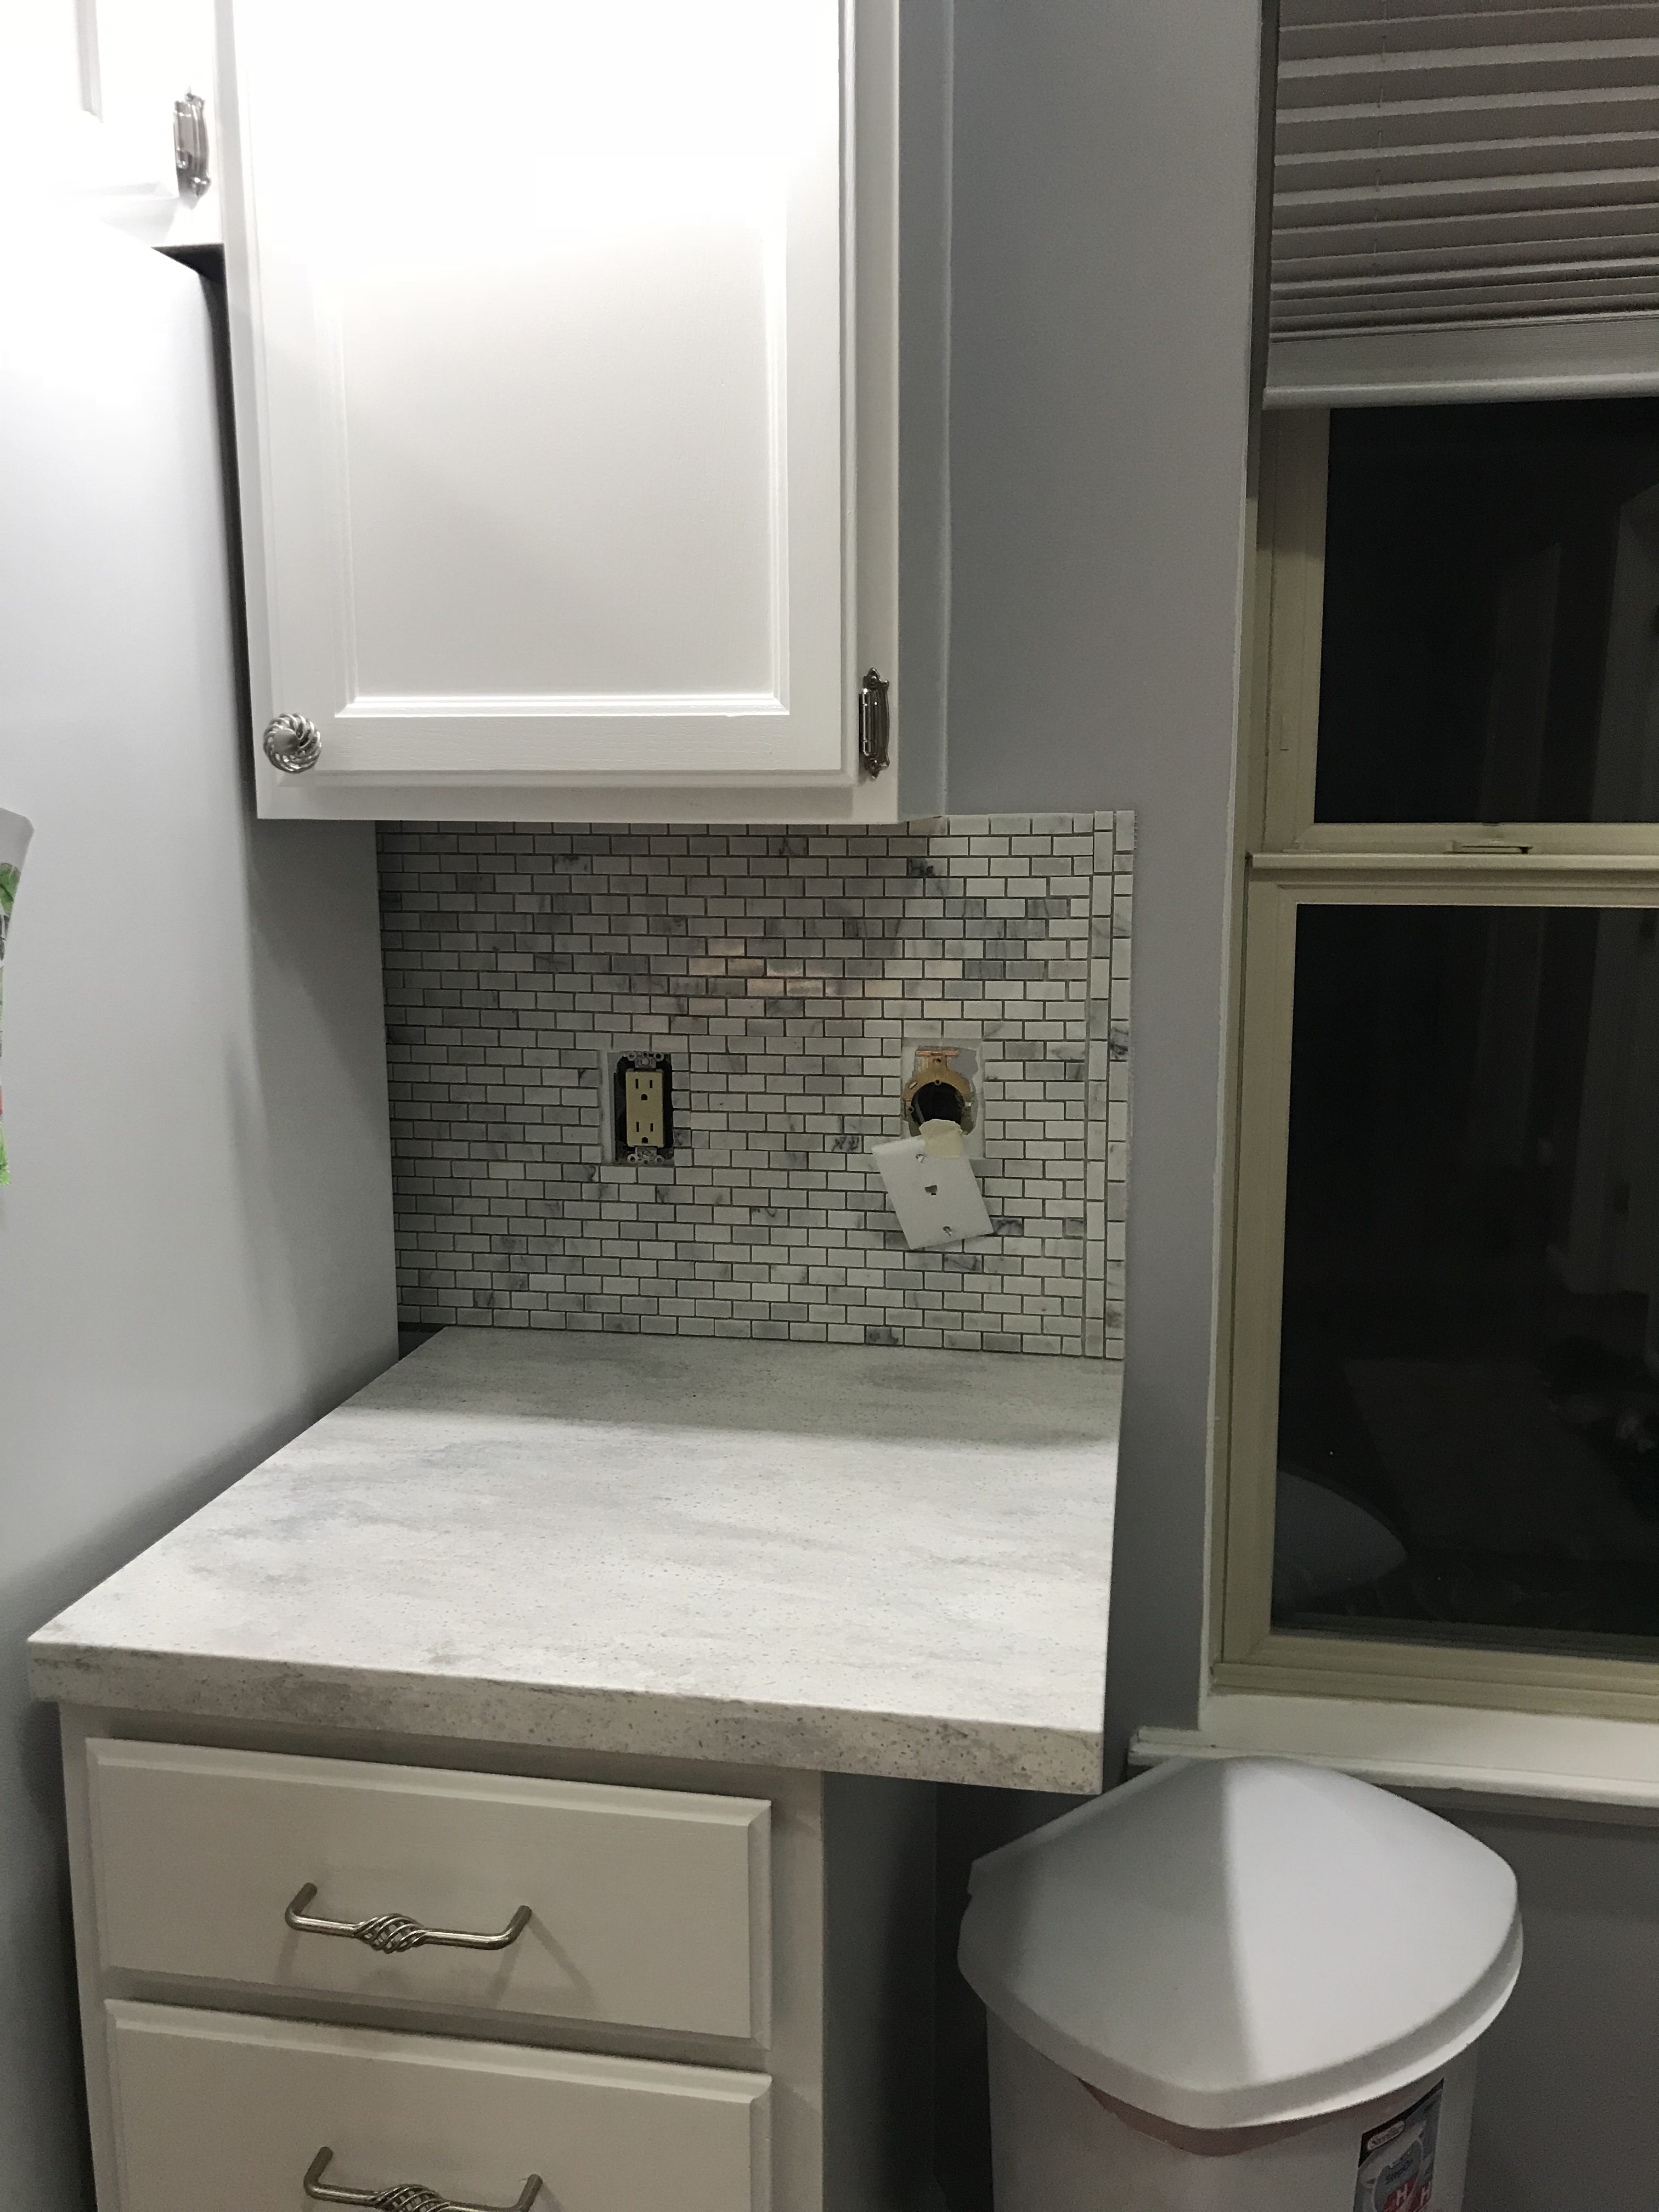
14. BACKSPLASH
OK – Here is the scariest thing I took on. I knew I wanted to add a tile backsplash and considered having someone install it but the labor was just too much money. The materials alone were expensive but after talking it out with my mom we decided we could do it!
Measure out the backsplash and make a template – I used a lot of cardboard for this and a big laydown area.
You’ll want to tape off your walls, cabinets and countertops so they do not get grout or adhesive on them. I used butchers’ paper for the countertops.
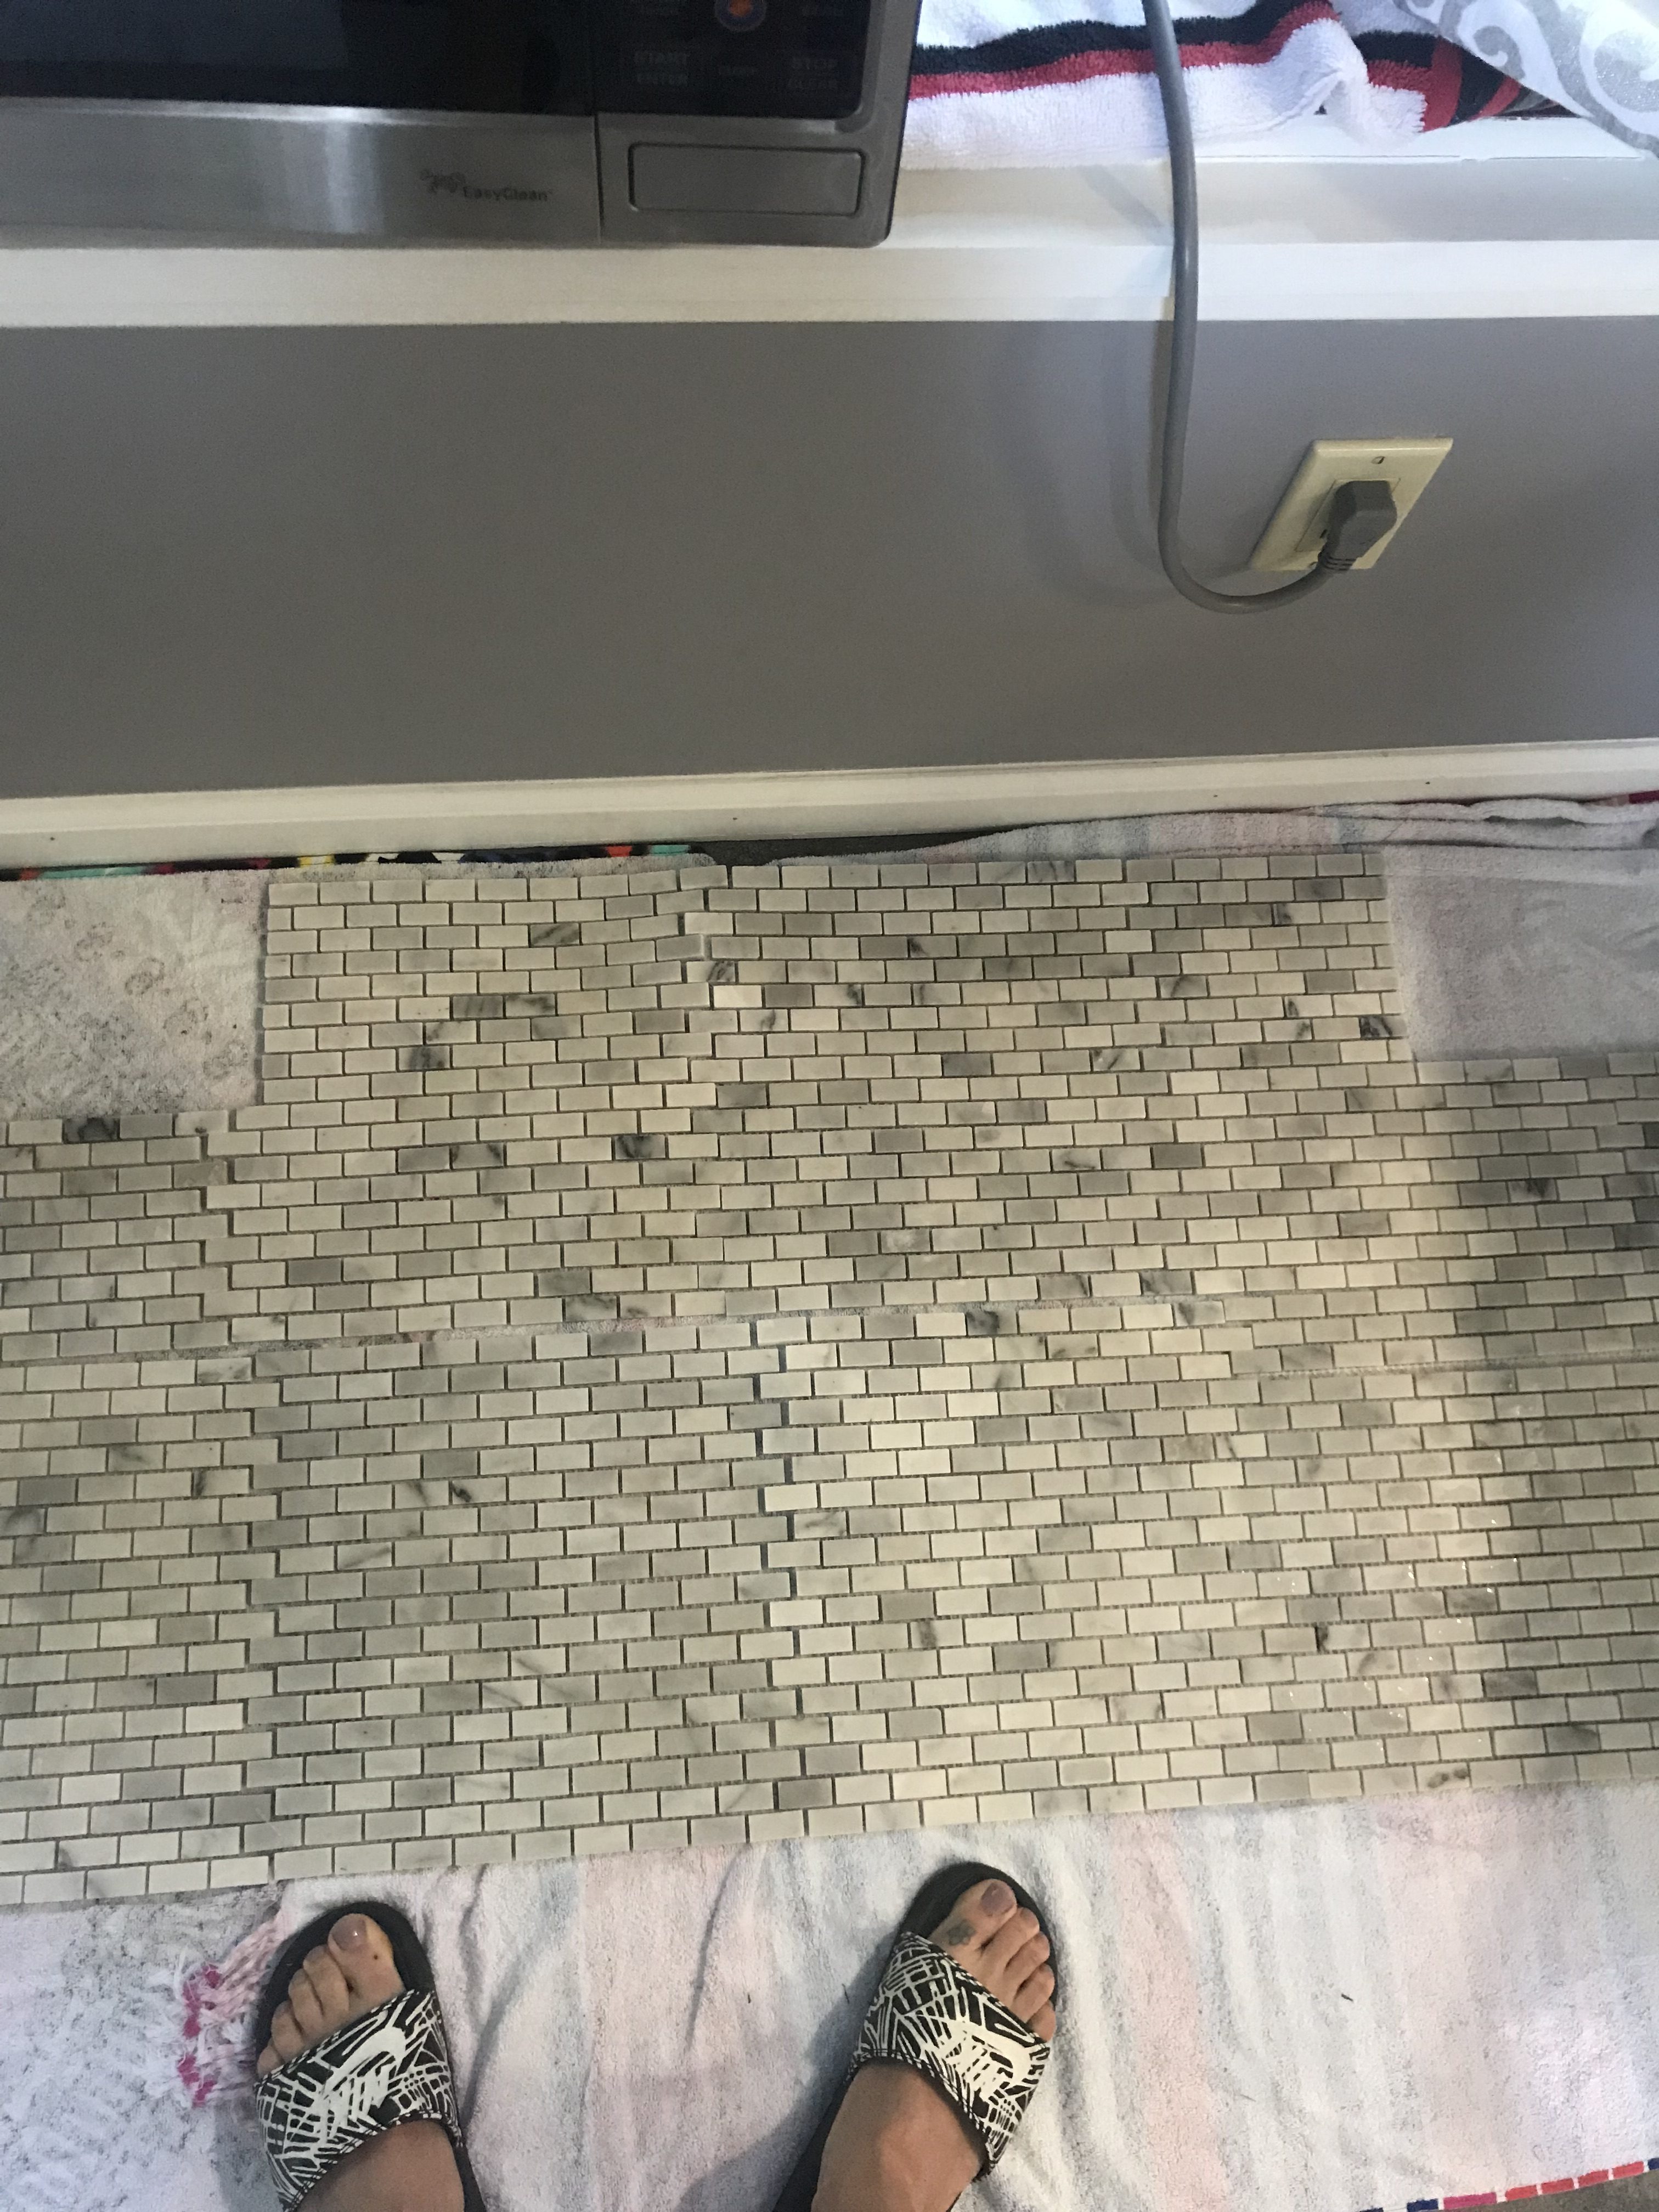
Once you figure out your sq footage you can buy your tiles plus about 10% extra, for cutting and mistakes. You can always take back what you don’t use.
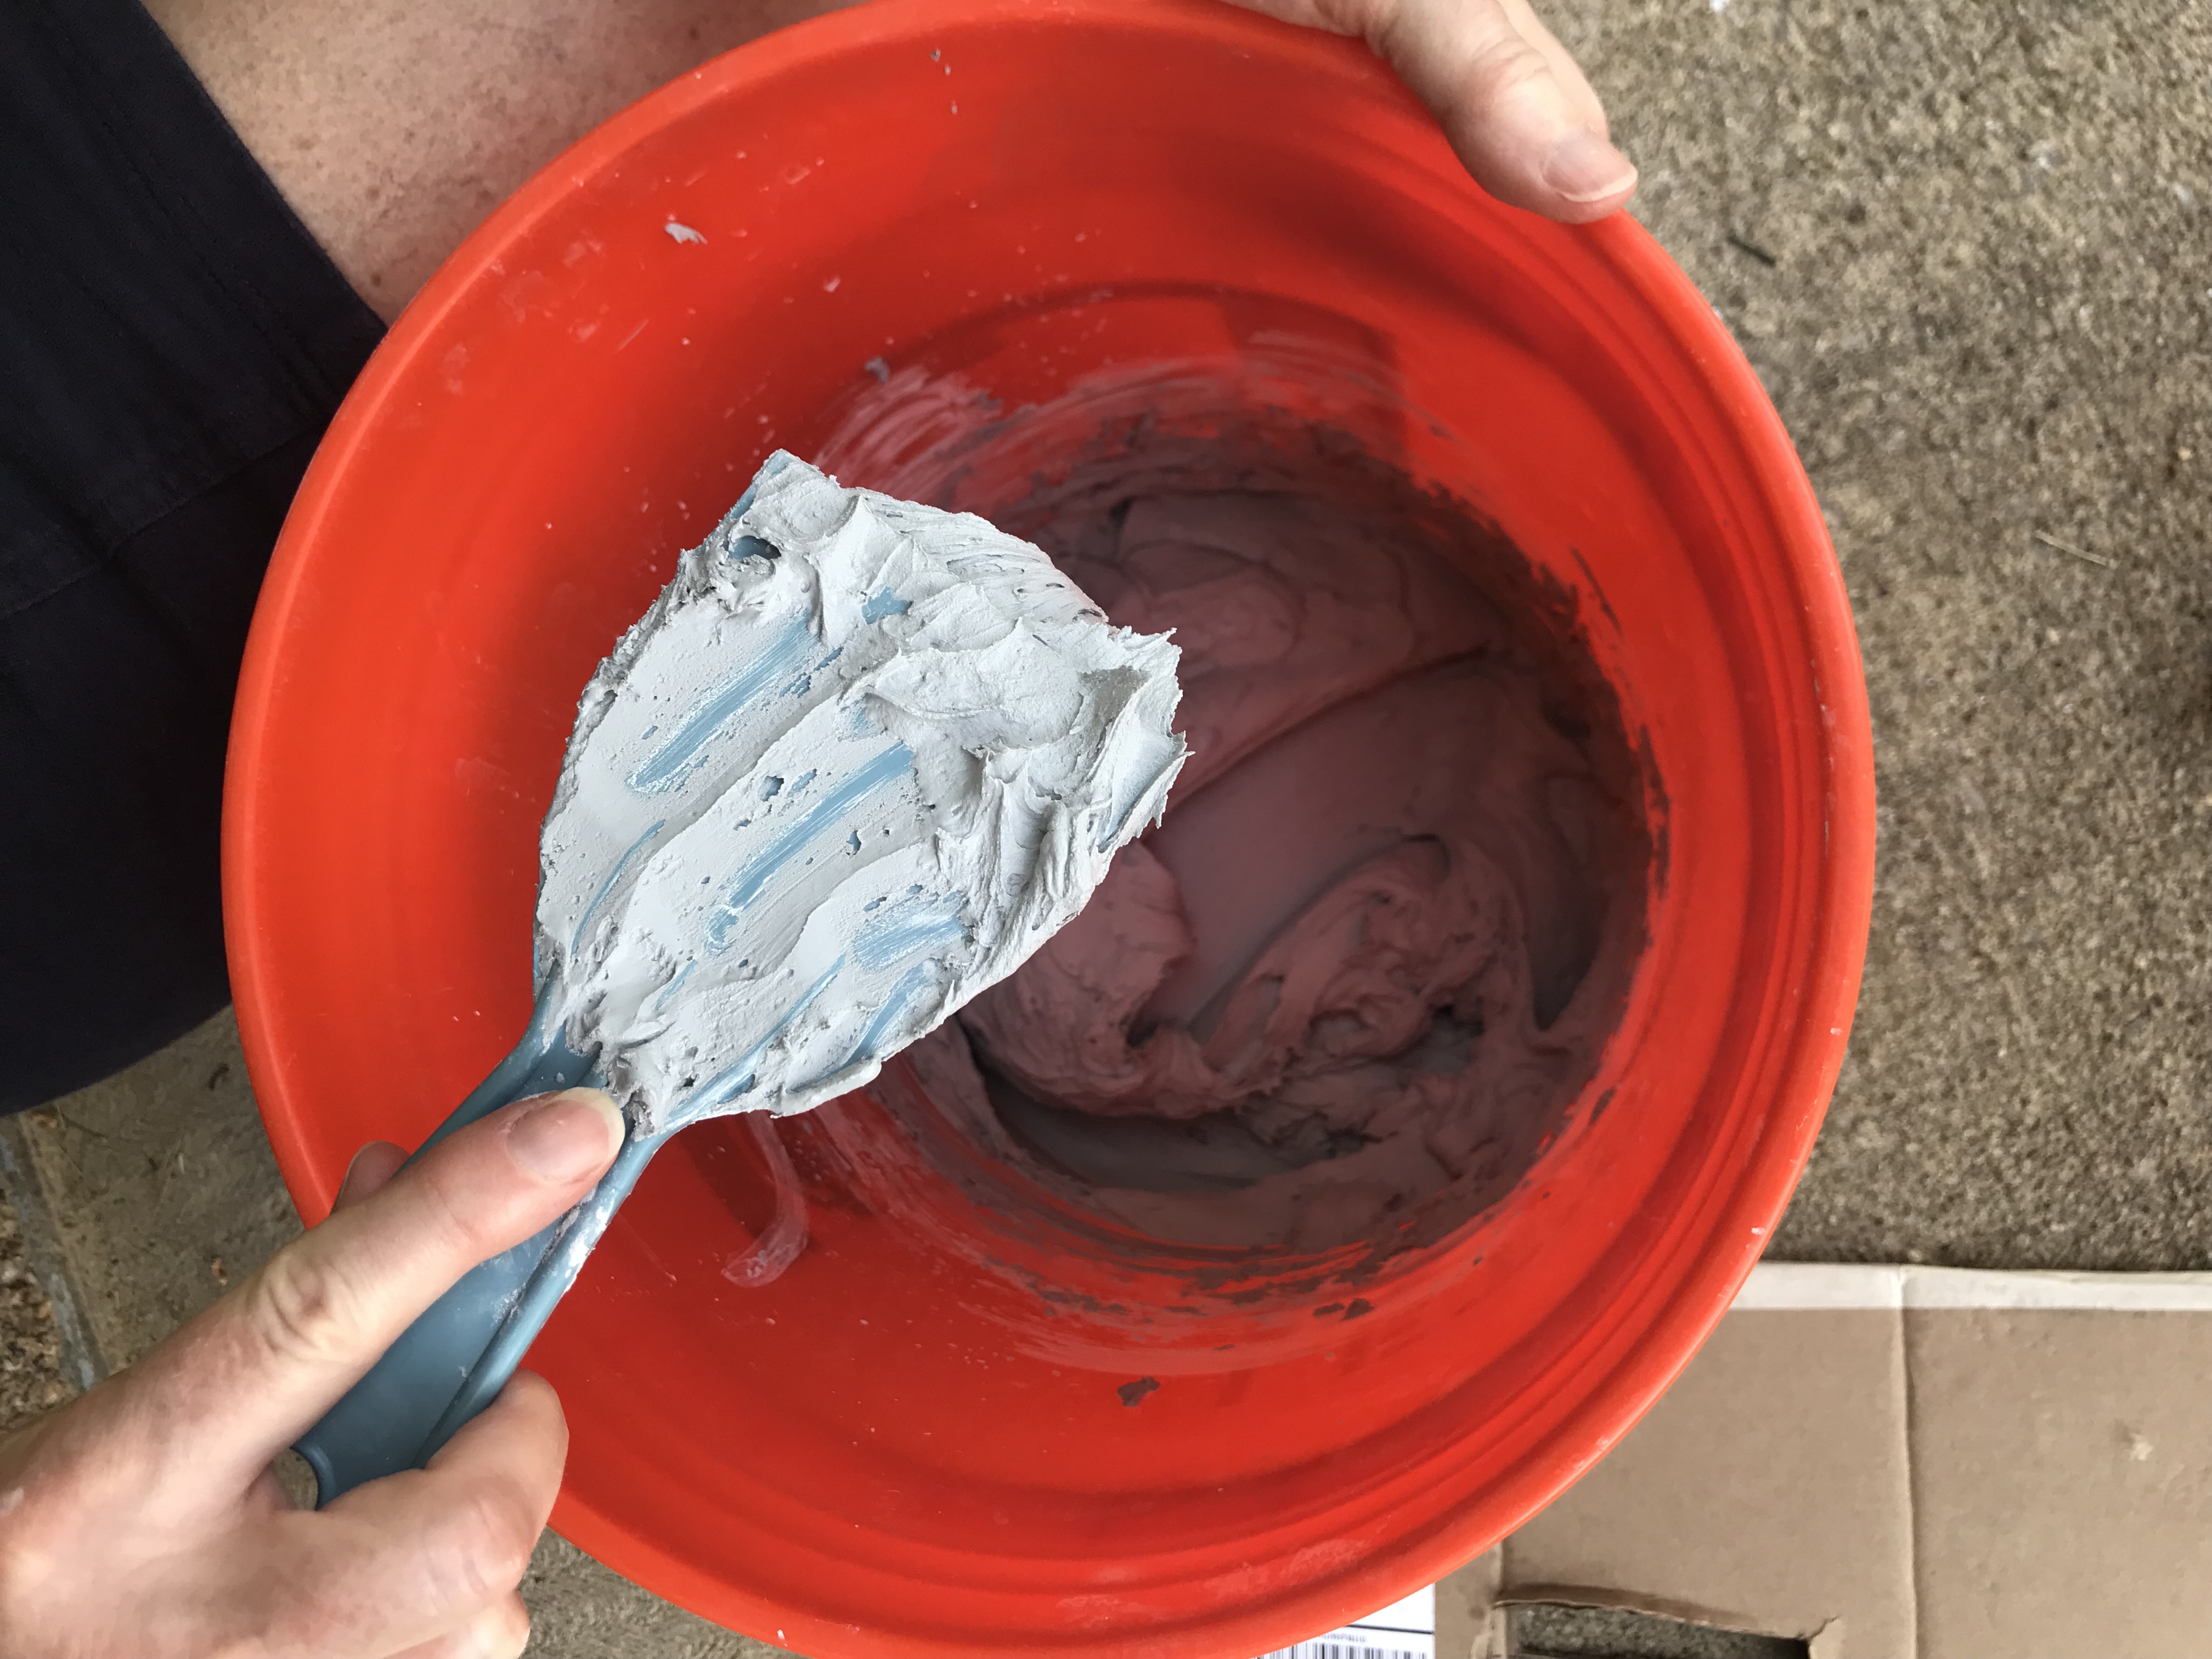
The grout I wanted was gray, so it had to be special ordered. Use unsanded grout! You want to be able to wipe the backsplash when it’s finished. While I waited for that to come in, I started to cut my tiles and allow them to dry.
I do not know how people cut ties and then apply right to the wall… my tiles held so much water so just be mindful of that.
I also just had enough grout to finish the wall. Buy more than you think you’ll need!
For the adhesive I used MUSSLEBOUND instead of thinset. I knew I could not work fast enough with the thinset and the tiny tiles I bought.
This was NOT an easy process to cut and get on the walls, but it works a lot like double sided tape and gave me more time to work on this project at my own pace.
You’ll want a sharp utility knife and a large plastic cutting board you don’t care about ruining.
It took both my mom and myself to unroll this, cut it and apply it evenly to the wall. This can be a pain because all walls are NOT created equal or level. (not the products fault).
Once you apply the sticky “WALL SIDE” to the wall you’ll use a float to press it on the wall and smooth it out. I let this sit overnight to adjust for any temperature changes and to make sure it didn’t peel off.
When you’re ready, peel off the front of the Musslebound and be ready to work.
By this time my tiles were dry & ready to be applied, my mom and I worked from the bottom of the countertop upward to the cabinets pressing it on firmly with the float again.
After all the tiles were up and filled in, we went over it again with the float and really made sure it was sticking.
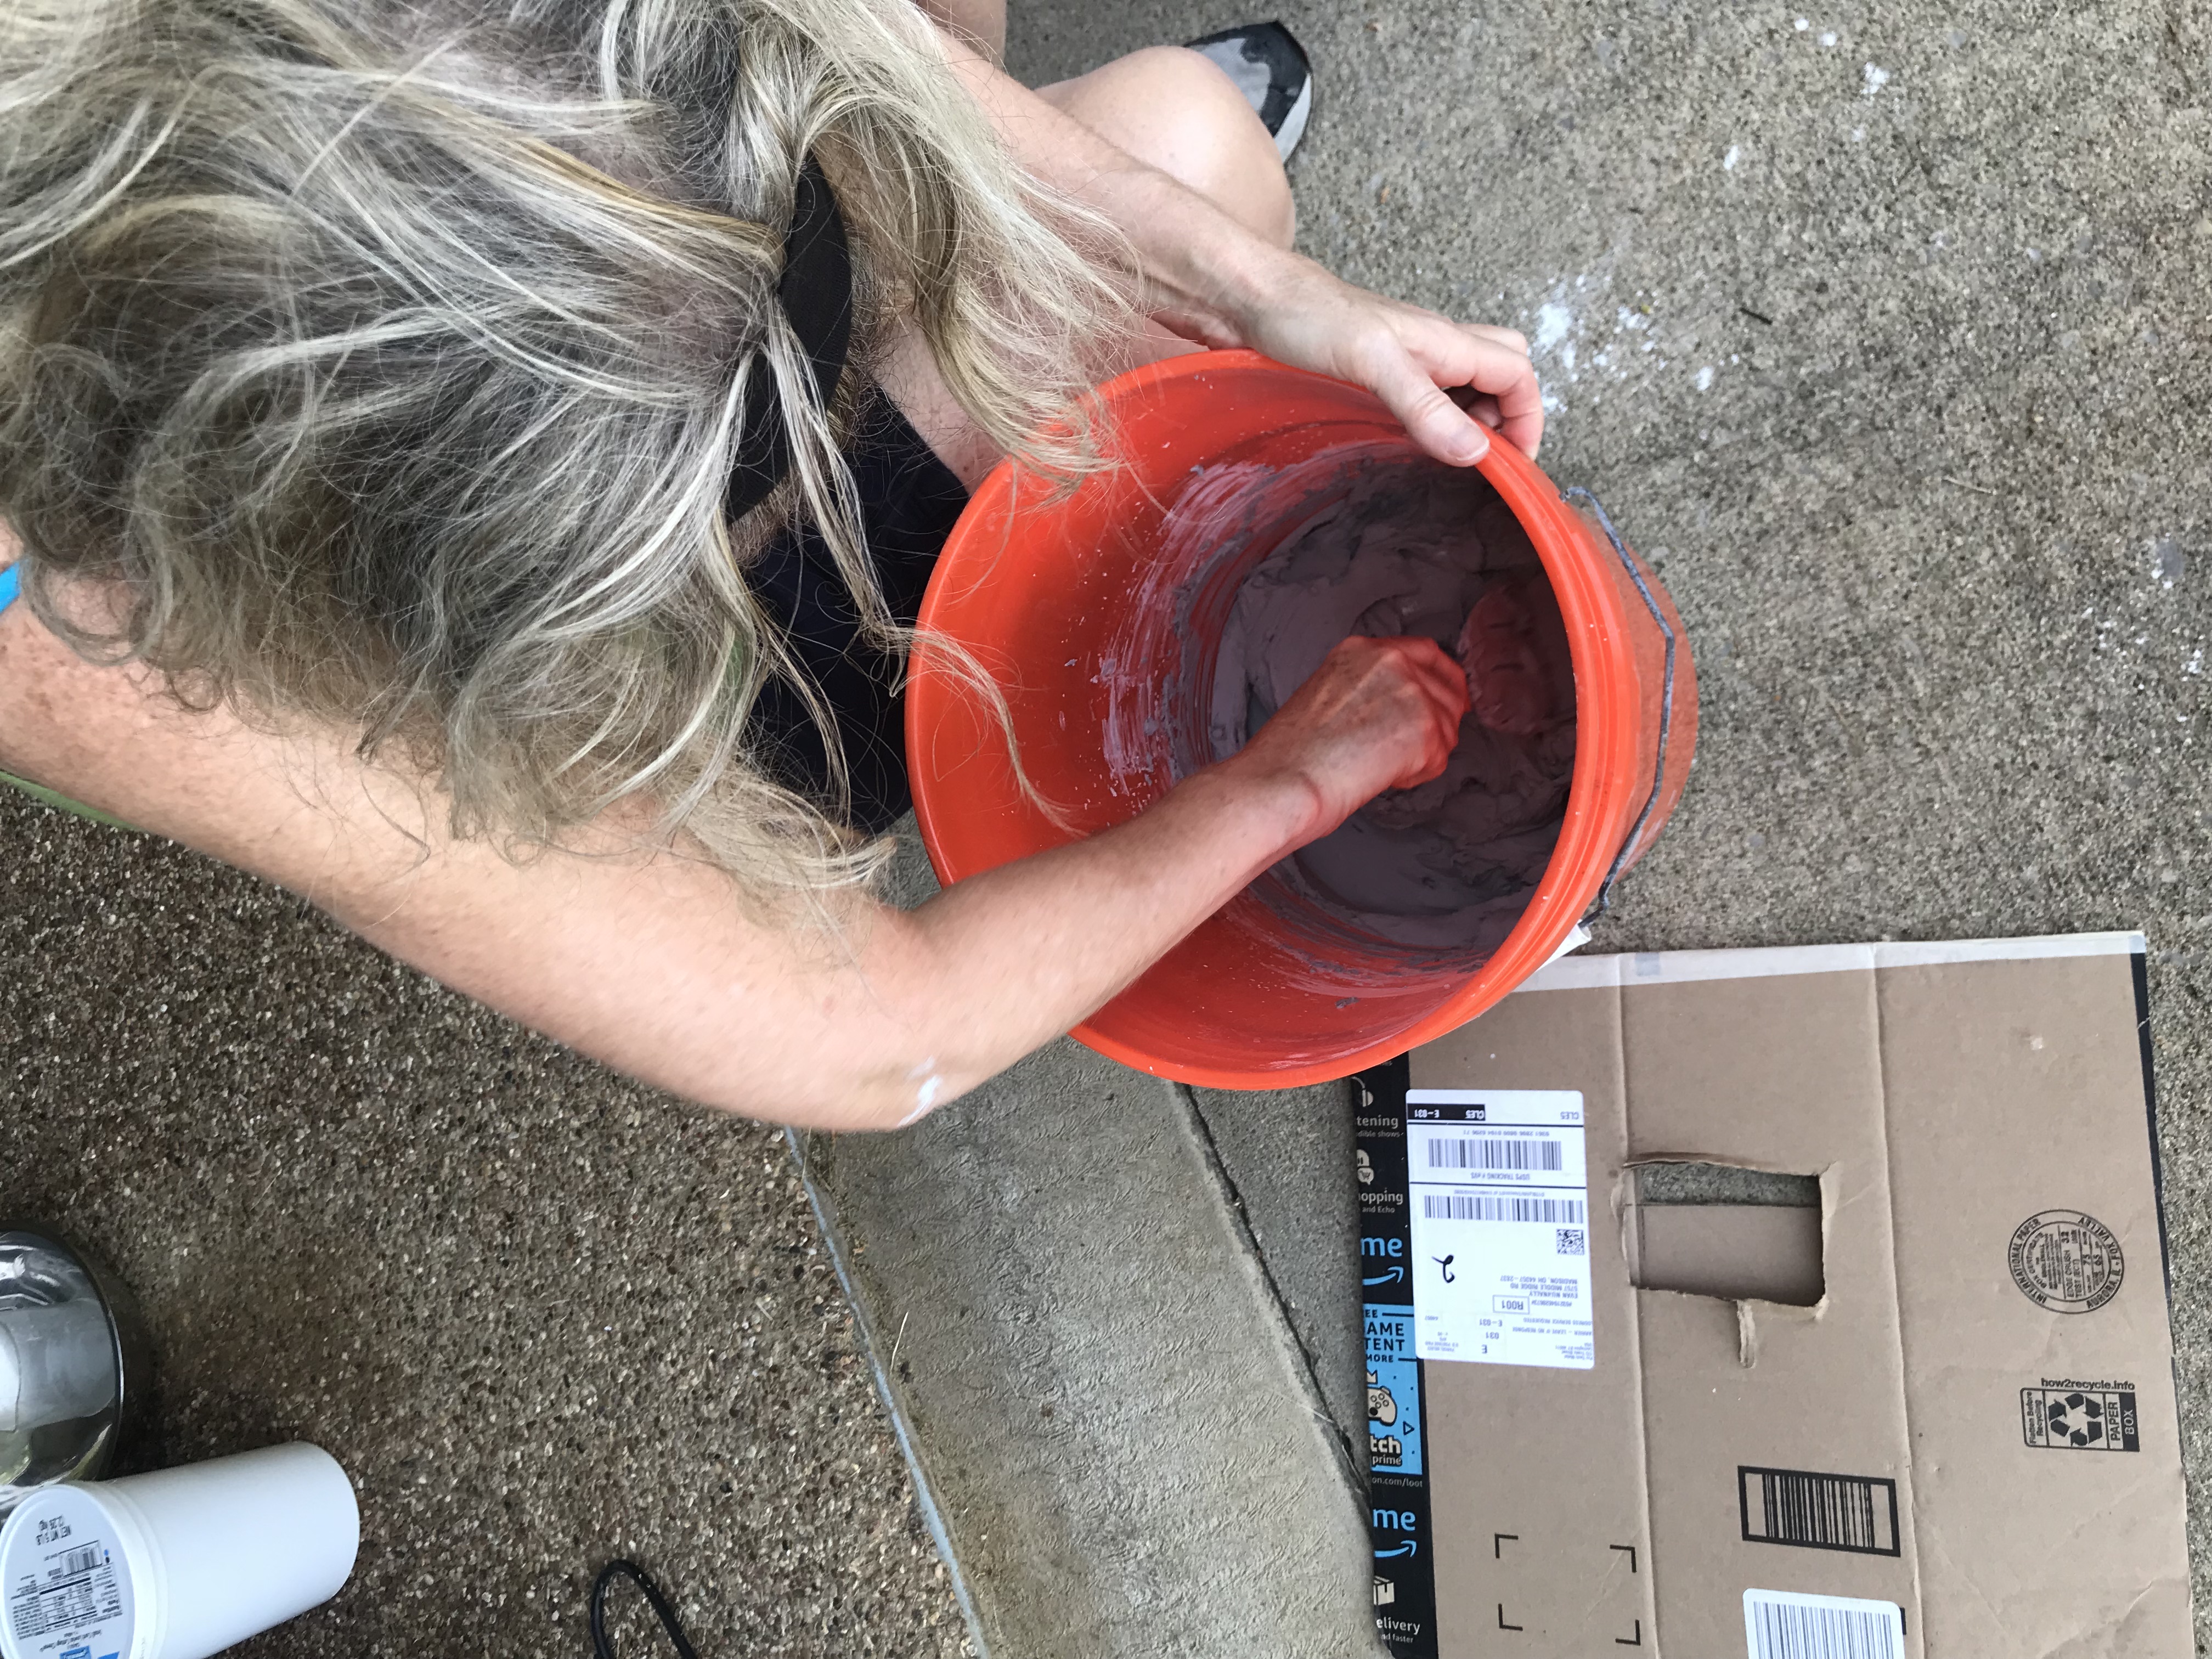
Next came the grout – grout was nerve wrecking because you don’t really know how to mix it. It’s just water a paddle to mix and hope it comes out like cake batter. We had to work realllllly fast with this and getting it in the small tiles was annoyingly time consuming. But we worked in small areas and one person wiped as the other grouted. I probably needed to wipe a lot faster and have more buckets of clean water there for the grout to not set so fast.
After it was all in and cleaned up we let it sit and dry. Is it 100% perfect, no… but I’m happy with it and I think it looks great for my first job.
I caulked all the edges, under the cabinets, sides and countertops and let this dry… sometimes it shrinks so you may have to do this a few times.
Lastly I sealed the tiles since it’ll be near cooking areas and subject to splashing. I used Miracle Sealants 511 Stone Sealer – just follow the directions – easy peasy.

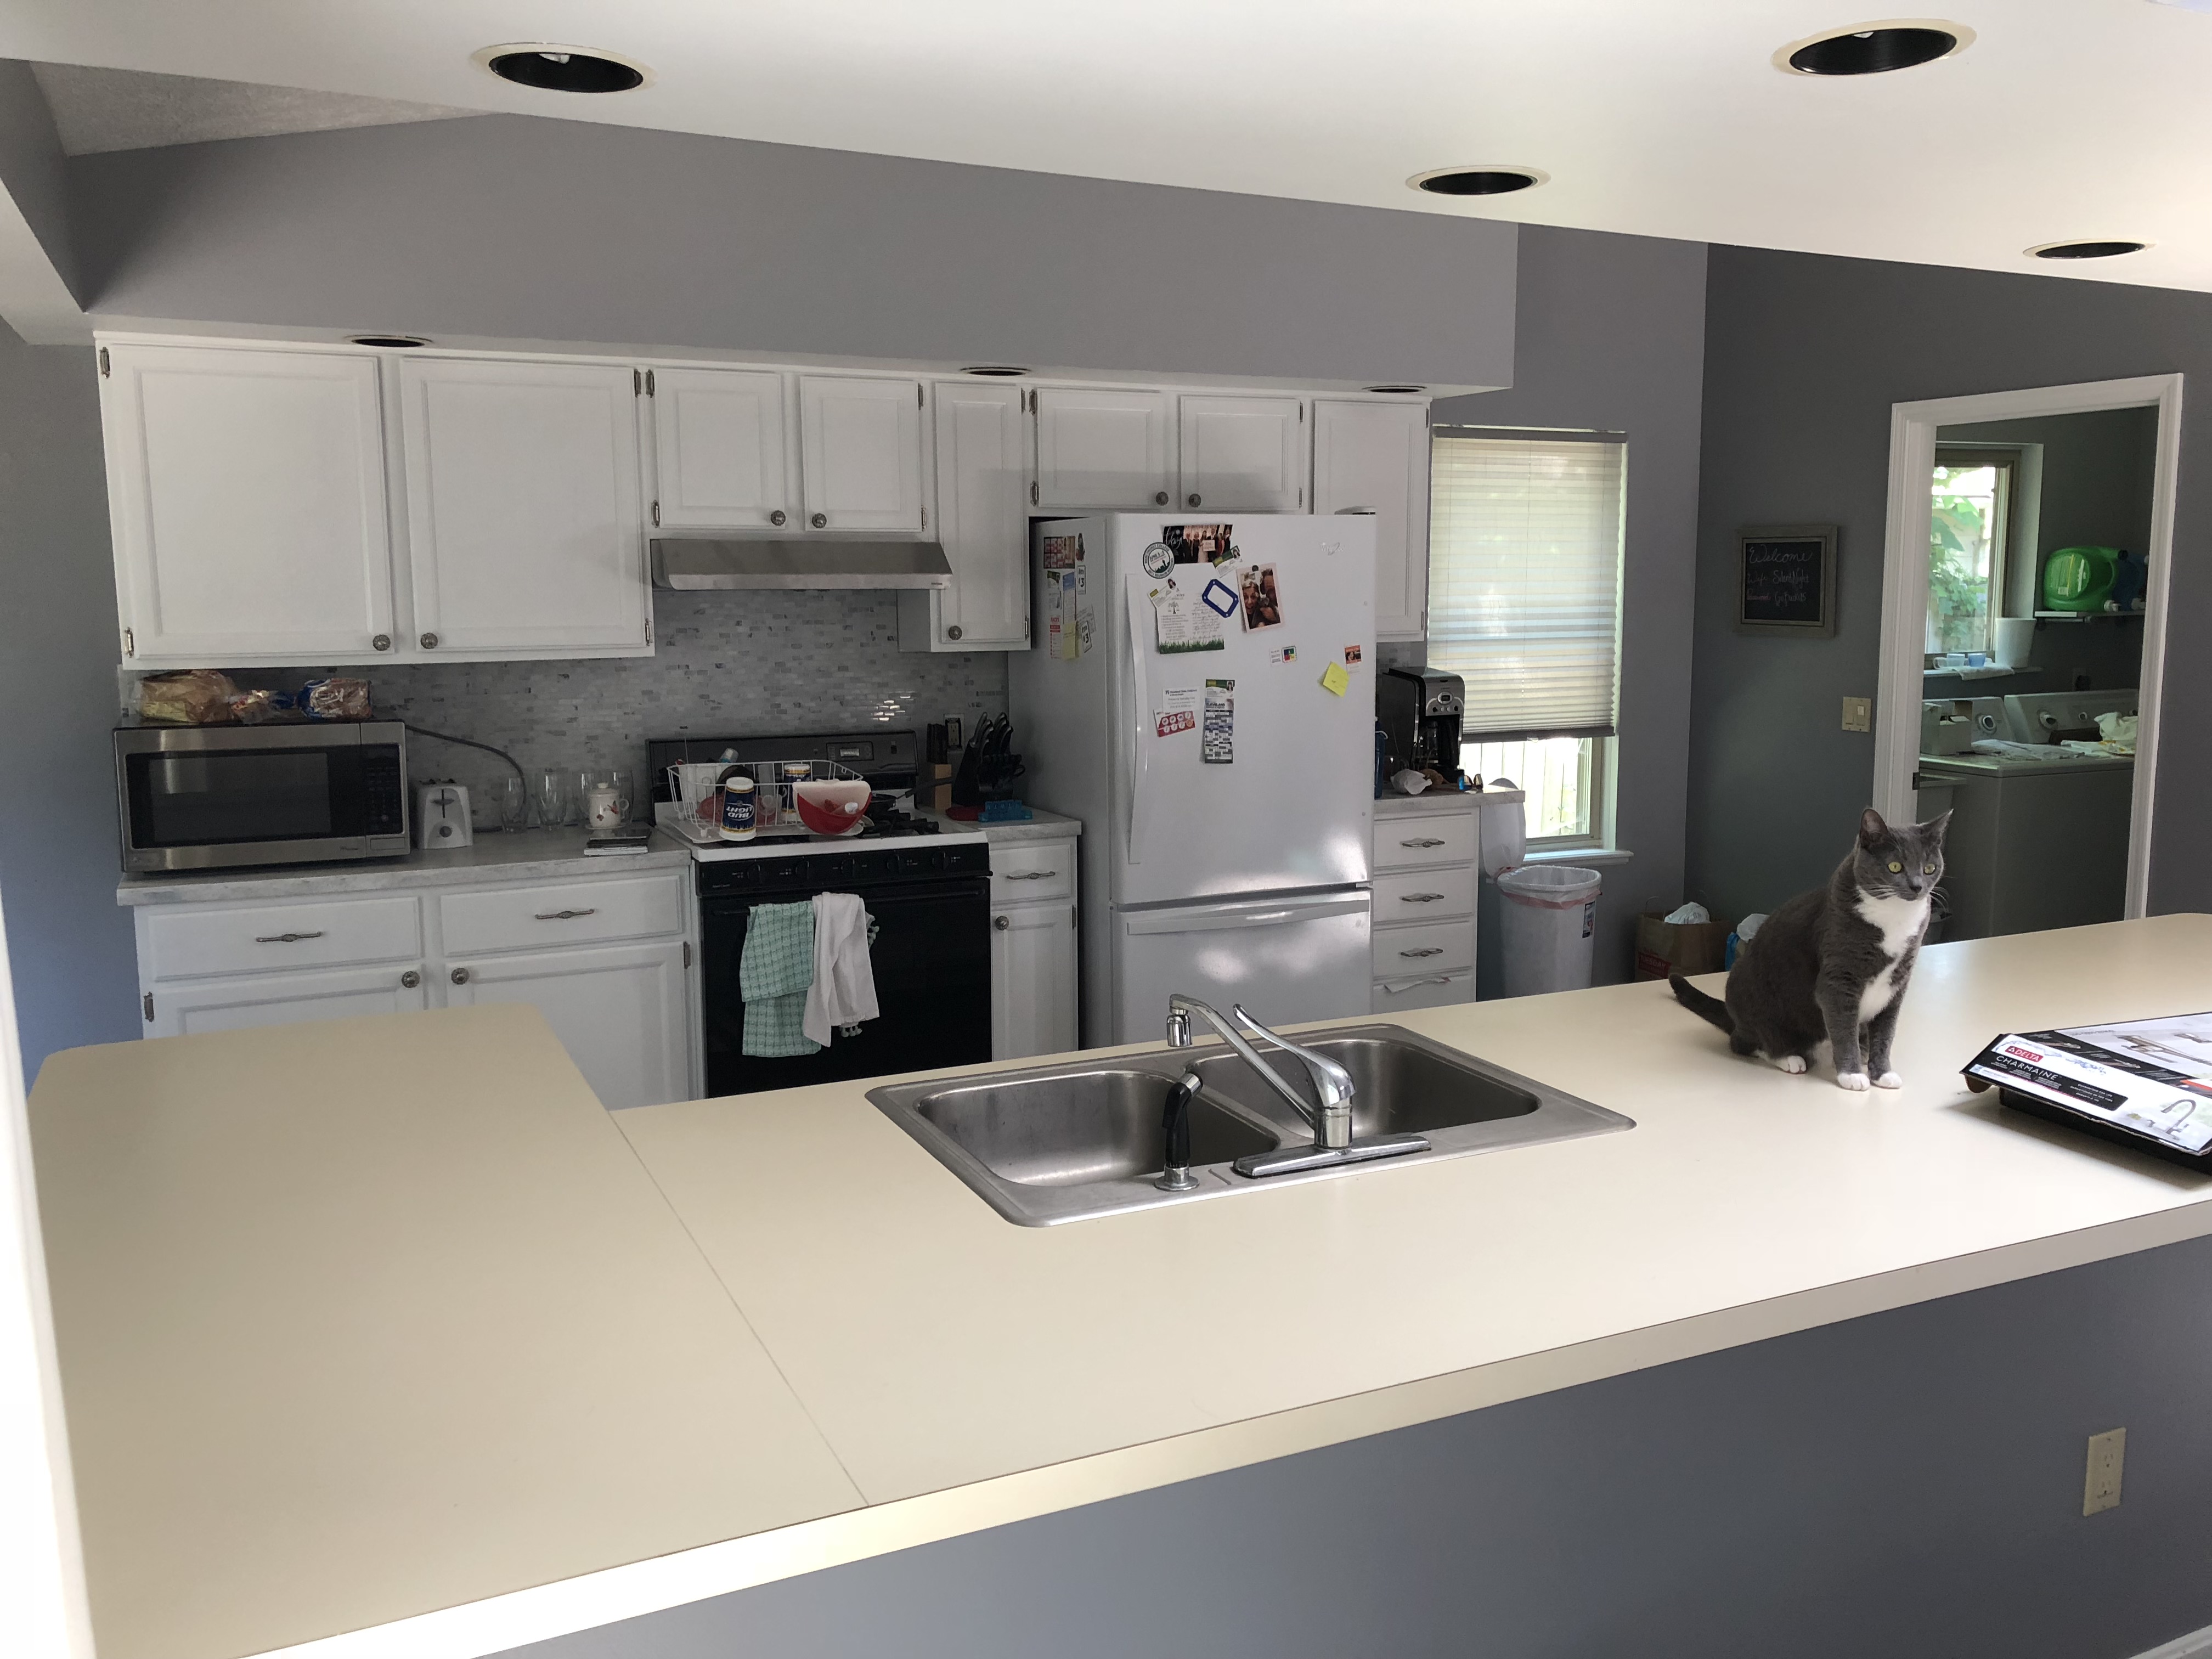
So that’s it i think!? Let me know if I forgot anything or ask me any questions you may have! I hope you get the courage to try more in your home…
Below I gave the pricing for all my components & ended up just under $4,000 for this DIY!
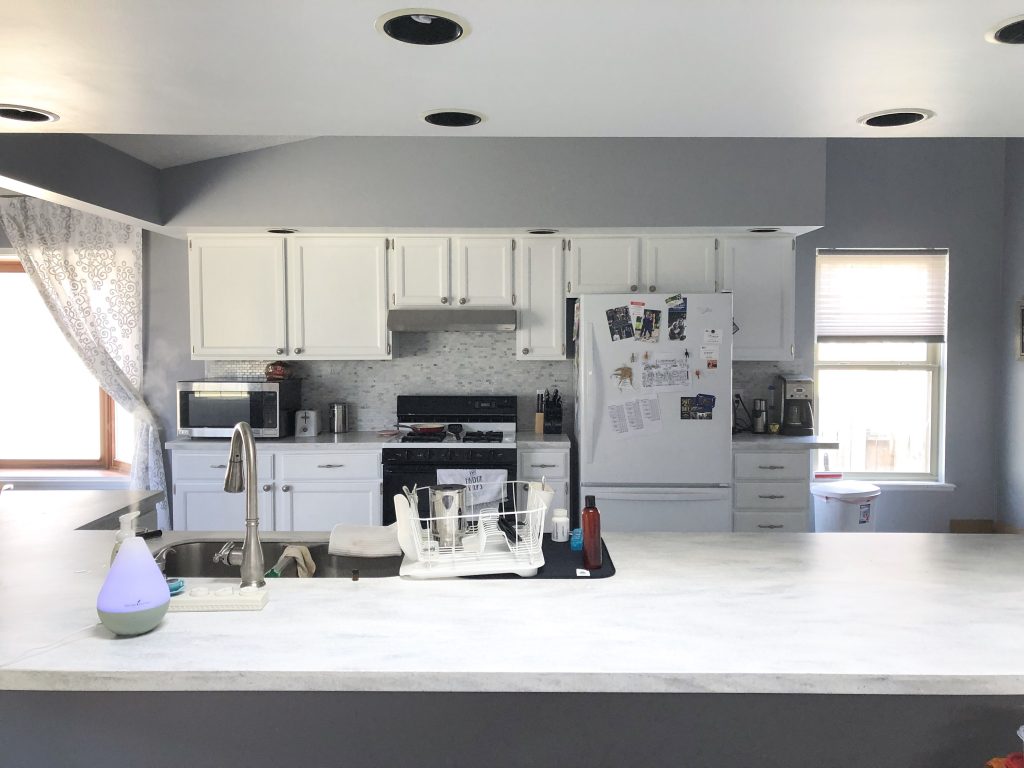
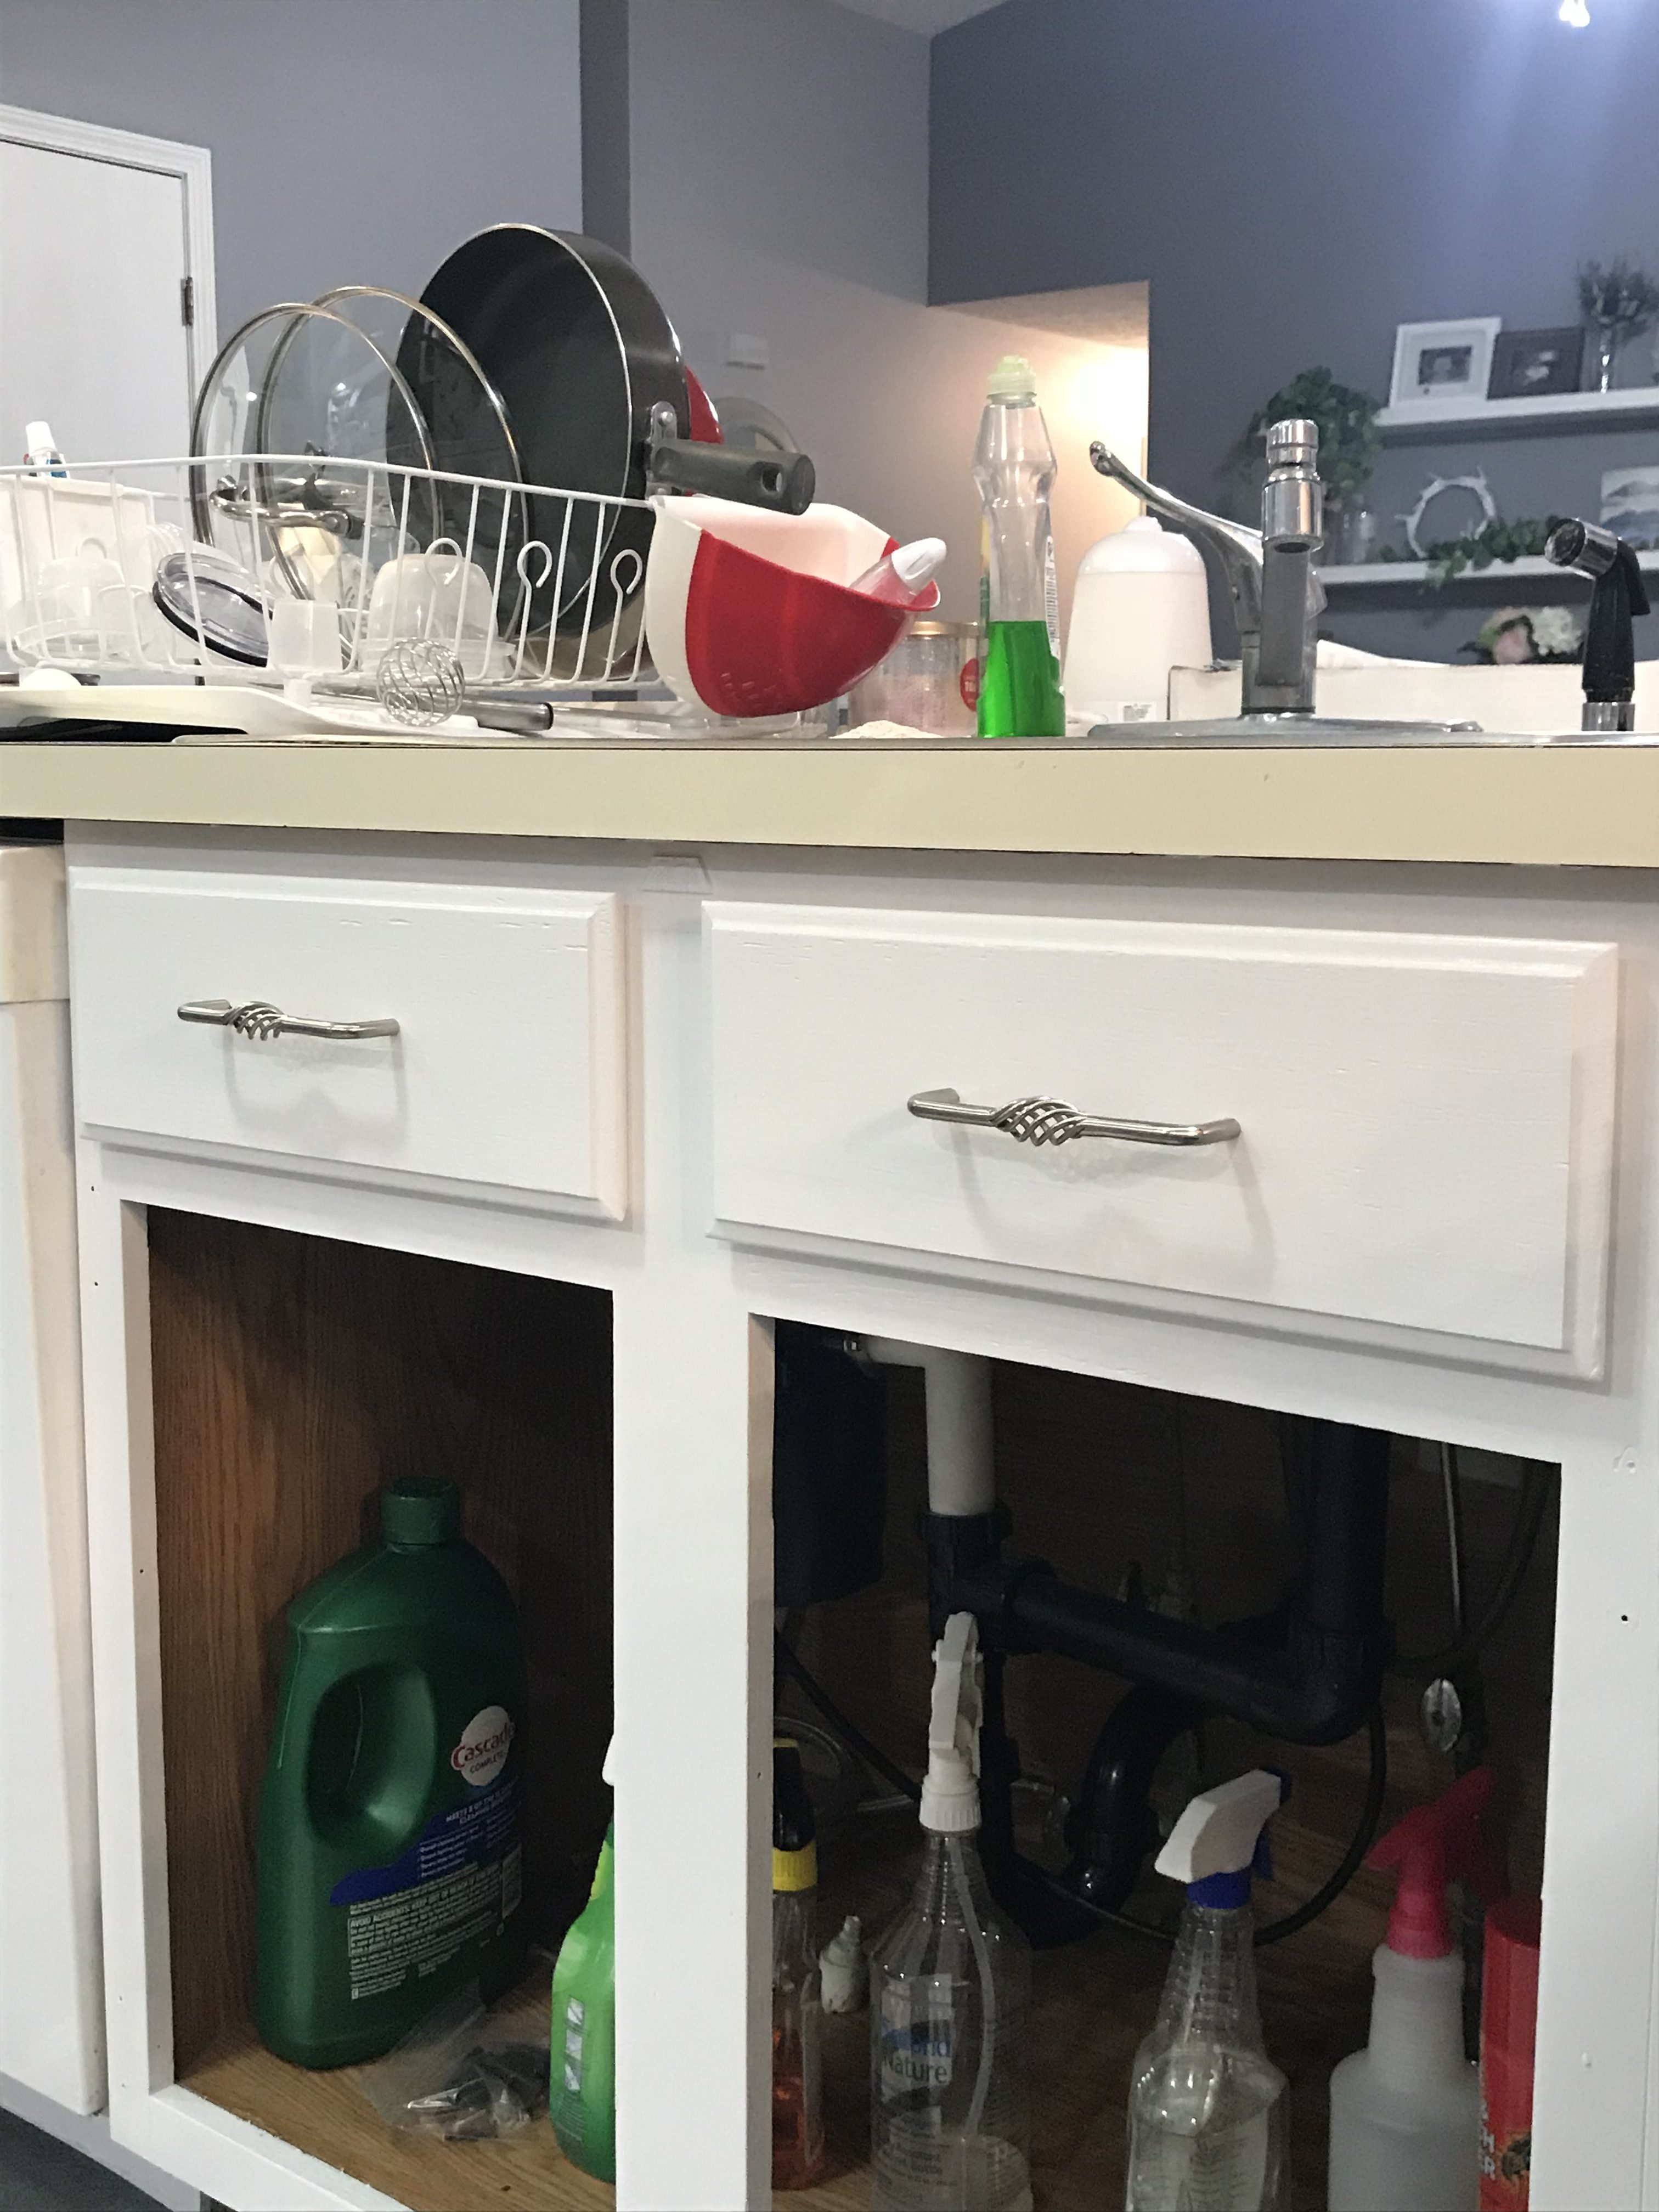
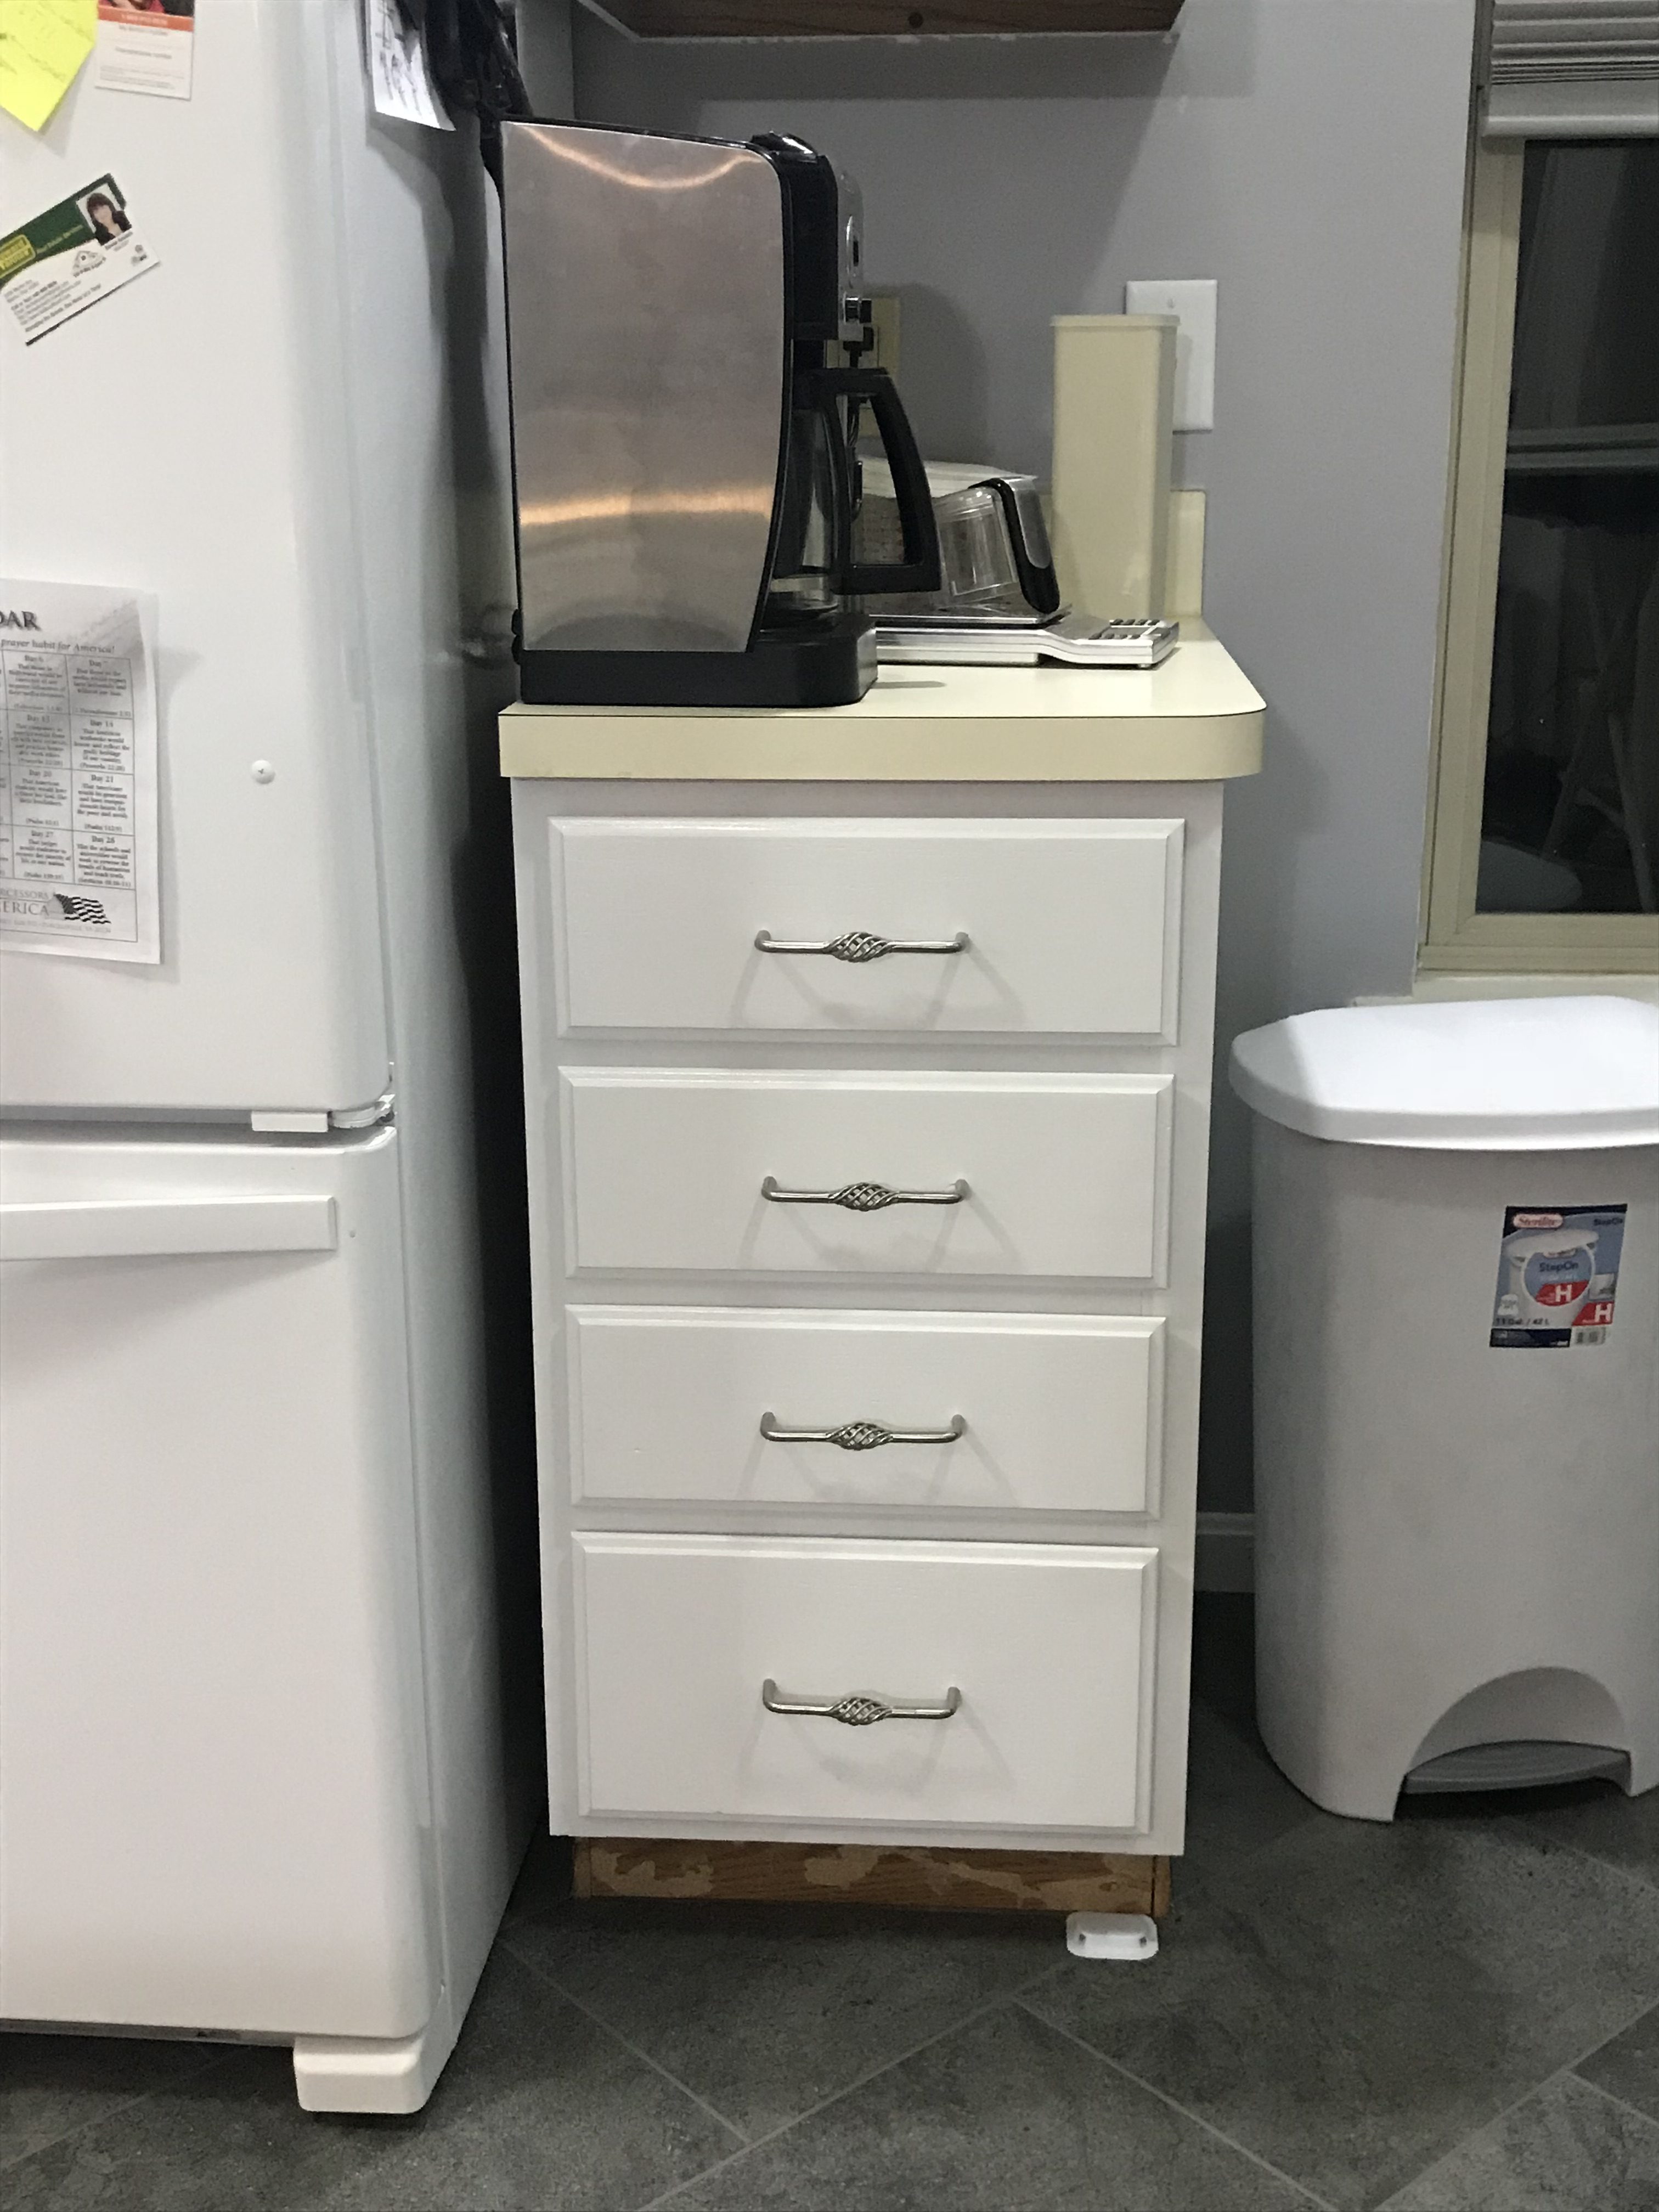
Enjoy the final photos!
xo
Dee


ITEM | BRAND | QT | PRICE |
COUNTERTOPS | |||
SINK | IPT SINK | 1 | $179.00 |
FAUCET | DELTA CHARMAINE | 1 | $189.00 |
COUNTER TOP | CORIAN | 1 INSTALL | $1,878.00 |
COUNTER TOP | HANZAK INSTALL | $1,000.00 | |
OVEN AREA | |||
HOOD | BROAN | 1 | $179.00 |
MULTI CORD | GENERIC | 1 | $10.00 |
CABINETS | |||
HINGES FOR CABINETS | JOUGHIN | 21 | $87.50 |
PRIMER – SMALL | KILZ | 1 | $8.00 |
PRIMER – LARGE | KILZ | 1 | $21.00 |
WHITE HI HIDE PAINT | SW EMERALD | 1 | $68.00 |
TRAYS AND BRUSHES | JOUGHIN | $13.00 | |
NITRILE GLOVES | LOWES | 1 | $4.00 |
LATEX GLOVES 10CT | LOWES | 1 | $2.00 |
ROLLERS | LOWES | $22.00 | |
DEGLOSSER | JASCO | 1 | $7.50 |
BACKSPLASH | |||
DRYWALL PATCH | DRYDEX | 1 | $8.00 |
TILE SPACERS | TAVY | 1 | $6.00 |
GROUT FLOAT | QTL | 1 | $10.00 |
WALL ADHESIVE | MUSSELBOUND | 2 | $2.00 |
WHITE MARBLE MINI BRICK | AMERICAN OLEAN | 18 | $180.00 |
PADDLE MIXER | UNIVERSAL | 1 | $13.00 |
BASEBOARD | |||
BASEBOARD | LOWES | 1 | $12.00 |
PRIMED PINE | LOWES | 3 | $26.00 |
$3,925.00 |